Have you ever wanted to add some text to a curved shape? Say a wreath or a circular gift tag? The ‘Curve’ Tool in Design Space is the simplest and quickest way to easily bend your text into a circular shape. In this article we’ll show step by step how to curve text in Design Space.
Where to find the Curve Tool
The Curve Tool is only available in the desktop version of Design Space, for Windows and Mac PCs and laptops. Don’t forget, you can sign in to your Design Space profile on any device using your username and password. As long as you have saved your projects to the cloud they will be visible on all devices you log in with.
The Curve Tool is located in the Text Edit bar at the top of the Canvas, between the Alignment and Advanced tools.
Here’s how you use it:
Step 1 – insert your text
Click the Text Tool in the Design panel to the left of the Canvas.
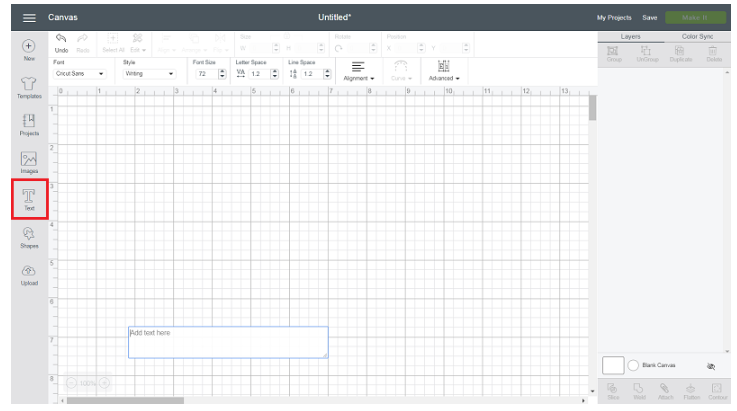
Step 2 – type your words / letters
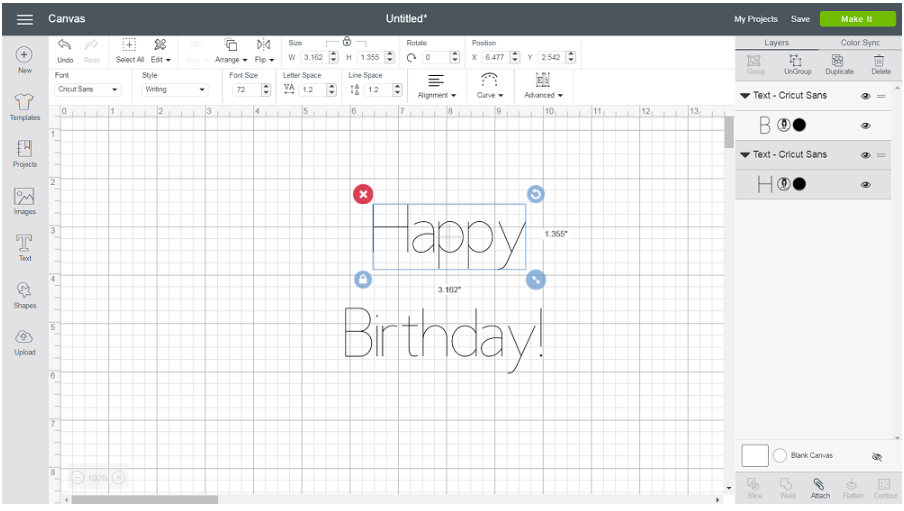
Enter text into the text box and choose your font and font style. Use the Letter Space tool to adjust letter spacing as needed. If you have multiple lines of text to curve, enter each line of text in a separate text box, or use the “Ungroup to Lines” tool to separate your lines of text into separate text boxes.
Step 3 – curve your text
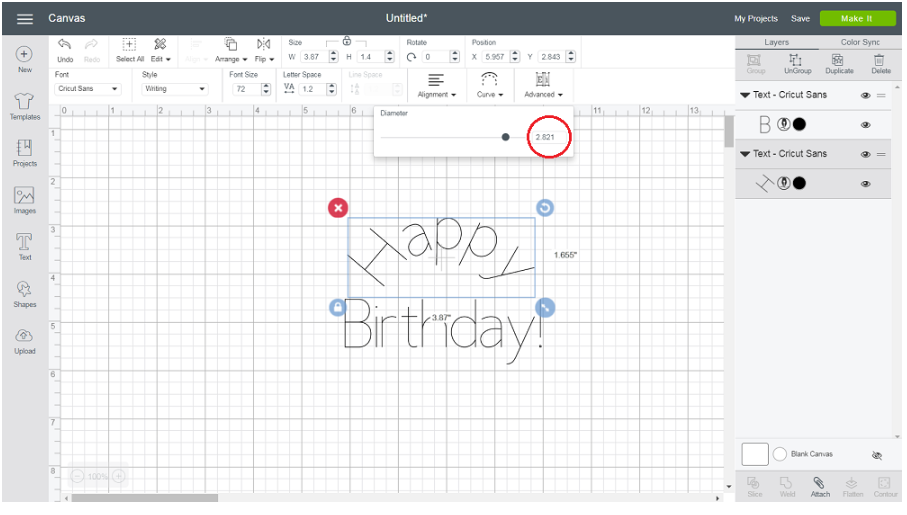
Click on the Curve Tool. Design Space will take a few moments to analyse your text for size and spacing, then display a slider and a number field.
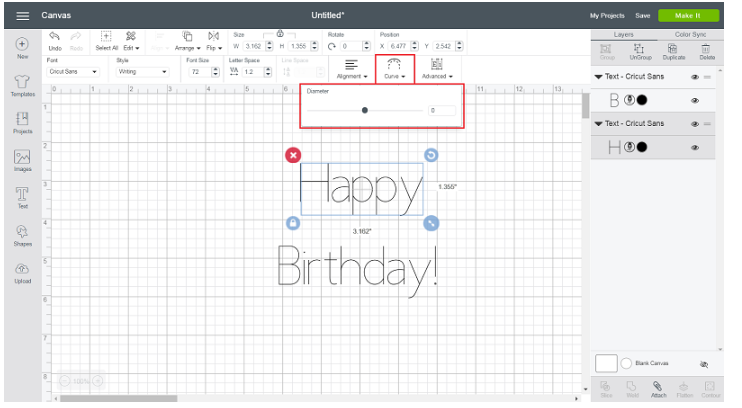
Step 4 – set the angle and spacing
Drag the slider to the right to curve the text downward.
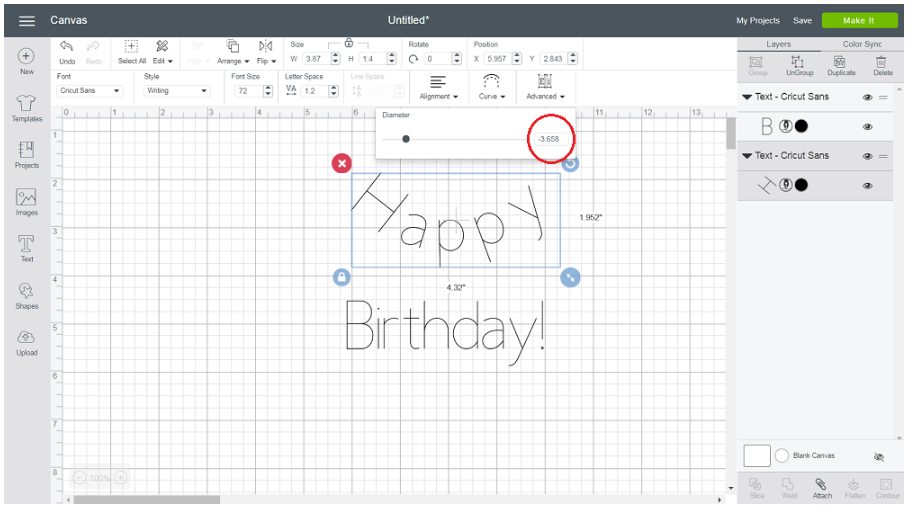
Or drag the slider to the left to curve the text upward.
Things to remember when using the curve tool
- Curved text remains completely editable unless welded or flattened. You can continue to adjust letter spacing, rotate, edit the actual text, and change the font type and style after curving your text.
- The Curve Tool will not enable if there are multiple lines of text in the same text box. Insert separate text boxes for each line or use the “Ungroup to Lines” tool to move your lines of text into separate text boxes. Then curve each line separately.
- At this time, projects containing curved text will not open in iOS or Android apps. However, if your text has been welded, sliced, isolated or ungrouped so that it is functioning as an image rather than as a text box, the project can be opened.
Further Help with Design Space
If you found this article helpful, you may also like our other Getting to Know Design Space articles: ‘How to upload images‘ and ‘How to weld‘ and ‘How to Contour‘.
We’ll be adding more helpful articles for specific functions in Design Space too so remember to pop back to see what’s new.
You Might Enjoy…