Welcome to Cricut 101. In this article, we look at how to to use the contour tool in Cricut Design Space. (See ‘How to weld’ here and ‘How to upload images’ here).
What is the Contour Tool
The contour tool allows you to hide a portion of an image layer by removing any unwanted cut lines. This is useful to simplify an image, turn an image into a silhouette or remove a word from a text image.
We’ve explained below, in a few easy steps, how to use the contour function. We’ve also shown the differences between the desktop version of the Design Space app and the mobile device version.
How to use the Contour tool
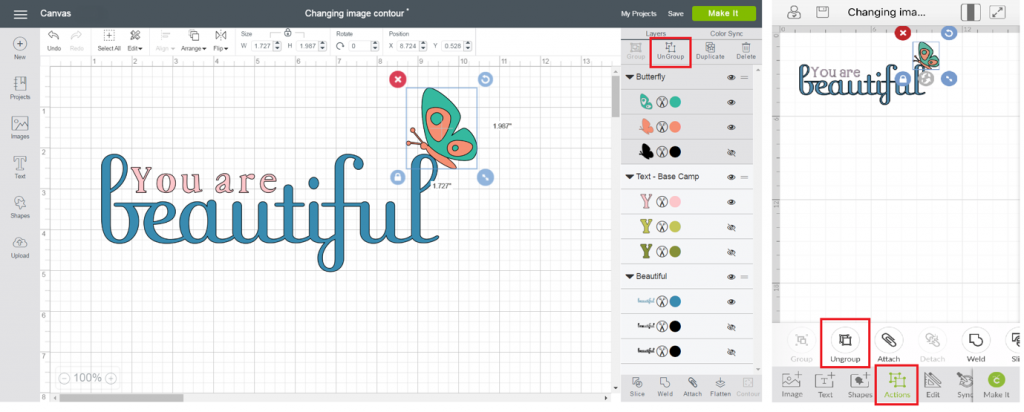
You will need to ungroup an image first if it has multiple layers. This means you can work on each layer individually.
- Windows/Mac – Select the image and then click Ungroup at the top of the Layers panel.
- iOS/Android – Select the image and then select Ungroup in the Actions menu.
Next, select the layer you want to hide cut lines from, and then:
- Windows/Mac - Click Contour in the Layers panel.
- iOS/Android – Select Hide Contour under the Actions menu.
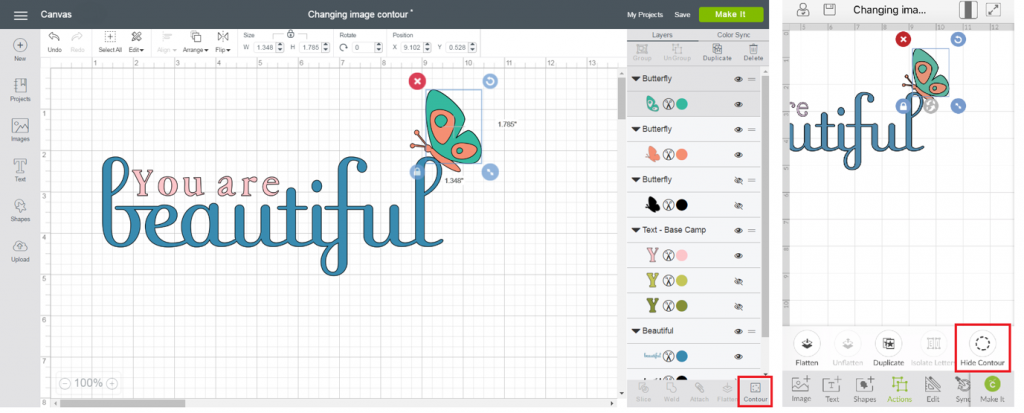
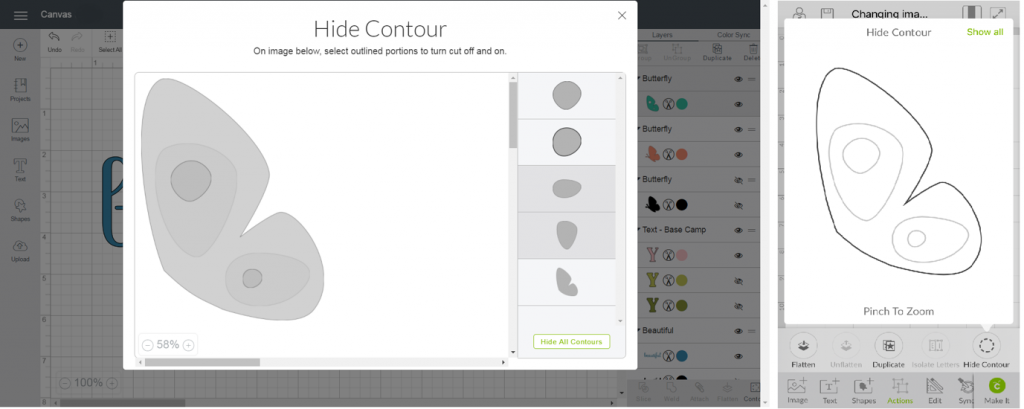
Whichever version of Design Space you are using, the ‘Hide Contour’ window will appear.
- Windows/Mac - The lines on the image represent individual cut lines. Click on the cut line you wish to hide on the image itself or select the contour to be hidden from the menu at the right of the window. The hidden contour will change to a lighter shade indicating that it will no longer show as part of the image and will not cut. Repeat with other cut lines, if desired.
- iOS/Android - The dark grey lines on the image represent individual cut lines. Click to hide the cut line. The line will change to a light grey, indicating that it will no longer show as part of the image and will not cut. Repeat with other cut lines, if desired.
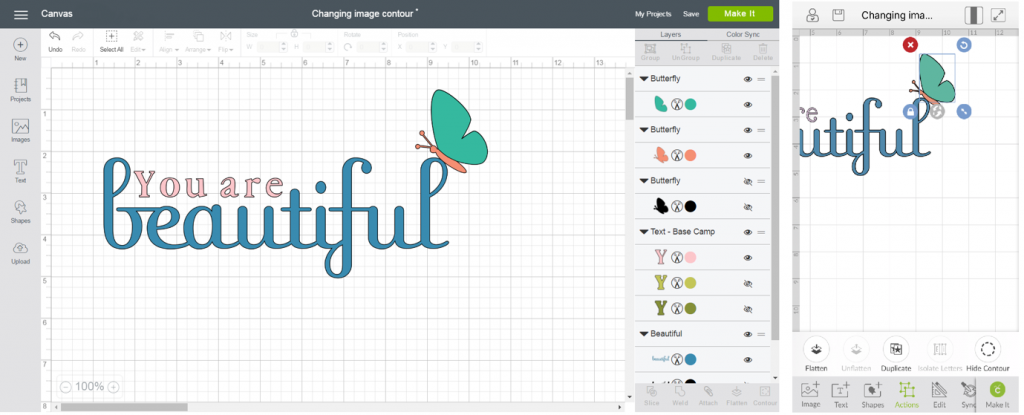
When you have finished hiding image cut lines, close the ‘Hide Contour’ window, or click outside of the window to dismiss it. In the mobile app tap ‘Hide Contour’ again. The hidden contours no longer appear as part of the image.
In our example below you can see how the spots on the butterfly’s wings, which were the same cut (and colour) as the body, have now been removed.
The best thing about contour is that it’s temporary, or rather, you can go back and add those cut lines back in whenever you want to.
If you wish to restore a hidden contour, repeat the process and click on the hidden cut lines to add them back into the cut. The contour will reappear on the canvas.
Further Help with Design Space
We hope this article helps you to do more in Design Space.You might also find these links useful:
- In this video, Jen from Crifty Crafty explains when to use ‘Contour’, and when to use ‘Slice’: https://youtu.be/S1_zv9cdv24
- Emma’s video shows how to use the contour tool in the desktop version of the Design Space app: https://youtu.be/KHSKlGQCoGU
- Paula, from the Cricut team in the US, demonstrates how to use contour in this video focusing on customising any image in Design Space: https://youtu.be/KcjYwbb2Gkw
And, don’t forget to visit our other Getting to Know Design Space articles: ‘How to upload images‘ and ‘How to weld‘. We’ll be adding more helpful articles for specific functions in Design Space too so remember to pop back to see what’s new.
You Might Enjoy…