How to make fabric appliques amazing with the Cricut Maker
Skill level
Intermediate
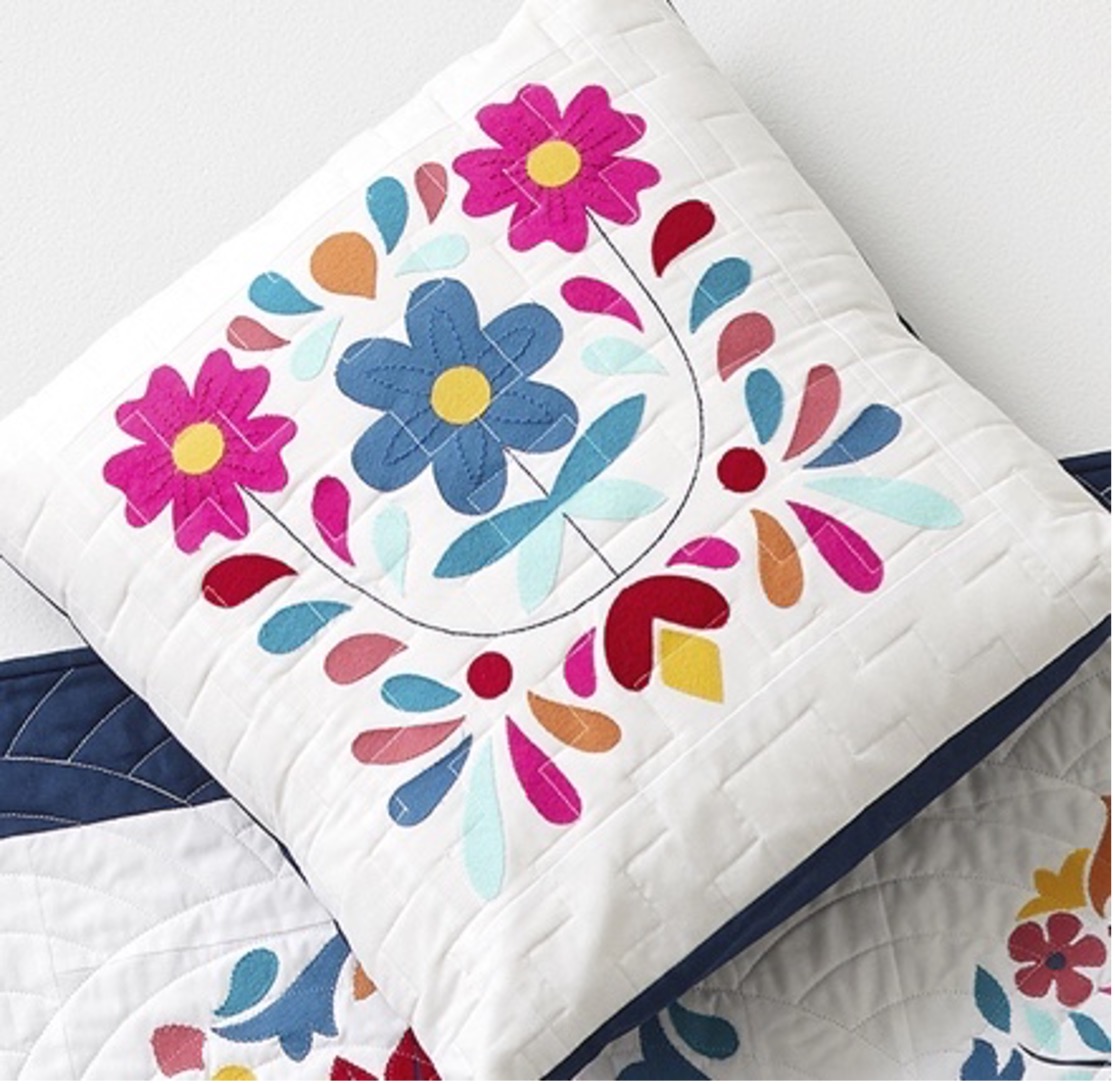
Applique is an easy way to create colorful and intricate designs with fabric without having to fuss with precise seam allowances, points, or teeny pieces.
Traditionally applique involves tracing, hand cutting each shape out of fabric and fusible material, placing, and stitching. With the Cricut Maker, you cut down the steps by at least half.
An added bonus to creating the Cricut applique projects is that we have designed them to incorporate iron-on elements to easily add beautiful details.
Here’s the list of materials you’ll need for the Mexico applique *block.
Supplies needed
Print this list
- Cricut Maker with a Rotary Blade
- Everyday Iron-On, Navy blue
- Fine Point Pen, Black
- EasyPress Mini or household iron
- Large EasyPress mat
- Hand-held rotary cutter + self-healing cutting mat or fabric scissors
- FabricGrip Mat 12” x 12”
- Brayer
- Weeder
- Craft Scissors
- White quilting cotton 12” x 12” piece
- Red quilting cotton
- Dark pink quilting cotton
- Pink quilting cotton
- Orange quilting cotton
- Yellow quilting cotton
- Mint quilting cotton
- Teal quilting cotton
- Medium blue quilting cotton
- HeatnBond Lite
Mexico applique block
Step
To prepare the fabric for applique you will need to make sure the fabric is clean and pressed.Cut your HeatNBond or preferred applique material to fit each piece of colored fabric that you will use for your block.Place the heatnbond on the wrong side of your colored fabric and press on medium heat with your EasyPress Mini or household iron.
Step
To cut the block, select the project from Design Space.Click Make it. This will bring you to the cut preview screen.
Step
On this screen, you will mirror all of the mats EXCEPT the white block. The preview screen also lets you see how much fabric you will need for each of the colors. You can arrange these shapes as necessary to fit the fabric you have prepared.
Step
Place the white fabric on the pink FabricGrip mat with the right side up. Insert the pen in the A clamp and the rotary blade in the B clamp.For the rest of the fabric, mats place the bonded fabric right side down (applique material side up) onto the mat. There is a slight shine to the applique material.Cut the iron-on material as you normally would, with the mirror on, StandardGrip mat, and fine point blade. Weed the iron-on design as normal.
Step
Once all of your materials are cut you are ready to place and press.
Step
Use the project canvas or photos to place all of the applique pieces in their correct outlines on the white block piece. The outlines are slightly smaller than all of the pieces so that most of the lines will not show once the pieces are in place.
Step
Once all of the pieces are in place, press the shapes for 3-6 seconds to tack them in place. Start with the larger pieces, making sure they are centered over their outlines the best you can. Do not do the iron-on yet. Once all of the pieces are tacked down, press the entire block again, especially along the edges of the shapes. Flip the block over and press all over the block again.Place the iron-on over the block, aligning the lines to cover the drawn lines. You may need to cut the iron-on into pieces to achieve the alignment needed. Press.Peel the backer away as you normally would, re–pressing any areas that come up if needed.To secure the edges of the shapes, we used monofilament thread and a zigzag stitch, but you can use a coordinating or contrasting thread and any stitch you would like. Stitching down the edges will assure that your project withstands washes and use.
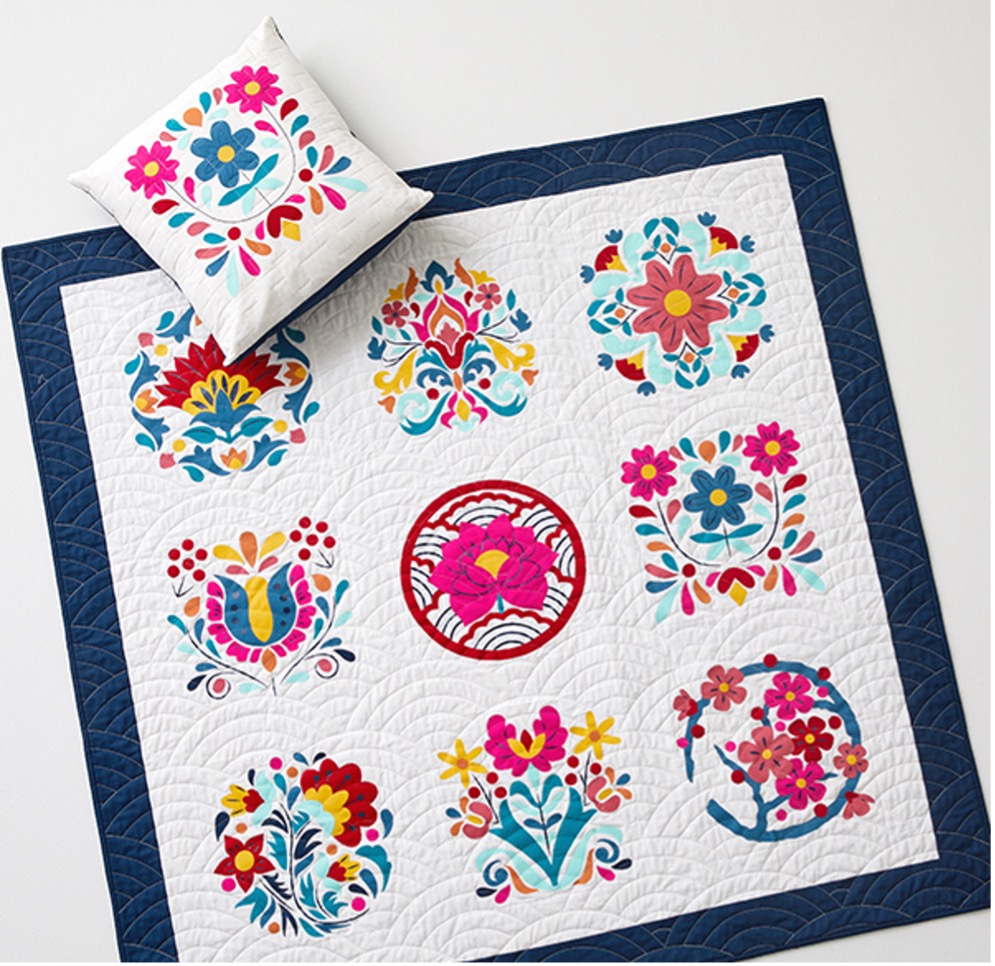
That’s it! Wasn’t that easy? Now you have a beautiful block that you can make into a pillow sham, combine with other blocks for an heirloom wall hanging, table runner, or quilt!
Check Design Space for the rest of the heirloom floral applique blocks in this series, released monthly, and check the blog for some project ideas including the quilted pillow sham and quilt!
*The fabric requirements listed above are only for the single block. If you are planning on creating the full quilt, we recommend planning on a minimum of 1/3 yd of each color plus 3 yds of the white, ½ yd of the navy (just for the quilt top) plus 3 yds for the backing, and preferred batting so that all of the blocks work together.
Search How-To
I want to make...


