9 tips and tricks to make you a Design Space pro
Check out these tips and tricks for Design Space from other Cricut makers
Sometimes the smallest tip or trick can make the biggest difference in your making experience with Cricut. We’ve reached out to our Cricut community to hear about how some awesome features in Design Space help people make. Keep reading to learn about some of our favorites tips and tricks from Cricut pros.
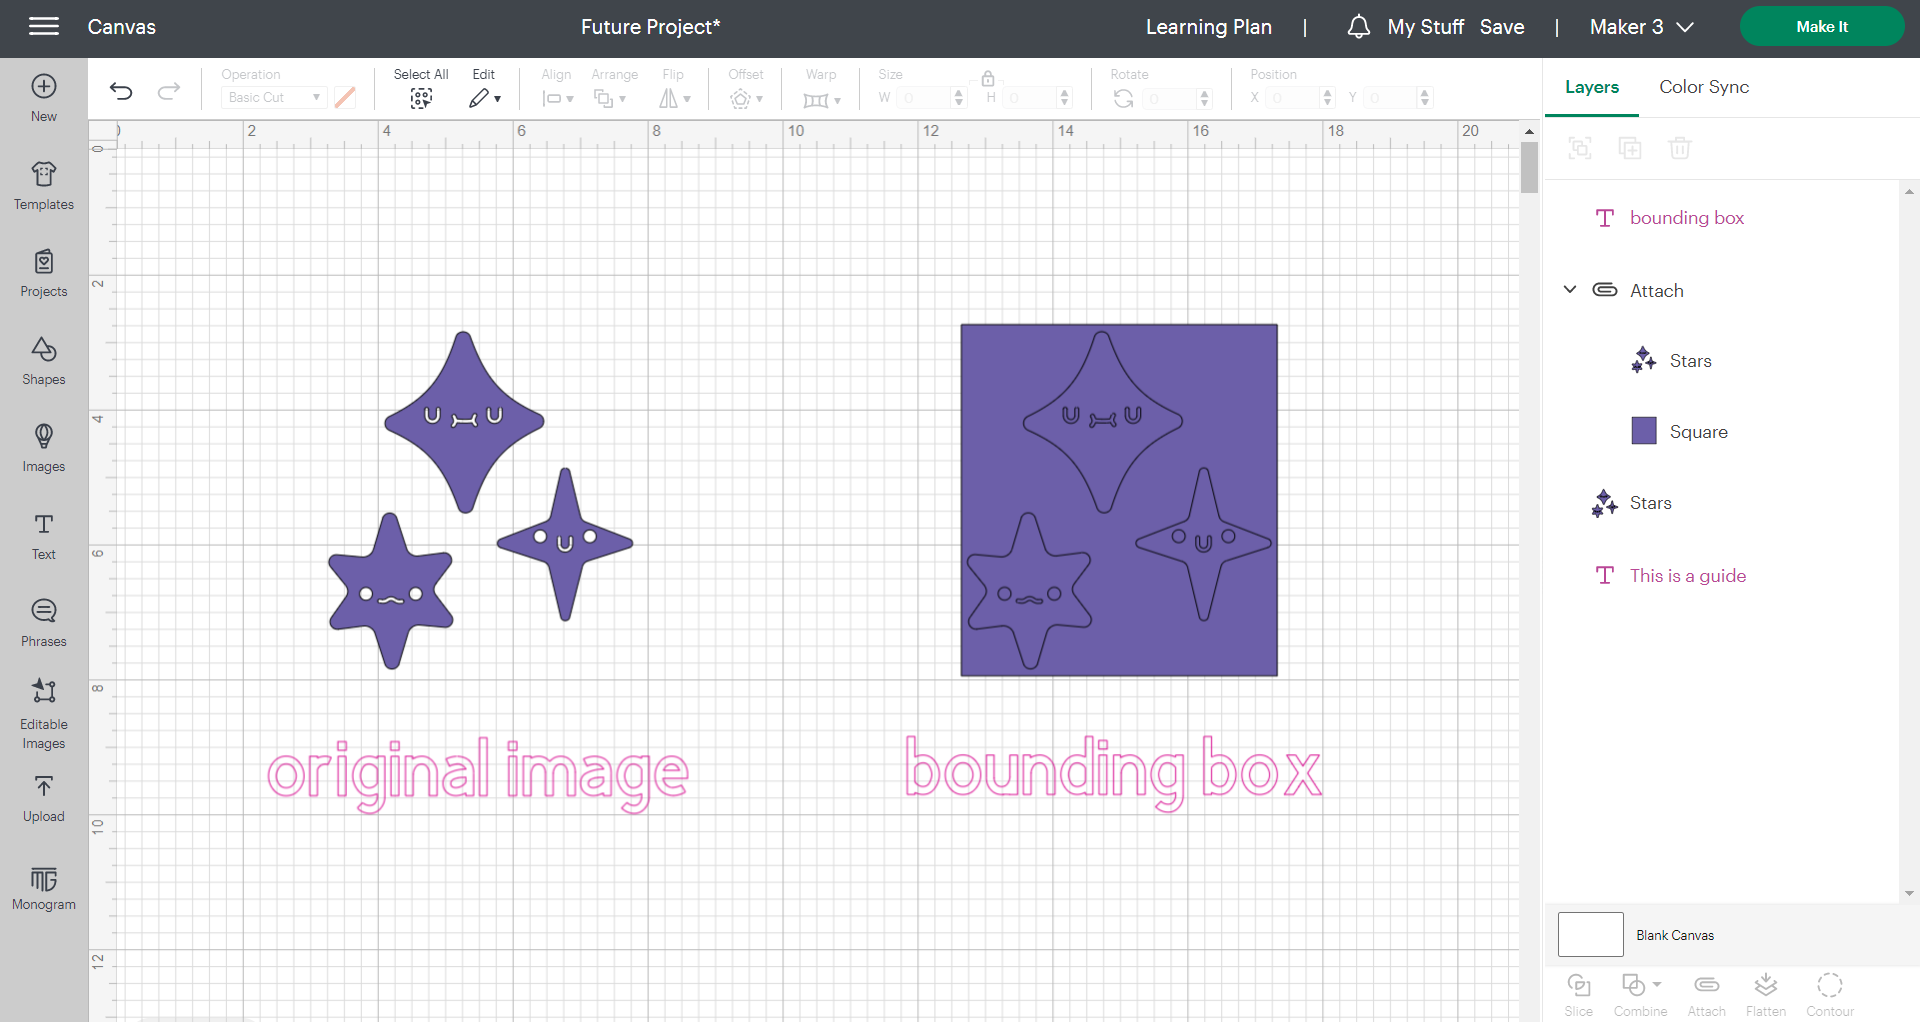
The material-saving “bounding box”
Smart Materials make it easy to create big designs or repeat images, but there may be times when you only need to use a small part. Save yourself some time and material by creating a bounding box instead of cutting off pieces of Smart Material.
A bounding box is simply a shape that you would place on top of the design you want to cut. After putting the shape on top of the design, use “slice” to cut the original design out of the solid box. When you’re weeding your material, pull out the box and leave the original design on the vinyl backer. Now, you can use transfer tape on the design without touching any other part of the Smart Materials. It is a great way to save material, according to Dawn, a Cricut creator. “The rest of the material is still on the original backing and can be re-used with a little care in placing your next design over the available material in Design Space.”
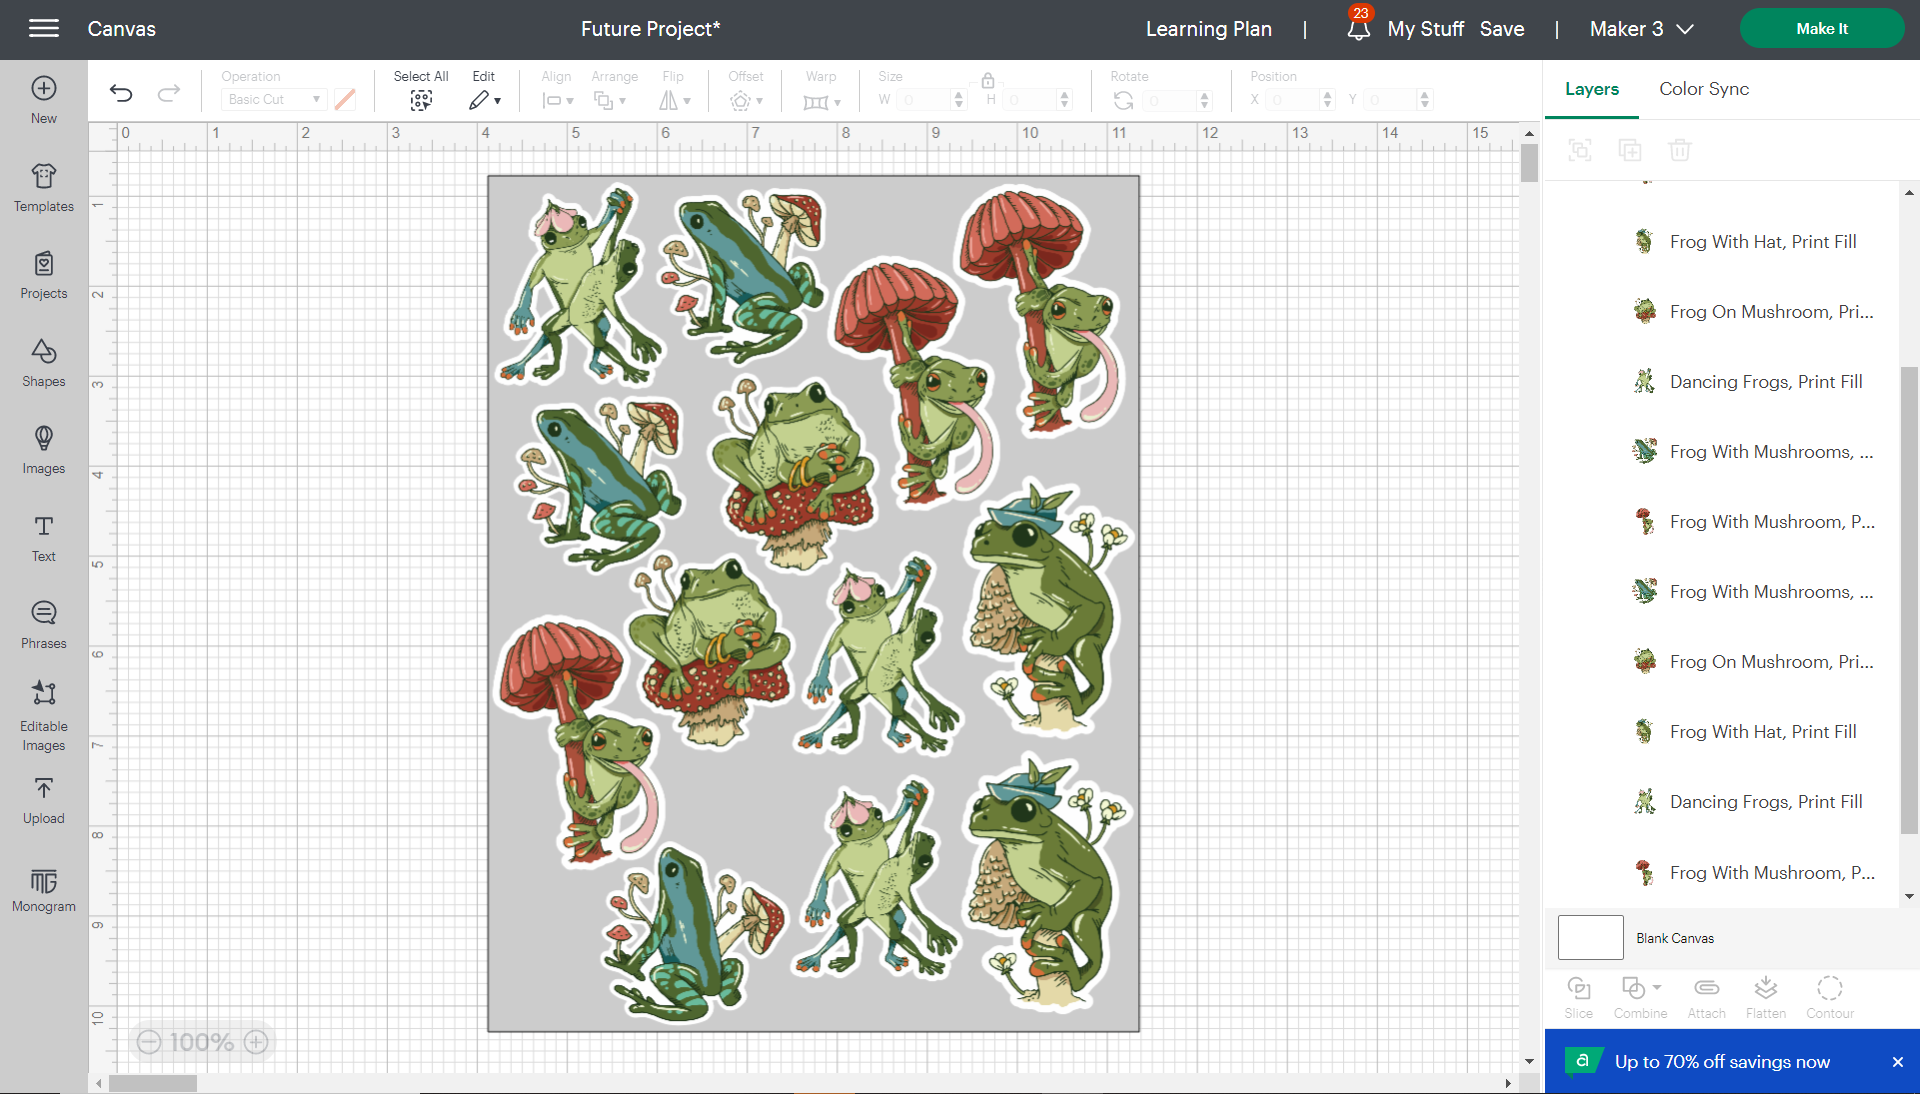
Set up sticker sheets with a Print-then-Cut box
Cricut creator Koi shares a great tip for making custom stickers using print-then-cut. “I measure the available print-then-cut area and use a rectangle shape to mark that space. By manually organizing my stickers within that designated area and attaching them together before cutting, I can utilize more room on the sticker paper and minimize material wastage.” And with Cricut Venture, print-then-cuts of up to 24”x28” mean that you can make even more sticker sheets at a time.
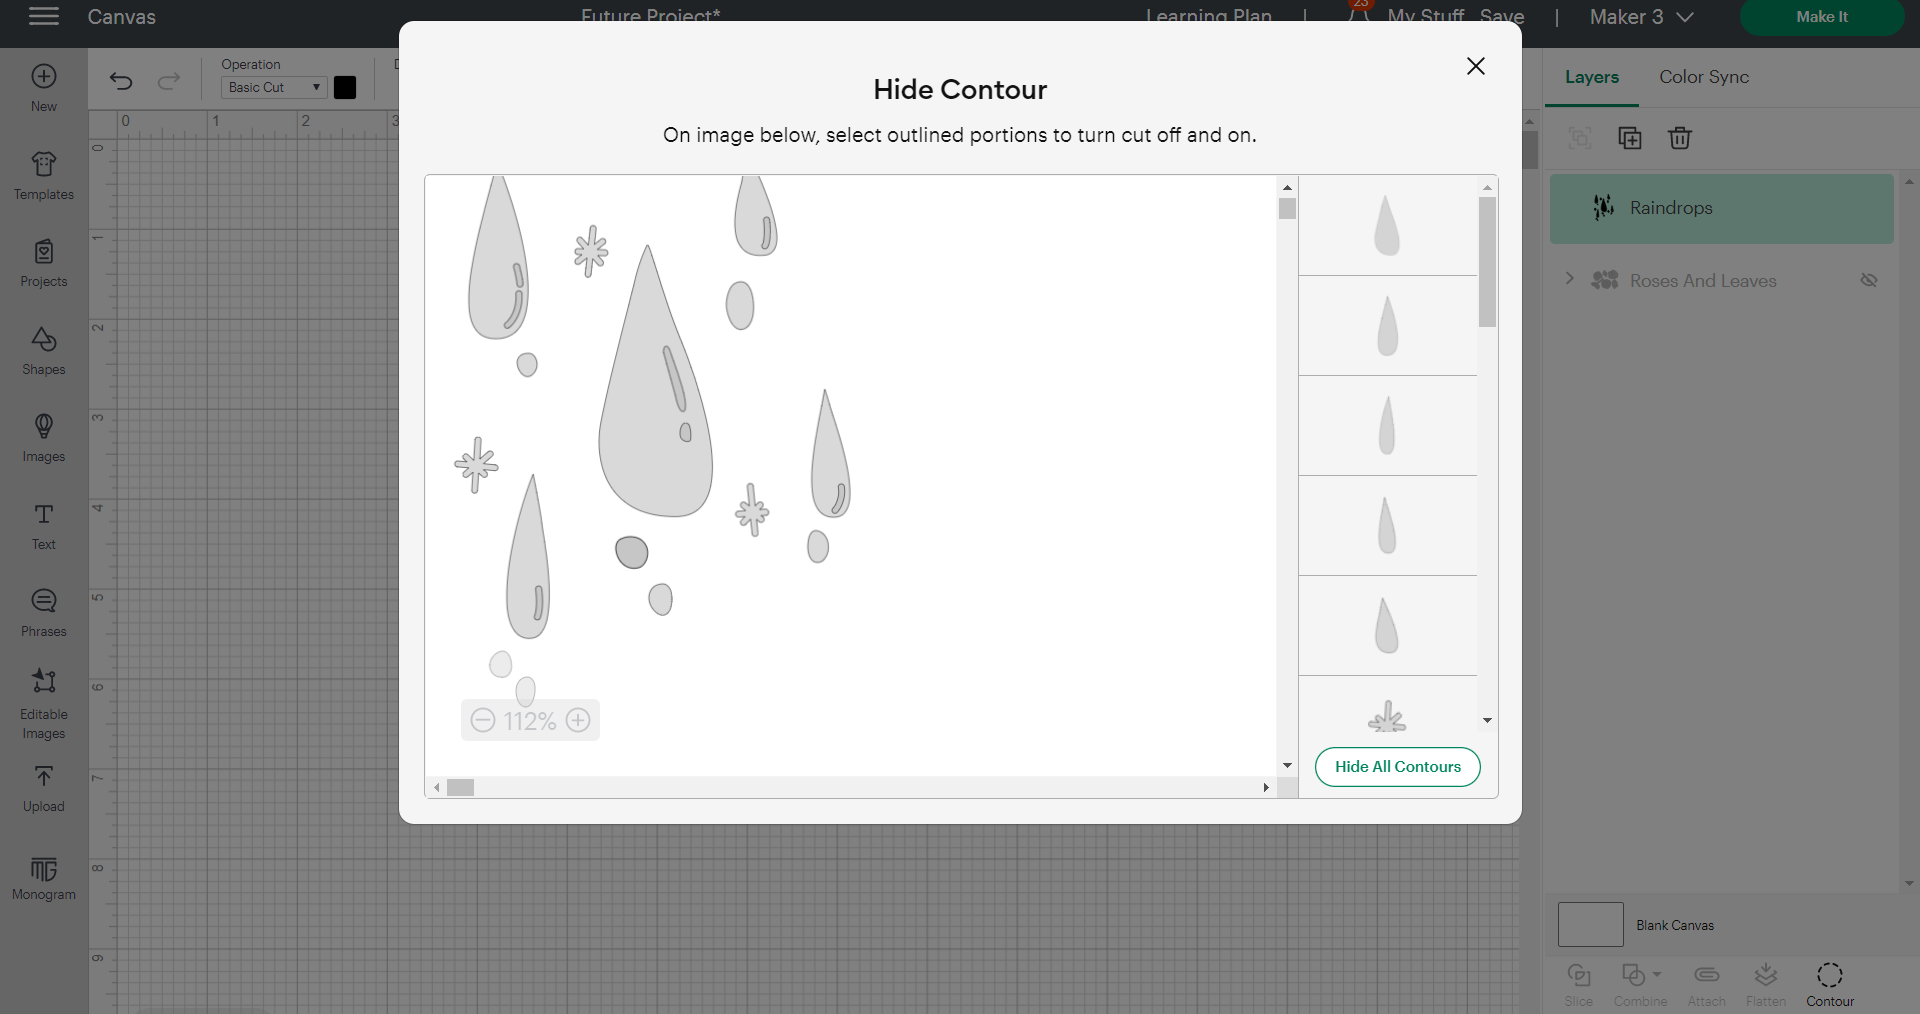
Customize more with Contour
Sarah, another Cricut creator, likes to use the contour feature to fine-tune her projects. Sometimes an image looks great, but there are pieces or elements like words, letters, or shapes, that you may not want in your final design. Sarah says, “With contour, you can see even the tiniest specks [that] you can just click it away.”
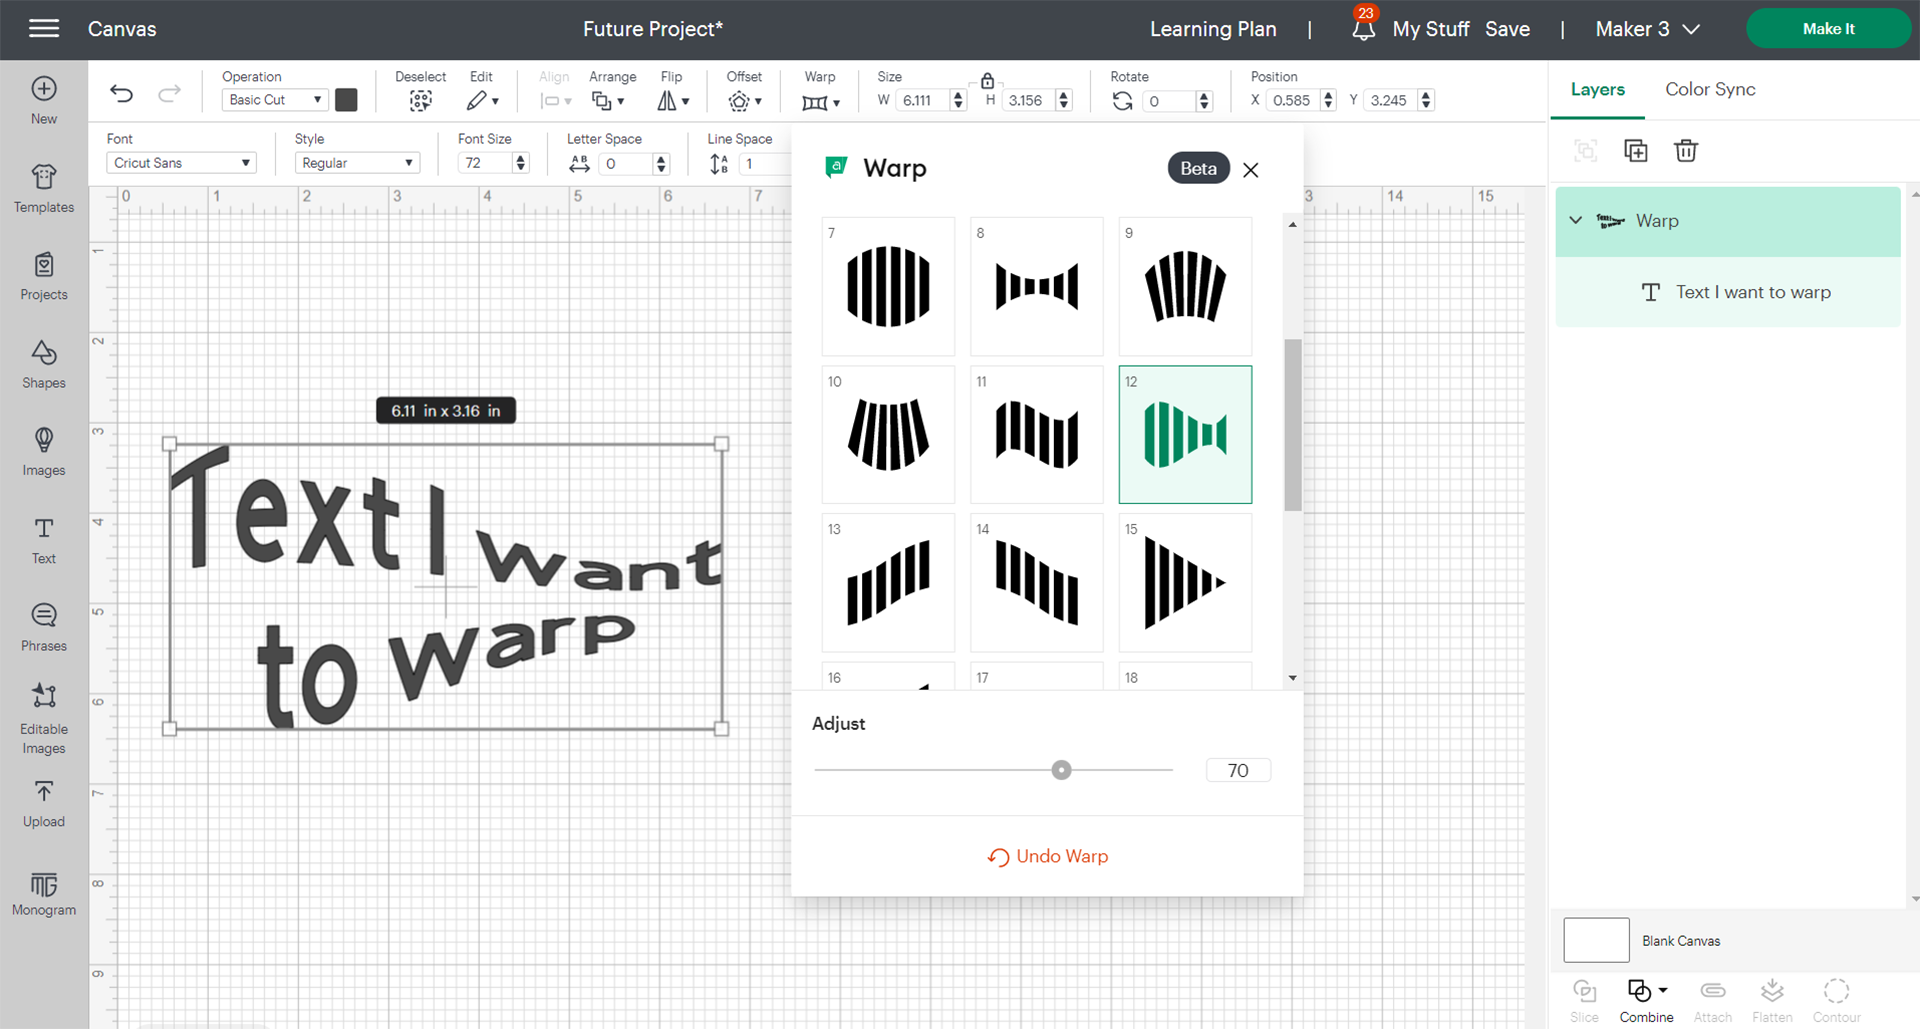
Add drama to your design with Warp
The warp feature is a quick way to manipulate and shape your design. If you’re using text, you can write whatever you want, and then choose a warp design to add flair and drama to it with a click of a button. The slider at the bottom of the Warp tool allows you to increase or decrease the intensity of the design. Warp, a Cricut Access subscriber exclusive, works with text, images, and shapes.
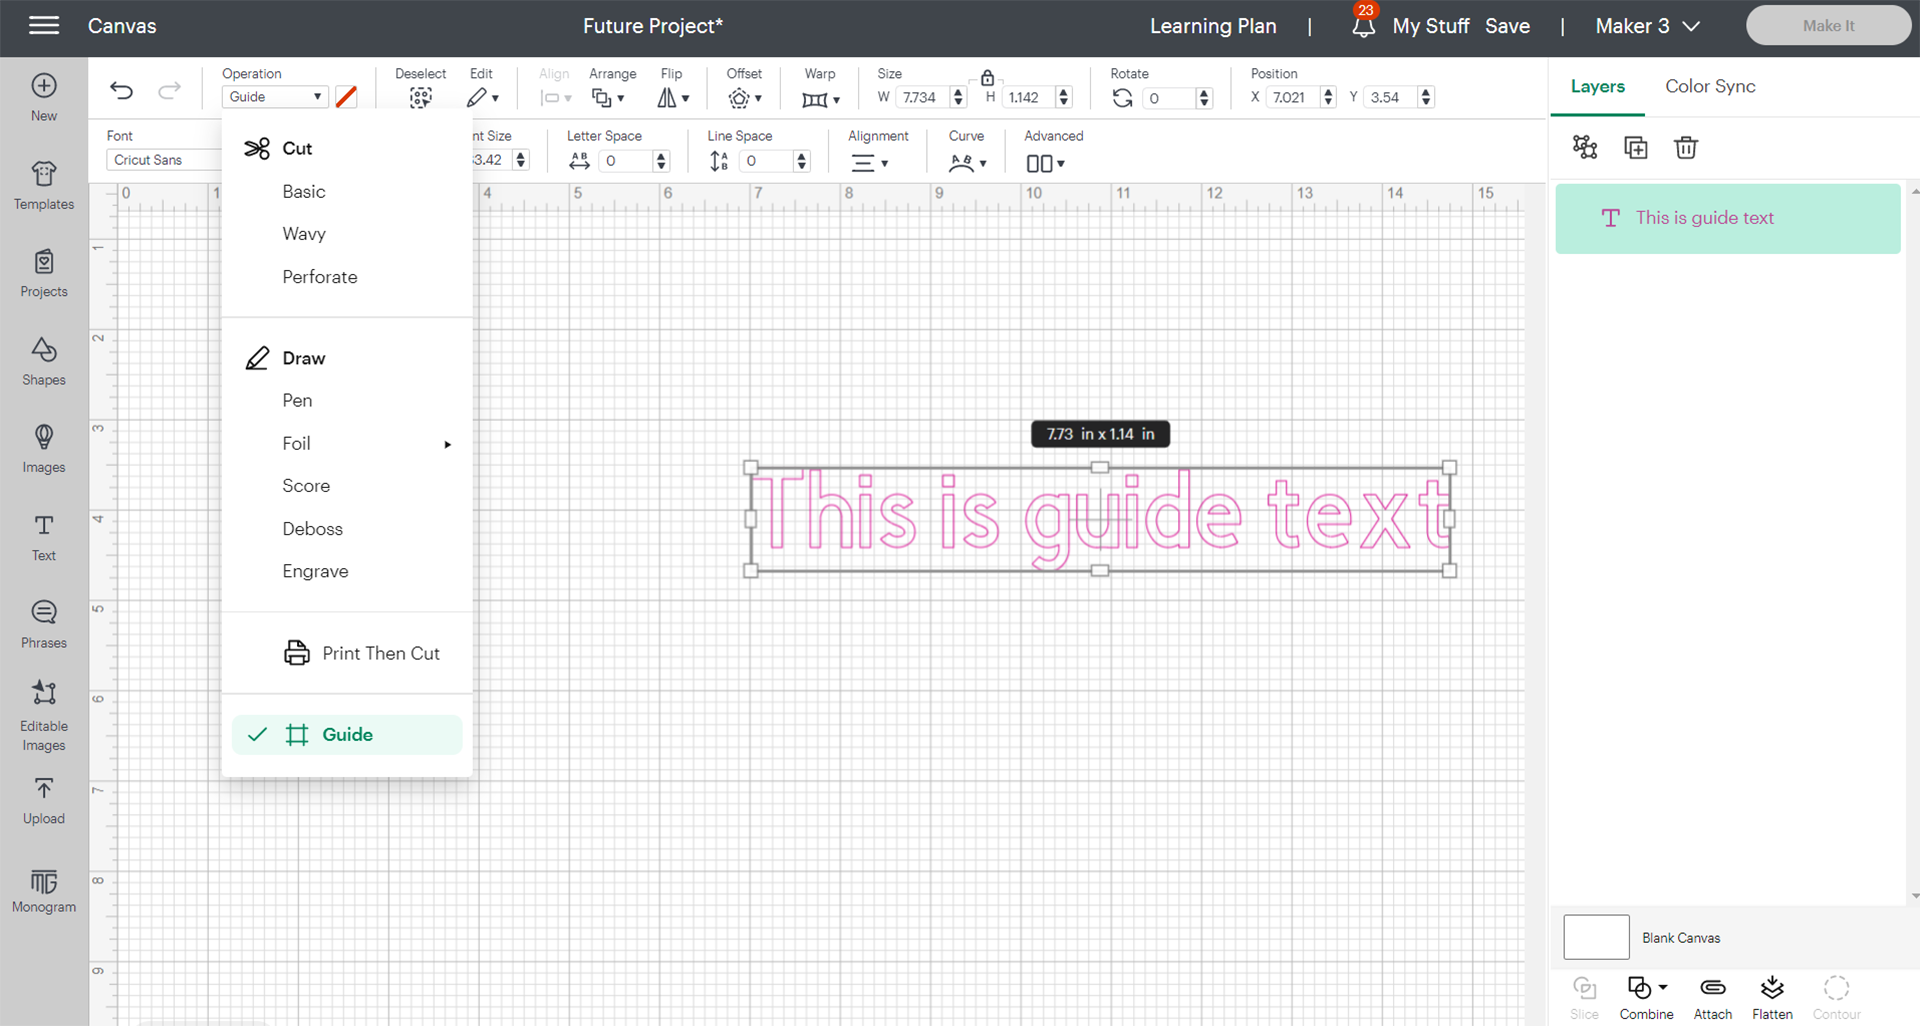
Add notes with Guide operations
When designing, sometimes you may find it useful to write yourself some notes for you to remember later. If you’re planning to share your design, it can be especially useful to write instructions for other users in case there is something special or different about your design that you want them to make note of. This could be something like reminders about a special layer, or inspiration for how to update text. Using “Guide” in the operation dropdown menu changes your text to a layer that won’t be cut when you click Make It. You’ll see it turn your font into a pink outline, which helps it stand out from the rest of your design.
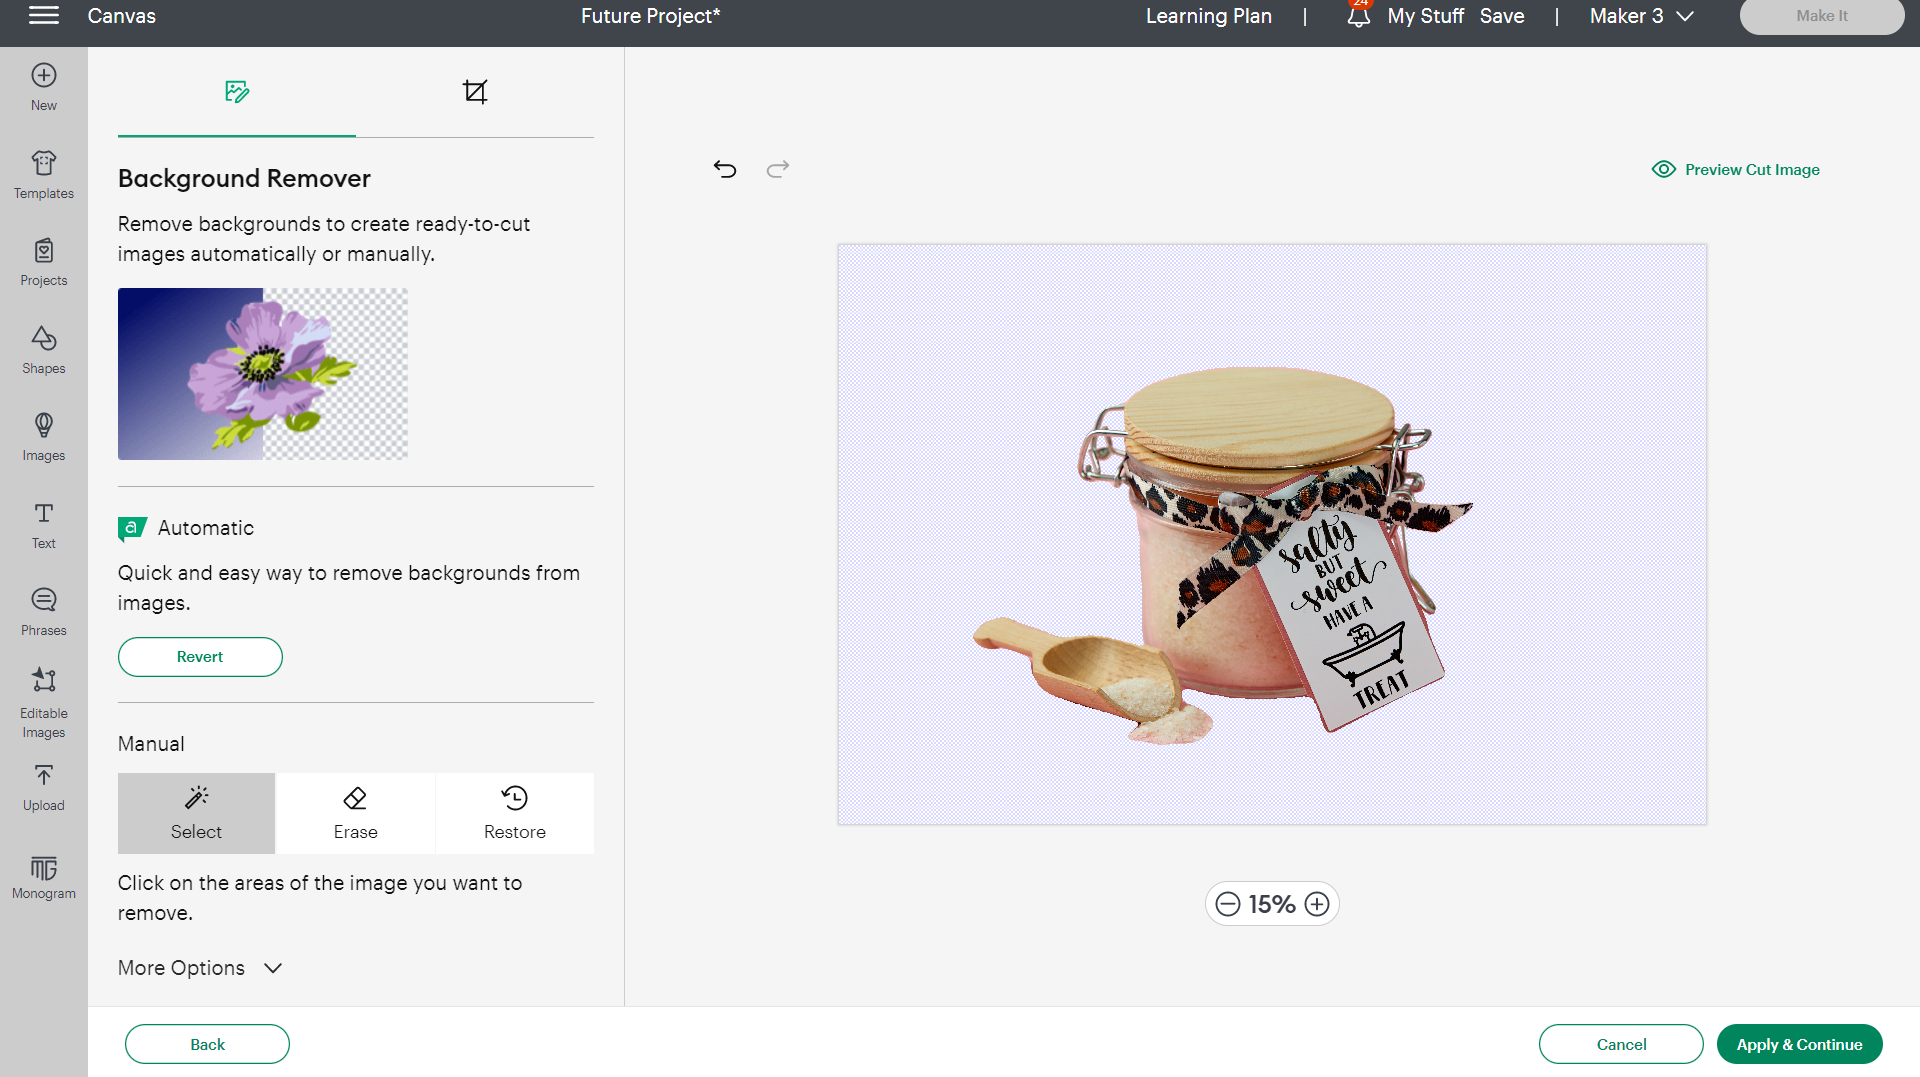
Remove backgrounds in a click
If you upload your own images to Design Space, you probably have seen or used our background remover. Manually select and erase areas of the image you want to remove. Make a mistake? You can click restore to revert any changes you made. With a Cricut Access subscription, this tool can remove backgrounds automatically! Whether you remove your image background automatically or manually, you can preview how the image will be cut before you save your changes.
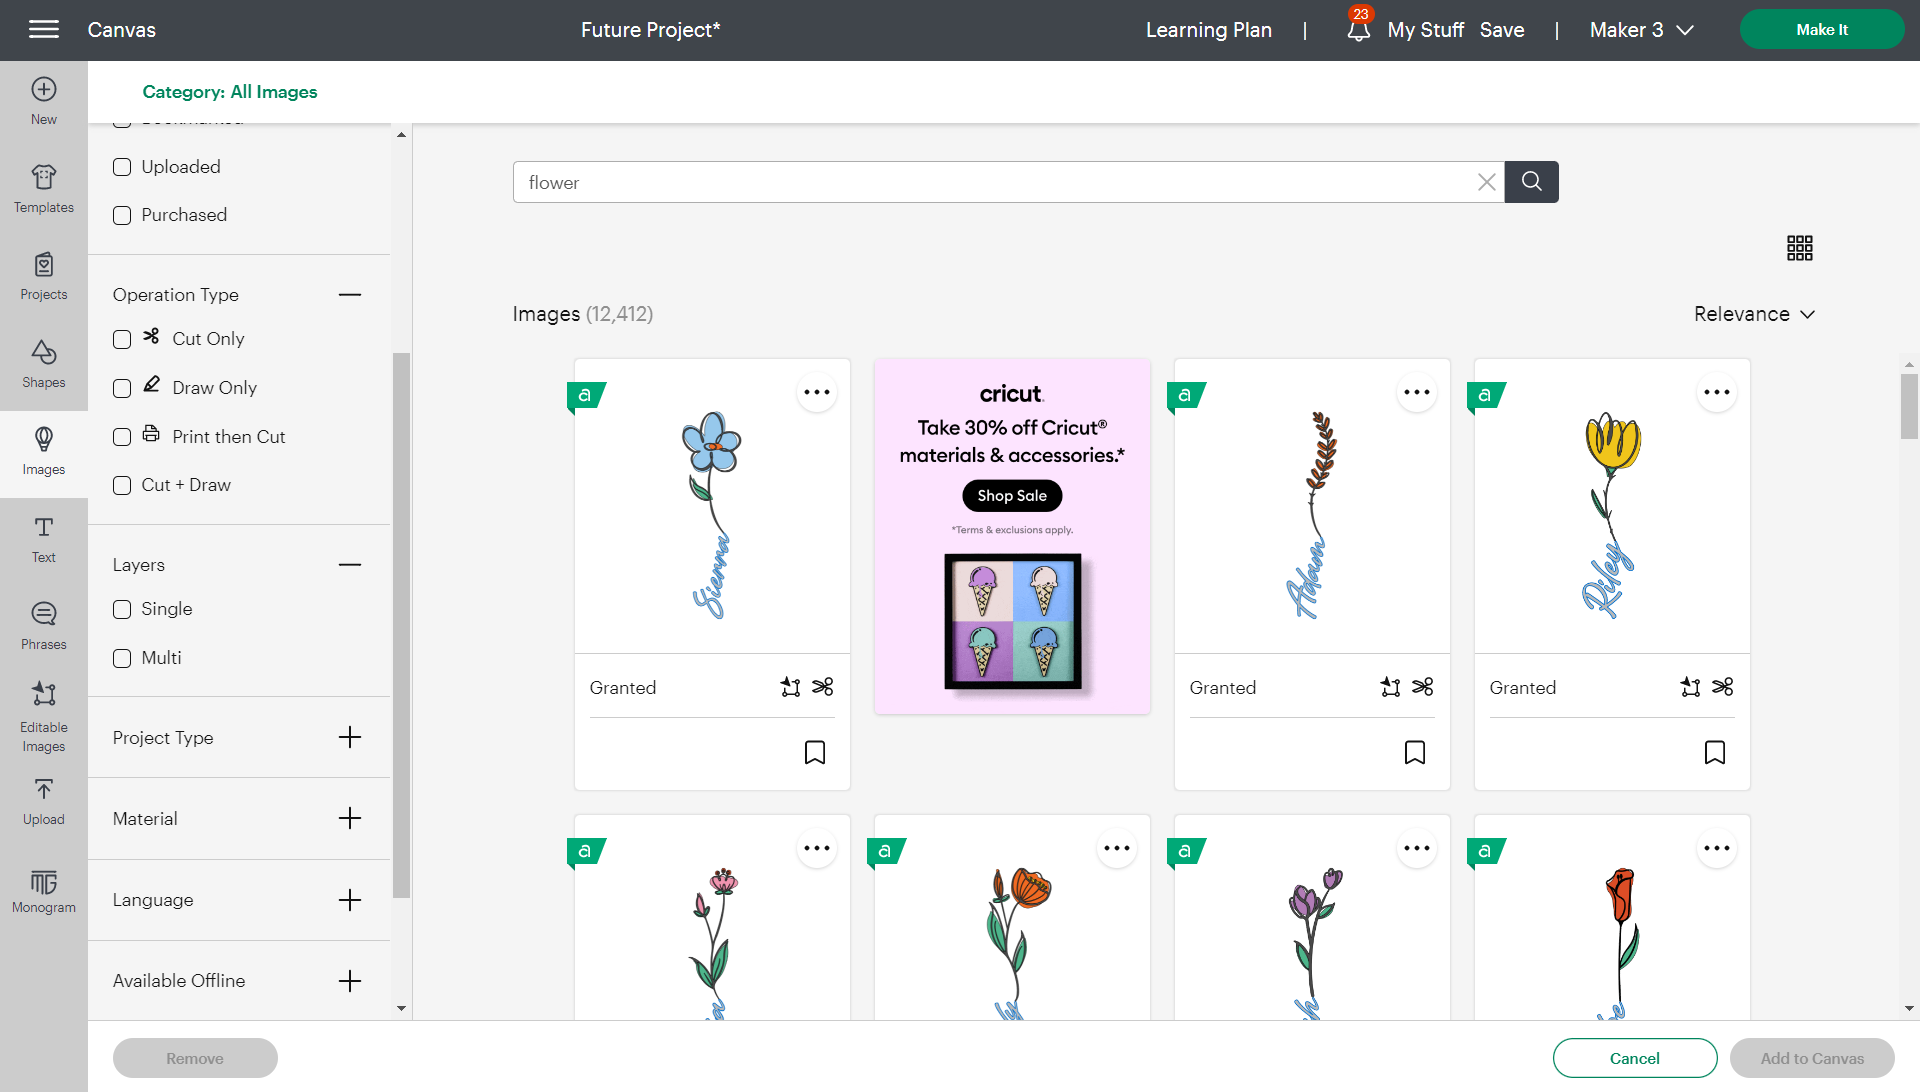
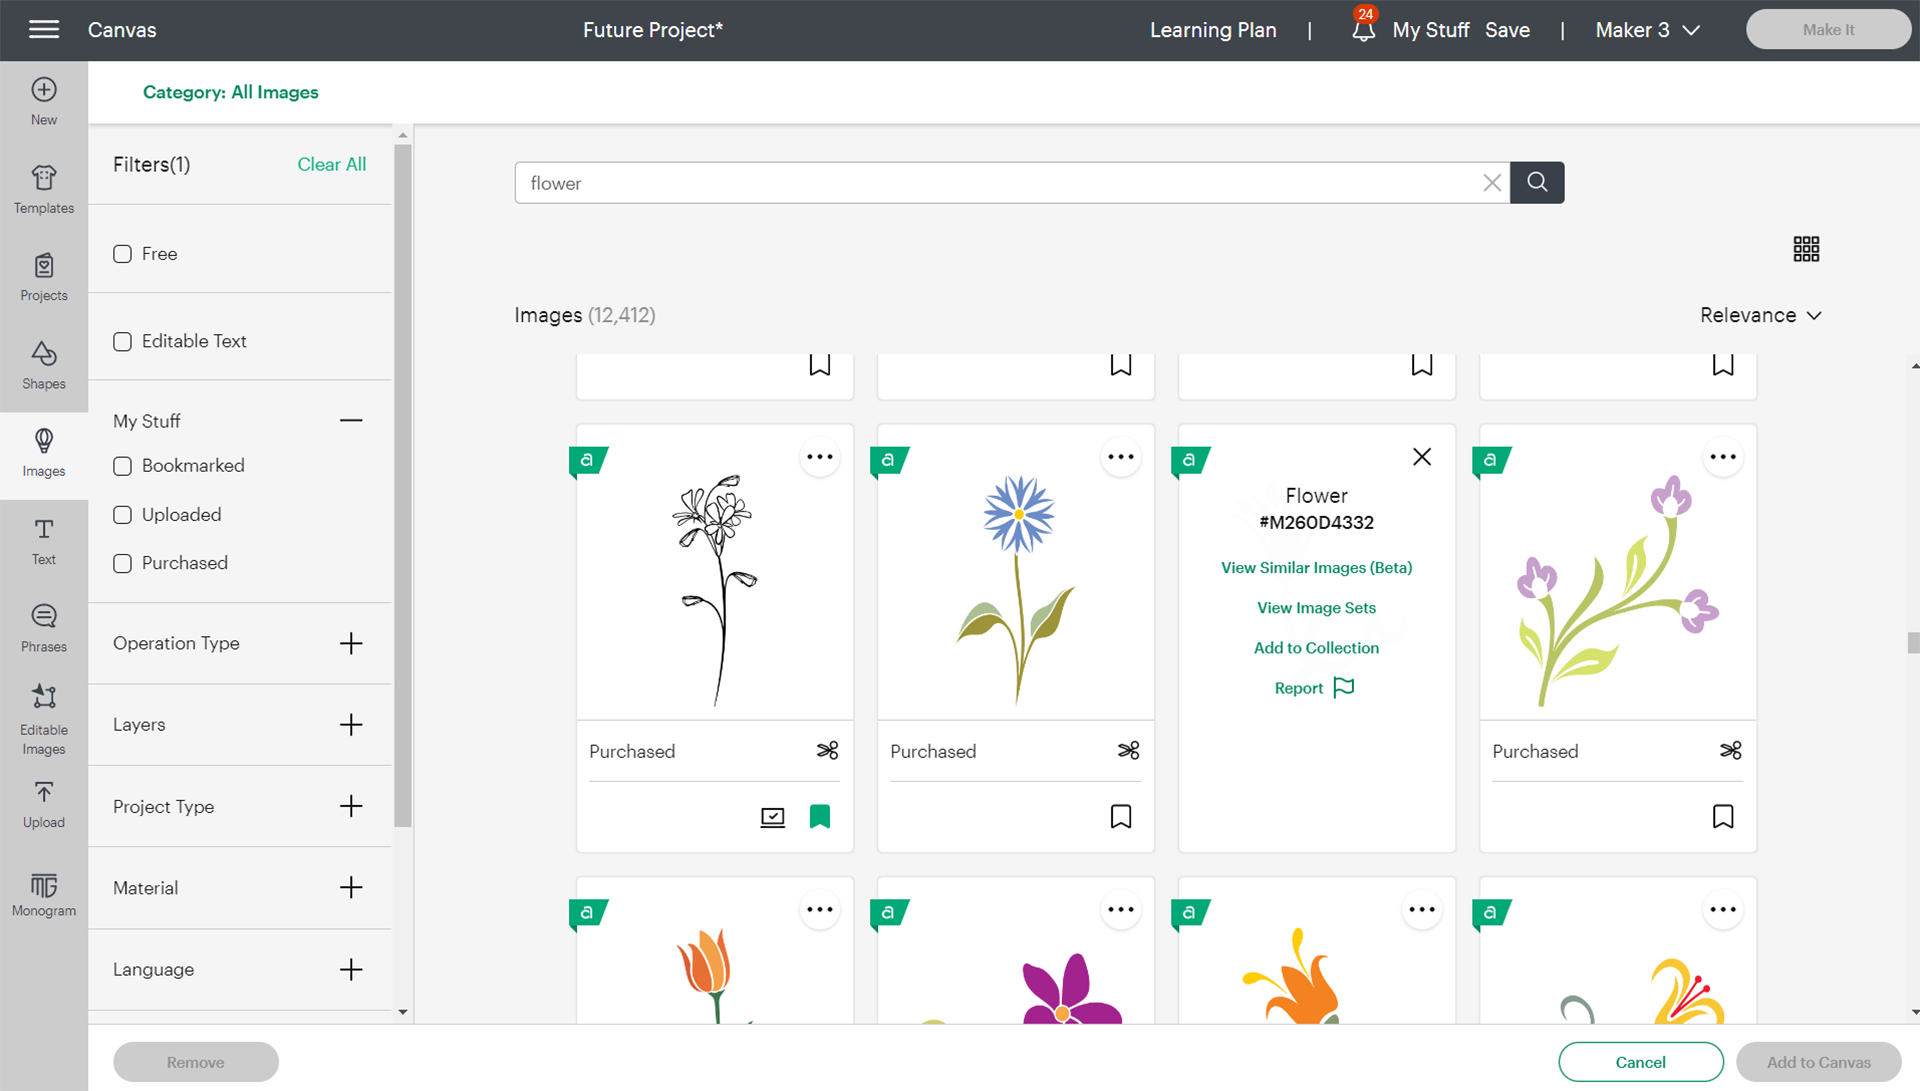
Filtering images
If you’re already in Design Space, you know that there are hundreds of thousands of images. Having a huge selection is great for inspiration, but sometimes you already know what you’re looking for. Using filters to search for images helps you quickly sift through the content so that you can find what you want and start using it right away. You can use keywords like “flower” to conduct your search, but you can also select options like operation type (do you want to cut, draw, or print-then-cut?) or the language on the left-hand side of the screen to fine tune your results. You can also click on the green “Category: All Images” text in the top left corner and selecting your desired category for even more filtered results.
Viewing image sets
When you find an image you really like, click the 3 dots in the corner of the image and then click on “view image sets.” Image sets are a collection of images in a similar style or that are a part of a series from the same designer. This is helpful when you find a style that inspires you and you want some options to actually use.
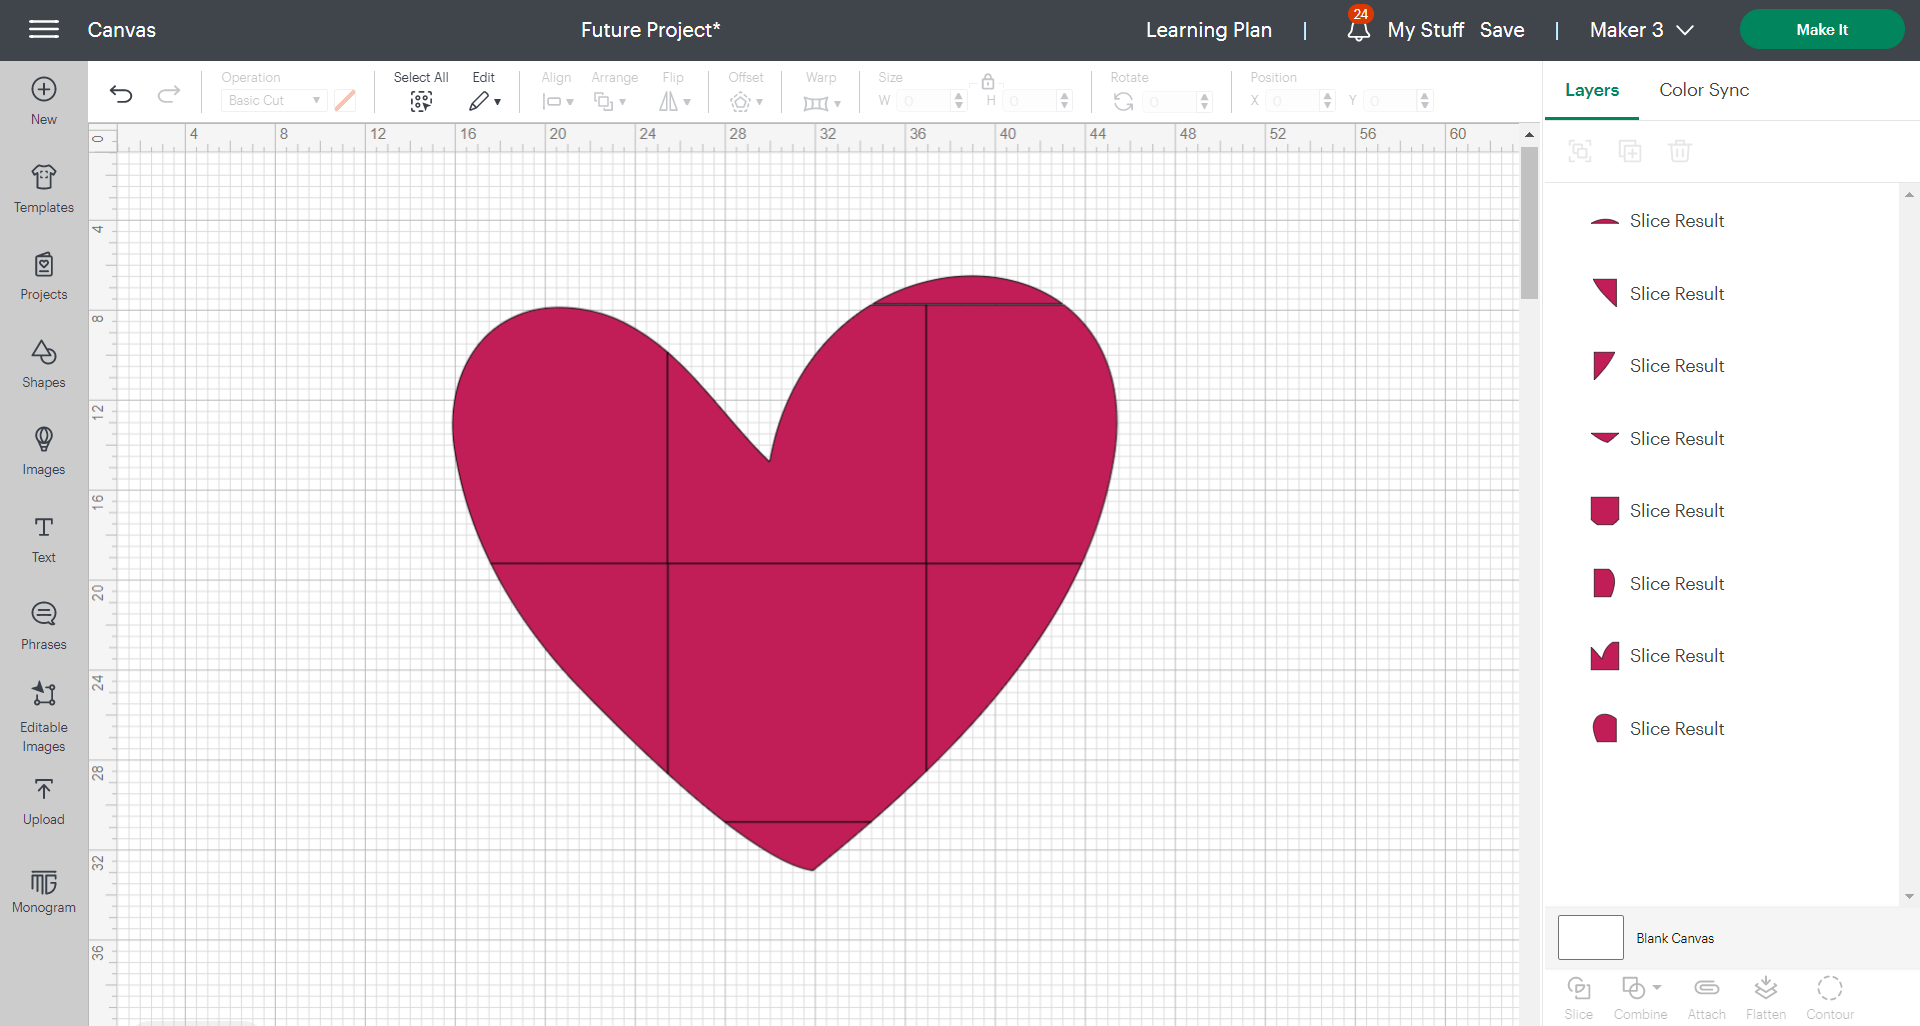
Make it big with larger than mat projects
If you’ve been crafting for a while, you might want to try your hand at larger projects. With Cricut Venture you can make projects with a cutting width up to 24” and lengths up to 75”. We also have materials like Cricut cardstock, which you can find as big as 24” x 28, to take advantage of large-scale format making. However, our other machines can also support large projects with the slice feature. Create a rectangle or square to simulate a 12” x 24” or 12” x 12” mat, and then use “slice” to cut your image into those sizes. When you click on “Make It,” Design Space will separate the sliced pieces into different mat setups so that you can put the pieces together once they’re cut. Whatever large project you make will sure to make a big impression!
While these aren’t all the Design Space tips and tricks our Cricut community has to offer, we hope this helps you save time while you make. Do you have more tips and tricks to share? Make sure to tag us on social using #cricut so we can see what you make and how you do it!
You Might Enjoy…