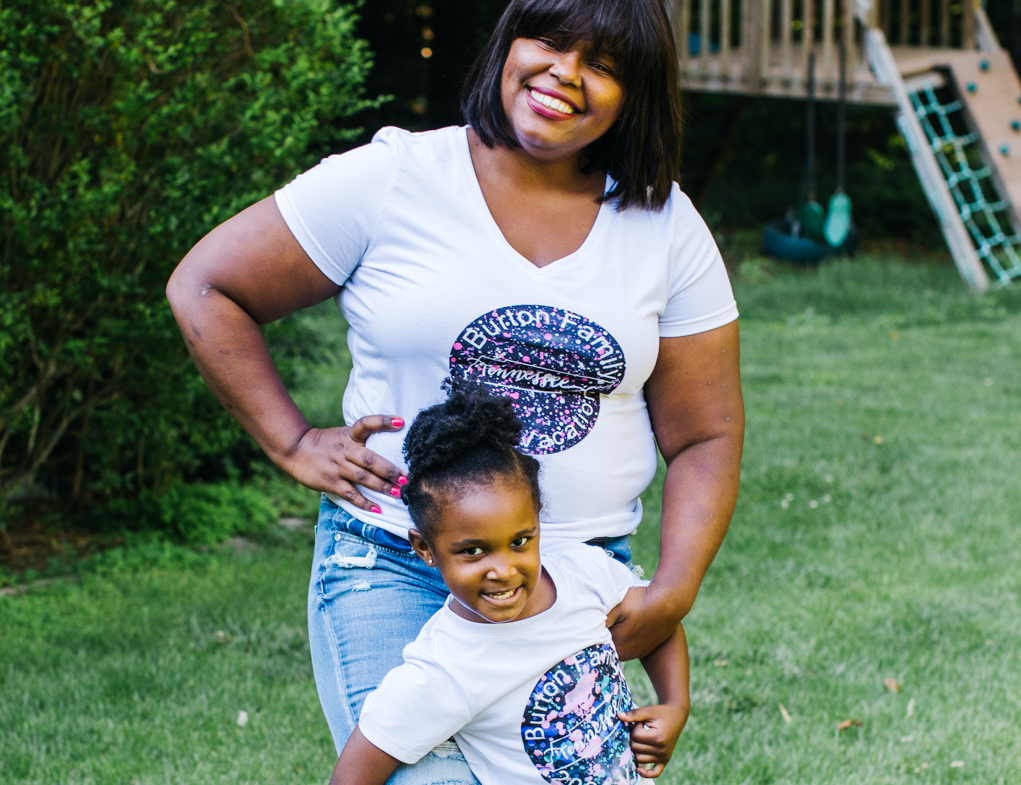
These custom tees make a cute summer outfit for the family
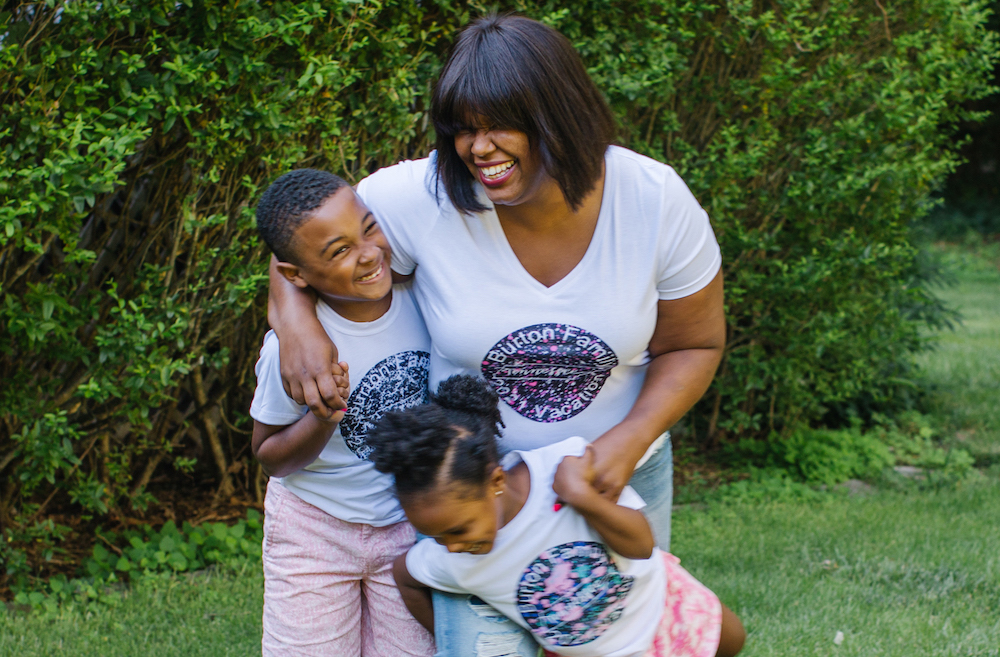
Journalist, travel lover and Momma Wanderlust blogger Tykesha Burton teaches us how to create matching family tees for the perfect summer outfit!
Are you looking to create custom, matching summer vacation tees for your family? Well, now’s a great time to get your creative juices going with Cricut.
I’m a technical writer by day and a travel blogger by night. As a working mom, there’s always something that needs to be done, but I still keep time for myself. While I’m not always the craftiest person, I enjoy creating things with my hands. I was instantly hooked when I discovered Cricut products a few years ago. These machines are the go-to technology for anyone looking to create a new summer outfit, décor, and more throughout the season. They even help the most inexperienced non-crafters – ahem, hand raised – to create projects that look polished and professional.
Since my family loves to travel and share our adventures online, we were so disappointed when the global pandemic grounded all our family travel. Now that COVID restrictions in our area have been rolled back, travel is making a big comeback and we are here for it!
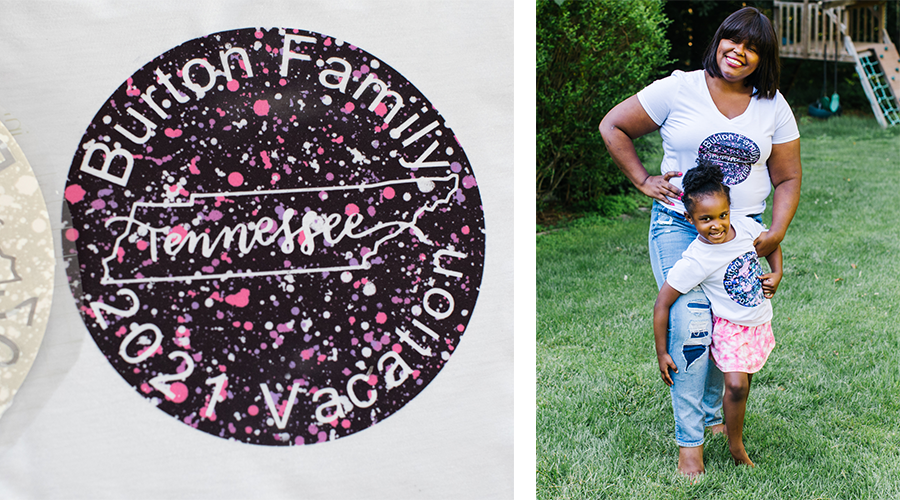
I’ve teamed up with Cricut to create a cute summer outfit for the entire family to commemorate our first big road trip since the pandemic. We’ll be driving from Washington, DC, to Nashville, Tennessee, and we are so excited to get out and explore again. Check out my process below to create your own amazing custom tees!
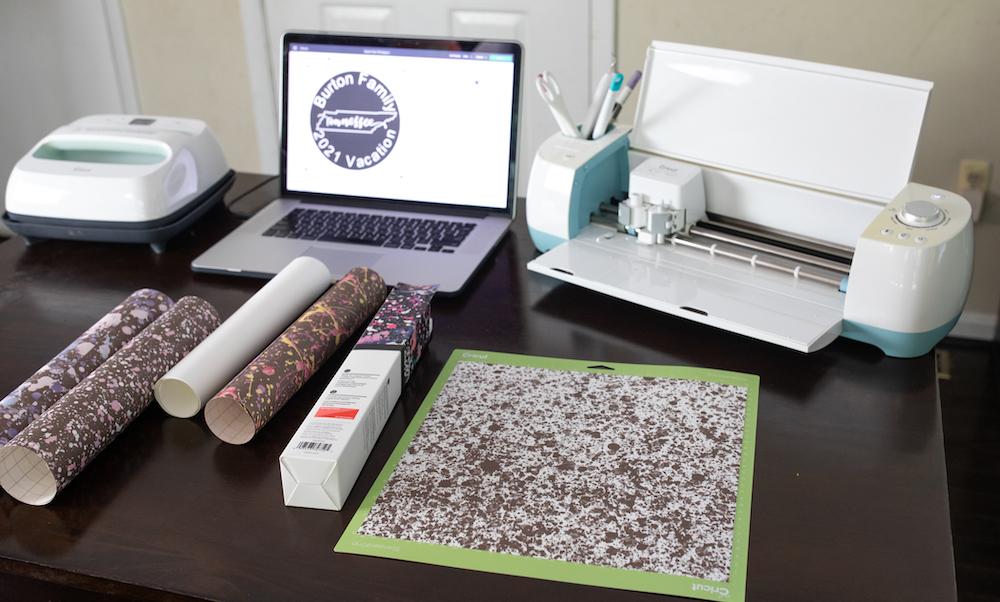
First, I peruse the Cricut blog, Pinterest page, and Design Space for inspiration to start my crafting session
Once I know what I want to make, I start crafting. For this road trip, I decided to create some cool matching t-shirts for the whole family. We held a vote for the design and once we figured out the family favorite, I started to make it.
I designed our summer outfit in Design Space using a simple Arial font and Infusible Ink pattern. I made sure the design was laid out exactly how I wanted it and measured how big it needed to be to look proportional on our shirts. Once it was properly adjusted, it was ready to cut.
Before I told my Cricut machine to cut out my design, I made sure to select “Mirror On” and the right material in the software settings. I mirrored the design because the material is cut from the underside, which is the part of the material that ends up touching the shirt fabric. Once I laid the cut design on top of the shirt, it looked exactly like it’s supposed to!
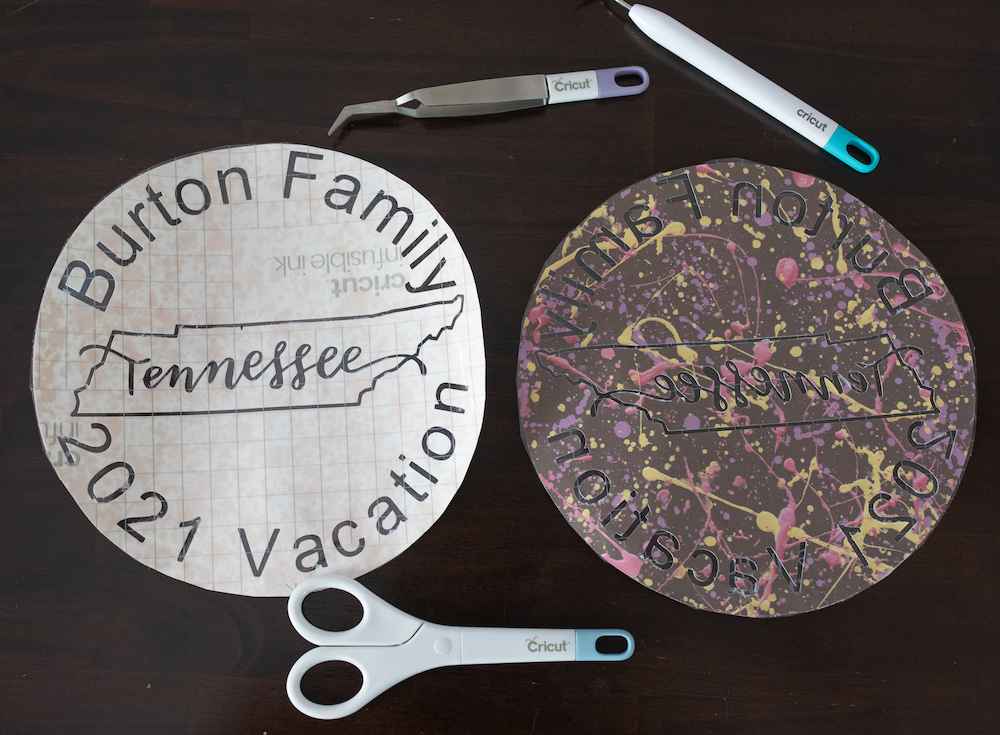
After the design is cut, weed or pull any excess pieces off the backing sheet
I made sure to leave extra space around the edges to use as an adhesive to hold the iron-on in place during the transfer process. I also removed all the excess lines, holes, and spaces in the letters. Ensuring that I don’t weed out too much is usually the most challenging part of the project, so take your time weeding. It’s helpful to use Cricut weeding tools to make the process a bit easier!
Next, preheat your EasyPress
Once the light turns green, that means it’s reached your desired temperature and should be ready to go.
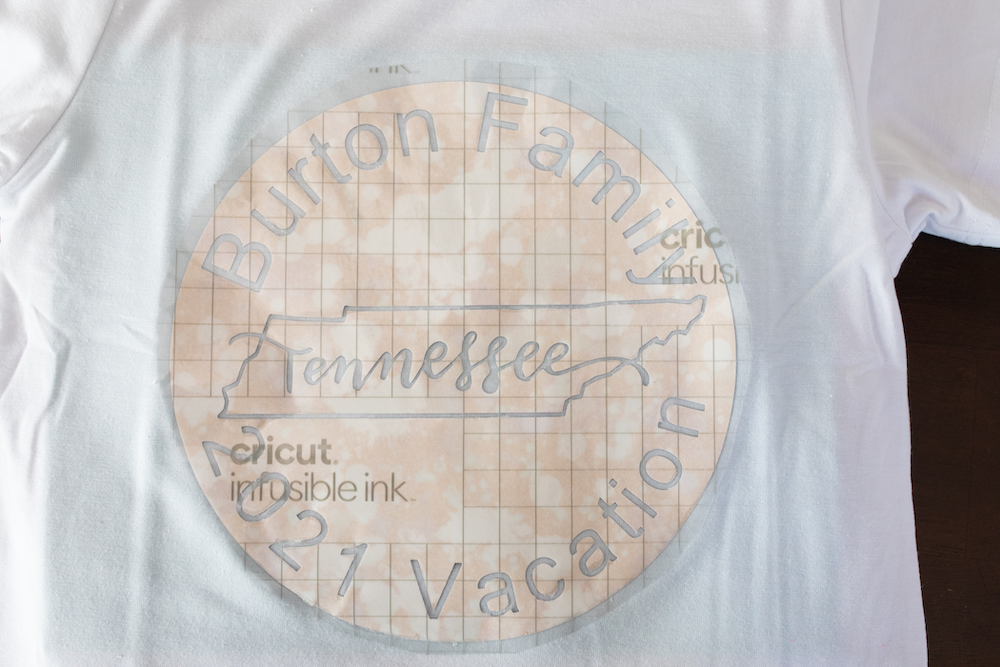
I placed my tee on the mat that comes with my EasyPress, and put a piece of butcher paper inside the tee to make sure that the ink wouldn’t bleed through to the other side. Then, I warmed up the t-shirt with my EasyPress for a few seconds before placing the Infusible Ink sheet face down on the front of the tee. I put another piece of butcher paper on top of the design as a buffer between the t-shirt material and the EasyPress.
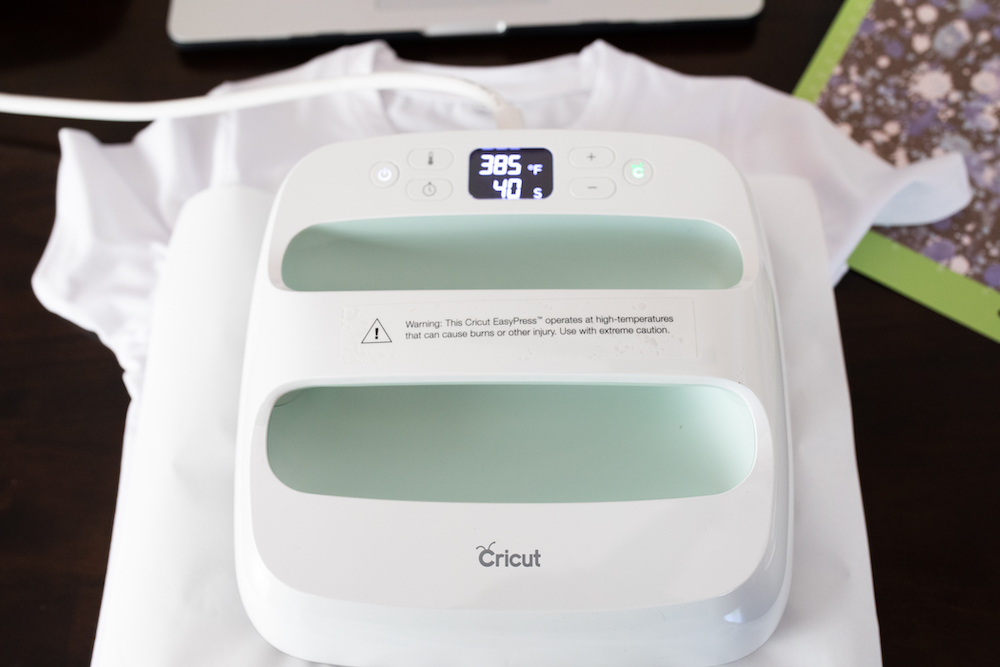
Next, I placed the EasyPress on top of the design and pressed the Cricut button to start the countdown
It’s always helpful to apply a little pressure to the EasyPress while you wait.
Once the EasyPress beeps, alerting you that the allotted time is up, pull it straight up and allow the shirt to cool. Once the Infusible Ink sheet feels cool to the touch, I removed all the paper and ink material and used tweezers to remove any small pieces.
And then, voila! Our summer outfit was ready to go, completely personalized to our family for our road trip. Once you get into the rhythm of making your shirts, you’ll be looking cool and coordinated in no time!
Related Making


Search How-To
I want to make...