I follow an influencer on Instagram that shares seasonal items and fan favorites from a popular national grocery store, and every time something new from her pops up on my feed I can’t help but want to check out my local store to see if it’s in stock. Whether its ube pancake mix or key lime popcorn or the newest sparkling water, she has this way of making everything sound so delicious and I just want. it. now. I constantly wondered where she put everything that she bought and what her cabinets must look like. Did she ever have to organize her pantry?
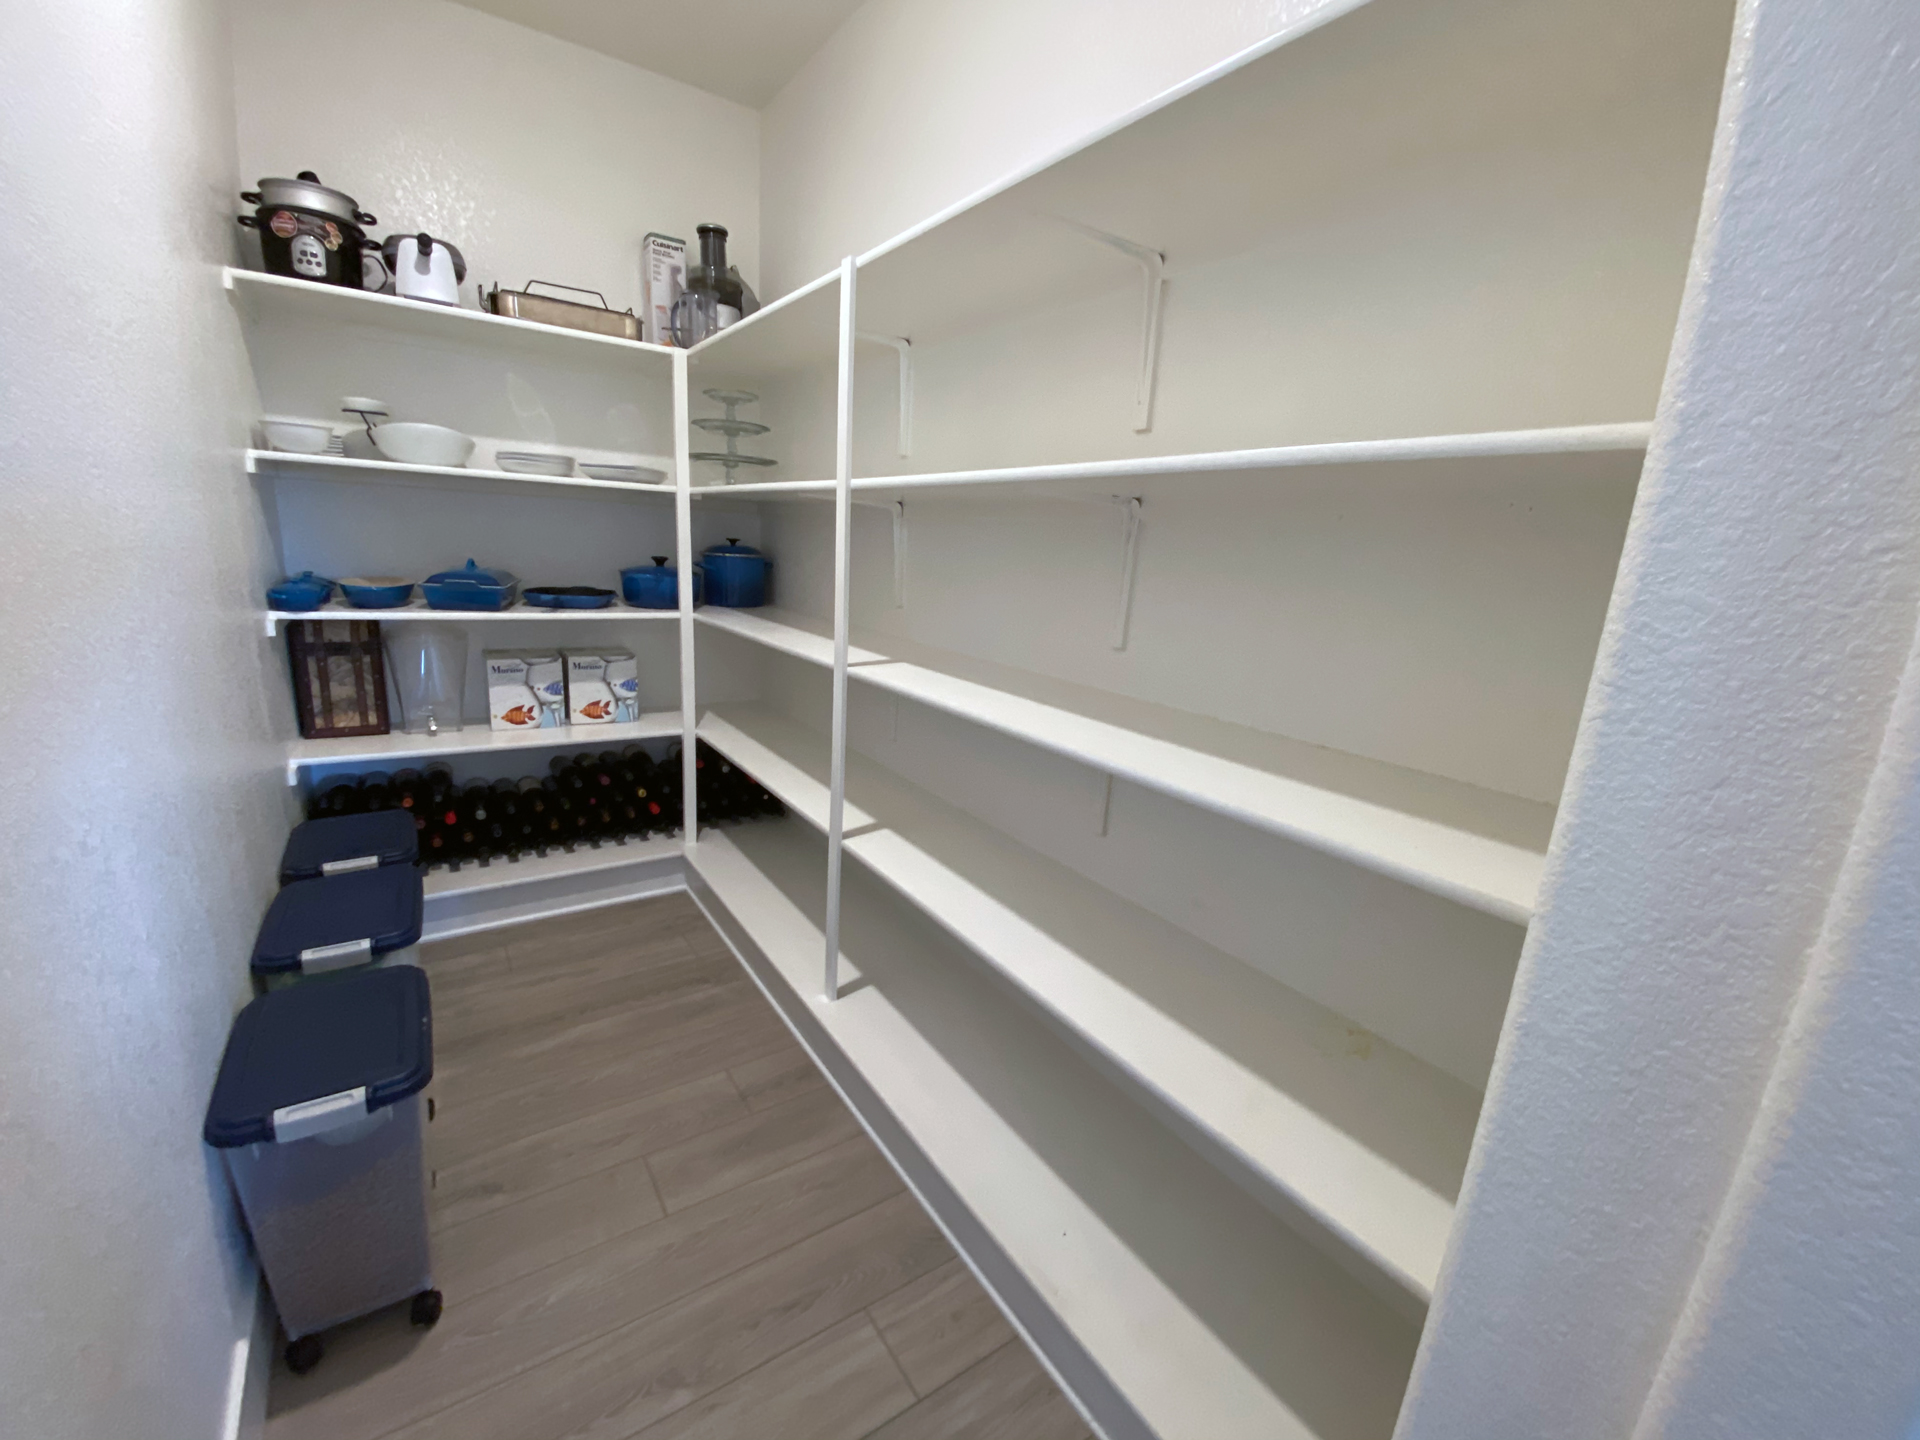
My four-person family used to live in a sub-900 sq. ft. apartment with virtually zero kitchen space, so even if I did want to buy everything in her feed, I didn’t have any place to put it. But, recently, we moved into a house with an amazing pantry that’s probably the same size as my kid’s old bedroom. And with that moved, space no longer was a problem — but keeping it clean sure was. Now, with the privileged problem of having too much space, I found myself filling it constantly with snacks and goodies for the whole family. After a few months of piling things on each other and squeezing bags into empty nooks and crannies, I finally had enough of my overstocking and decided it was time to organize my pantry.
And funny enough, it was great that I did this when I did it. More on why below.
Step 1: Get yourself ready to organize your pantry
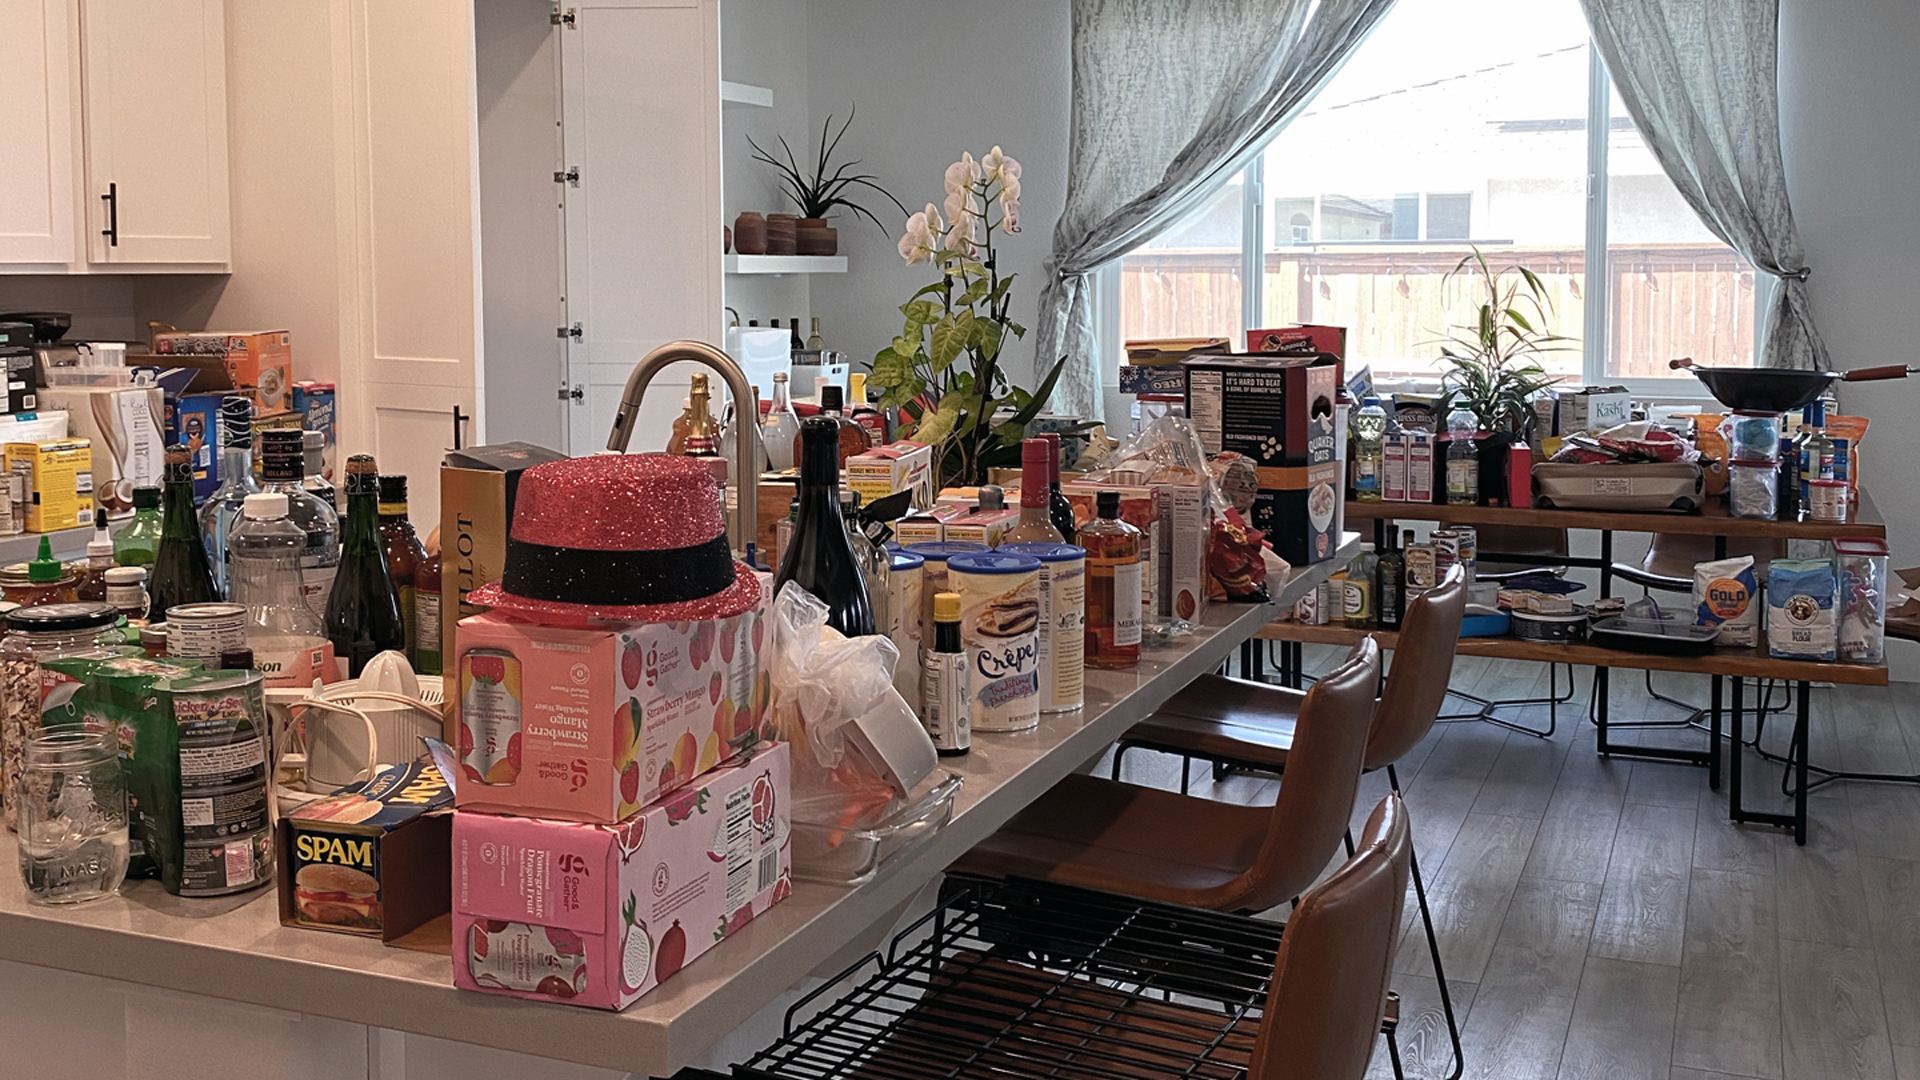
First, it was not an easy task. I admit I regularly stopped and started, causing this effort to last more than a week. The sheer amount of stuff accumulated was nothing short of amazing. On top of that, I tend to get fixated on decor themes, symmetry, and other aesthetics, and I kept changing my mind on what containers I wanted (and what could fit all our goods). I had to admit to myself that to organize my pantry I had to stop thinking of it as a “quick and easy project” and, instead, look at it as something that may be tedious now but would pay off in the long run. Because of that, however, I did things a little out of order from most people and compared to most other blogs I found on the internet about how to organize my pantry.
Step 2: Pull everything out
When I say everything, I really mean everything. I find it easiest to start with a clean slate. With a completely bare room, I could move things to exactly where I intend to place them. This prevents any unnecessary and anxiety-induced shuffling.
Step 3: Sort and toss
With everything is out of the smaller pantry space, start streamlining. First, I went through and looked at all the expiration dates. Anything that was expired or stale — which was quite a bit — got tossed or placed in the recycling bin.
Then, I put everything in sorted groups. Jars went in one area, chips in a different area, my mountains of seaweed snacks in another, etc. This visual picture let me see what I was actually working with before I had to make decisions on containers. As I sorted, I discovered that there were multiple instances where two (or more) packages of the same item were open. This gave me a chance to combine open packages and discard the empty containers.
With everything sorted, my family went through the items and looked at what else we could get rid of. Anything unopened packages we didn’t want to keep went into a donation pile that we brought to the neighborhood “pantry” — a place where people could get free food if they were in need.
Step 4: Stock up on supplies to organize your pantry
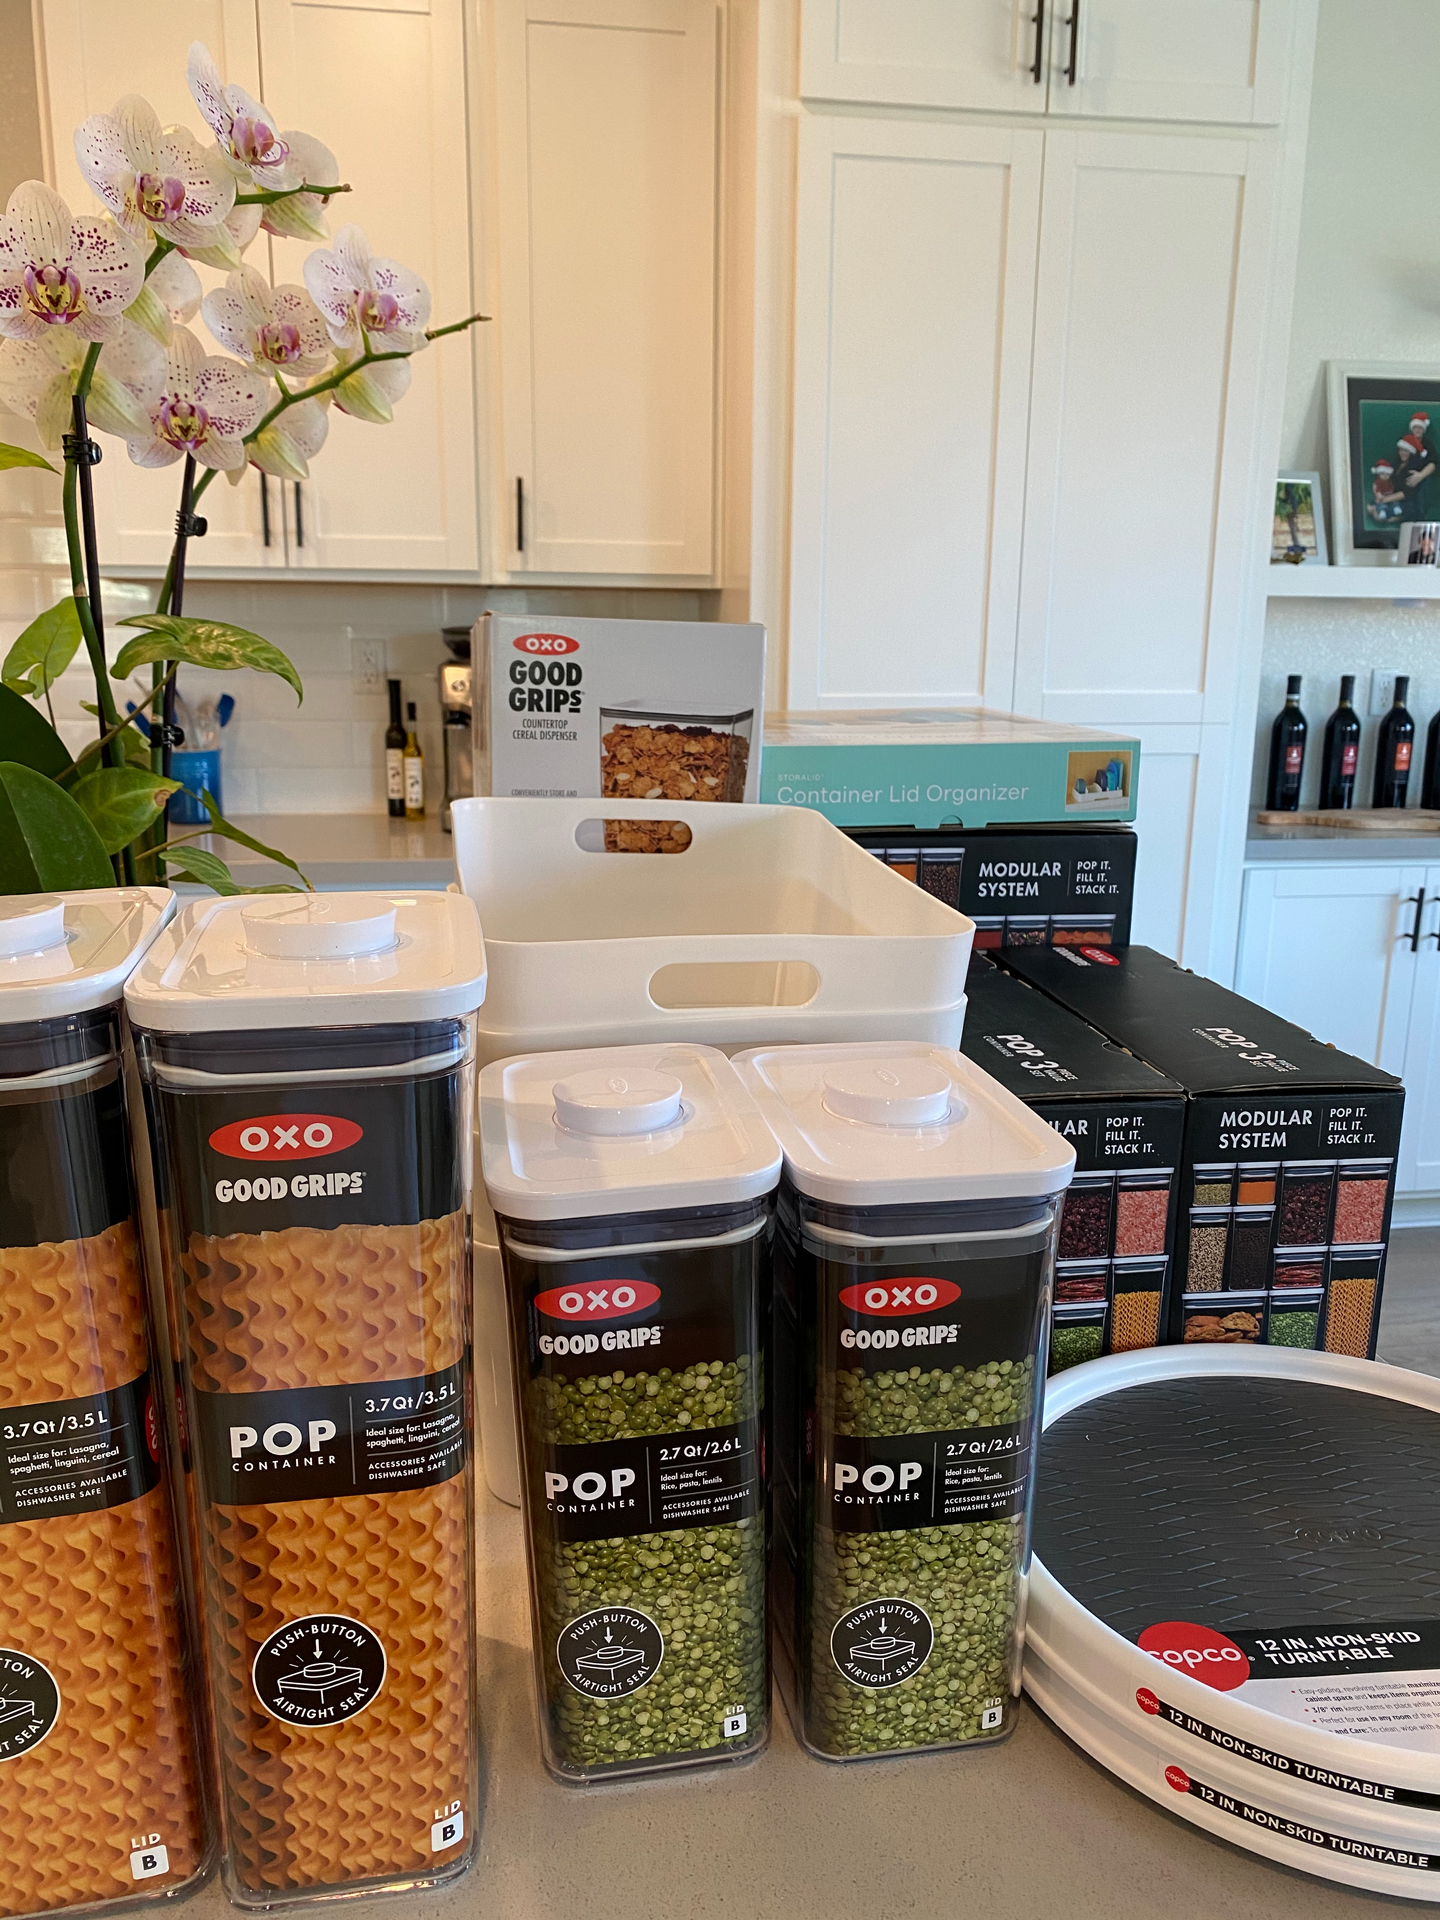
Now that I knew how much actually needed to go back in to the pantry, I had a better idea of what other supplies I would need to finish this project. It was time to find the containers to help me create an Instagram-worthy organized pantry. This took the most time. I spent hours walking up and down the aisles of my favorite stores. I must have looked so silly to passersby as I’d pick up bins in one aisle and then find a different bin elsewhere and then go back to the first aisle to put them back on shelf…just to do it all over again and ultimately put everything back before checking out another store.
If I could rewind time, I would have gotten more of these details on paper first. For example, settling on a color scheme would narrow down the tremendous number of options available. Also important — measuring my shelf space to know how tall and wide these containers could even be. I learned the hard way that my shelves are not all the same height.
I finally settled on a few key items:
- Modular plastic containers
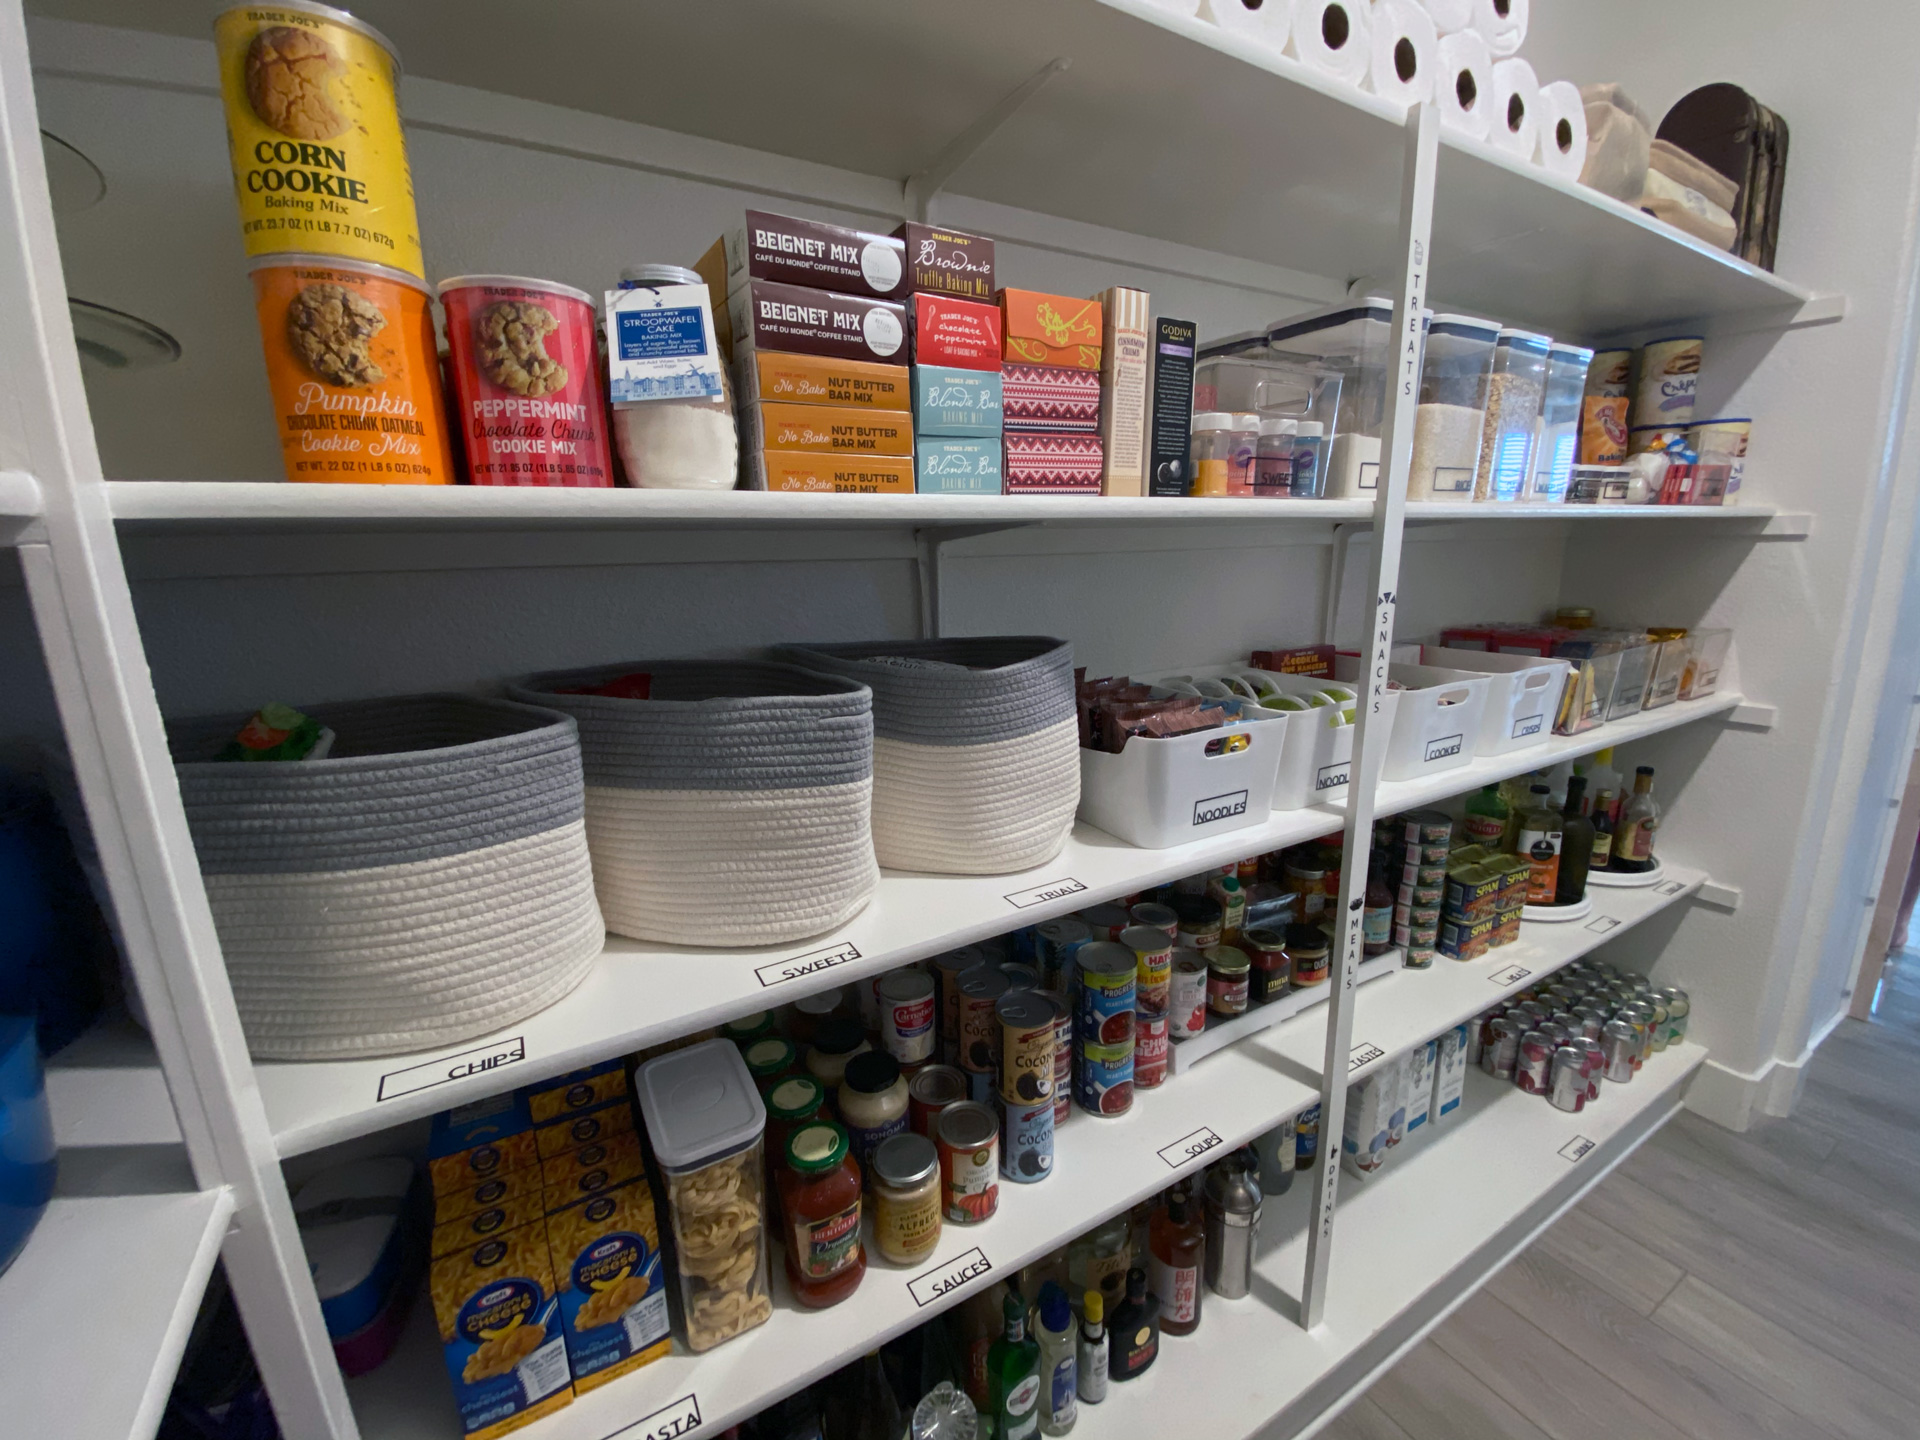
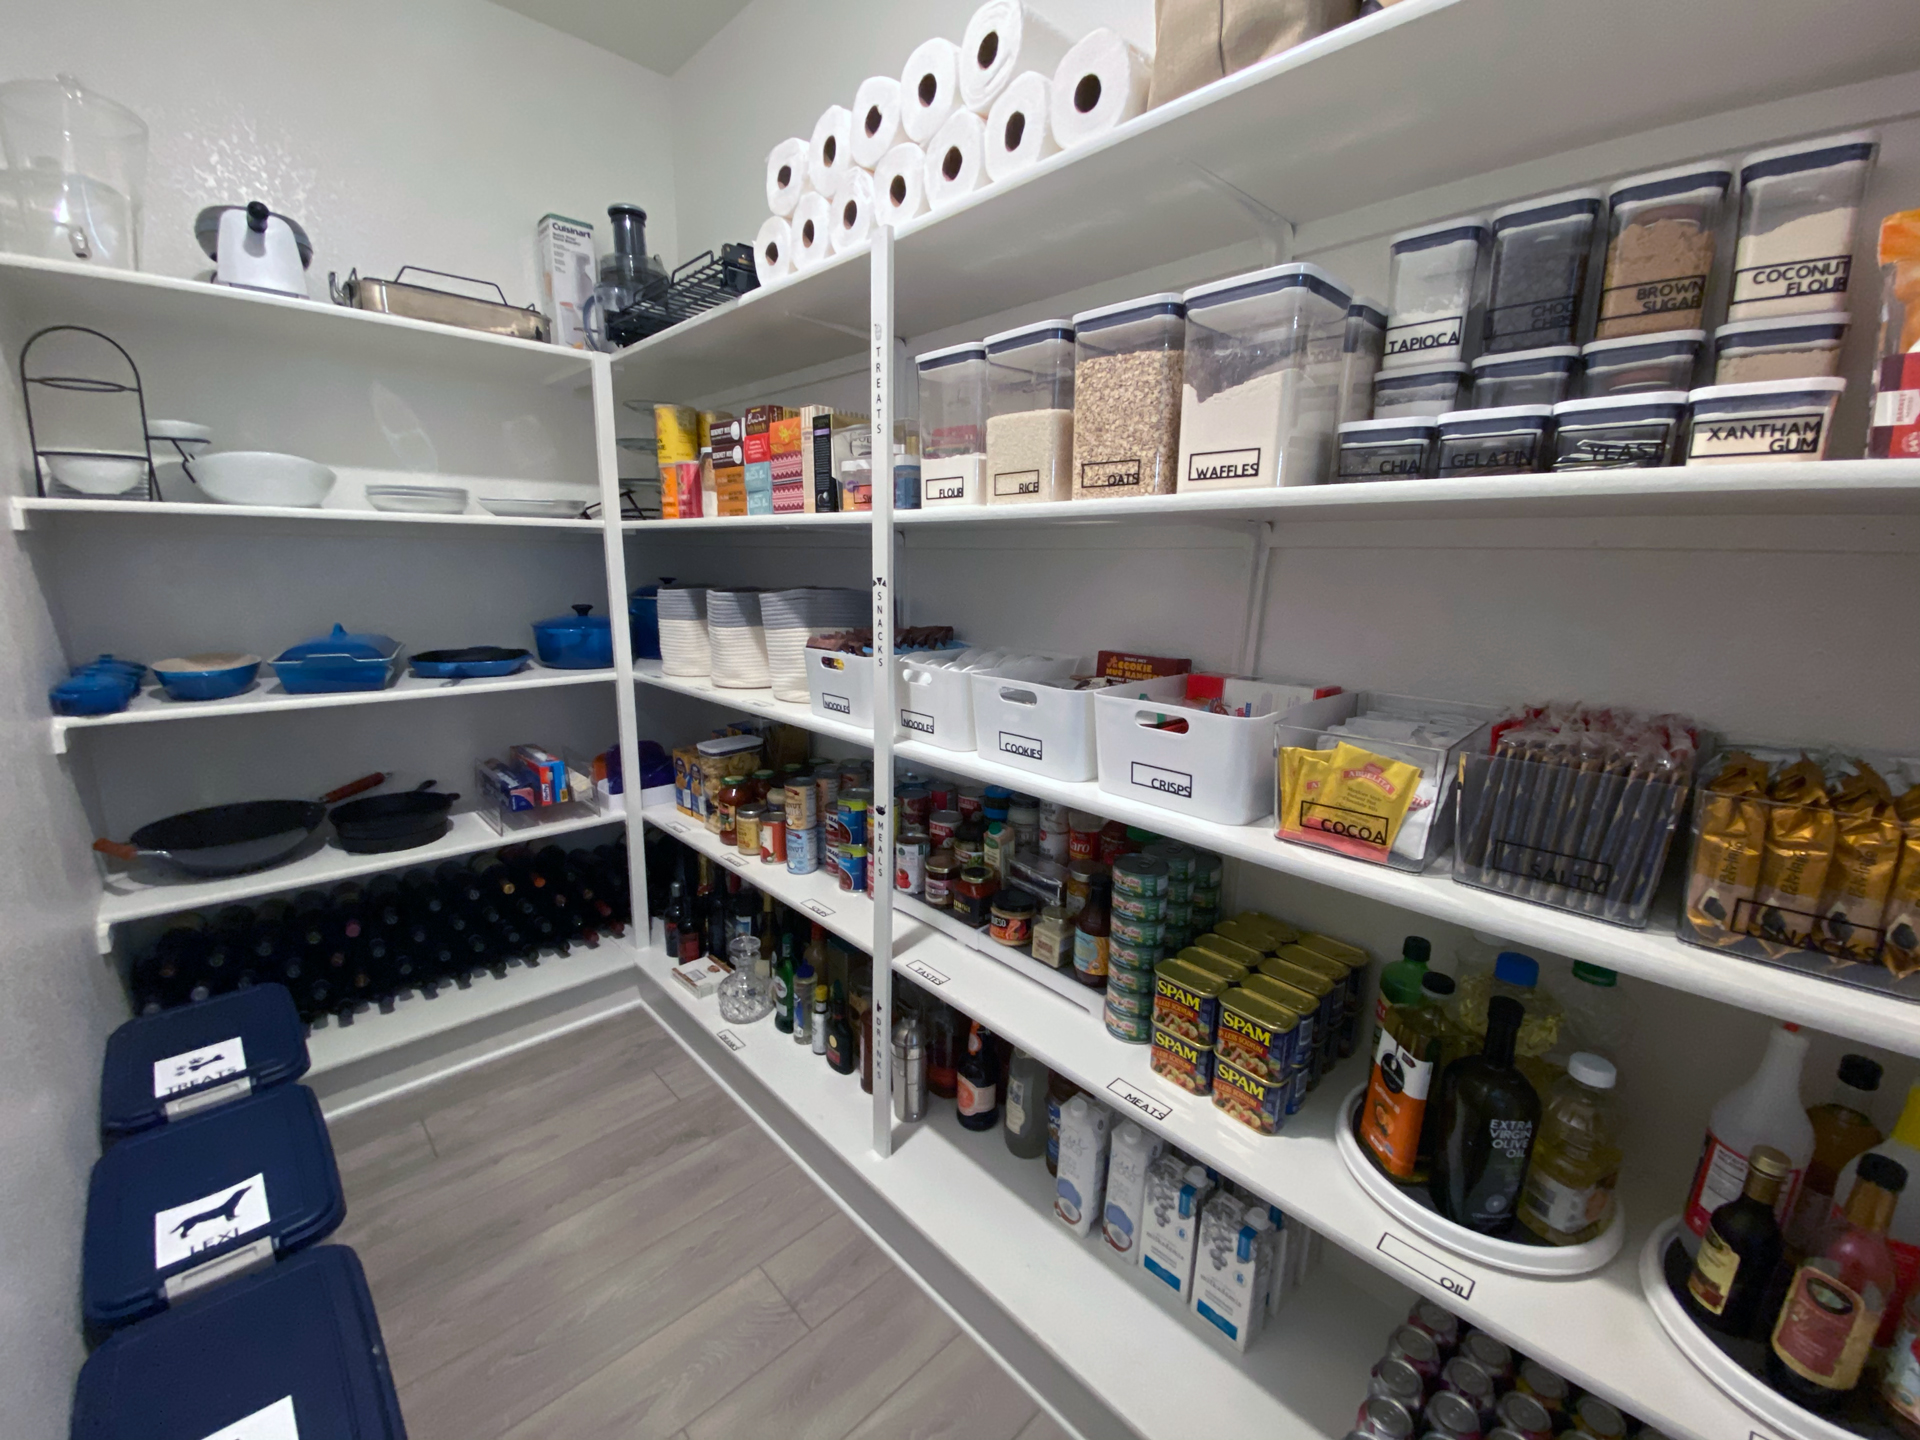
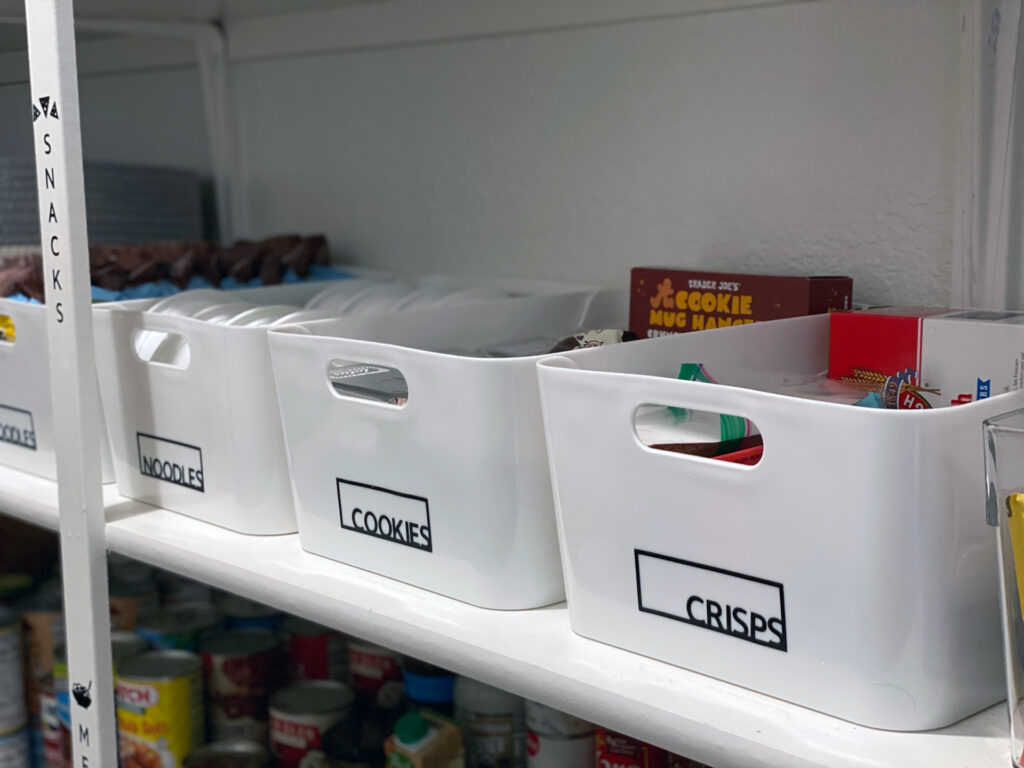
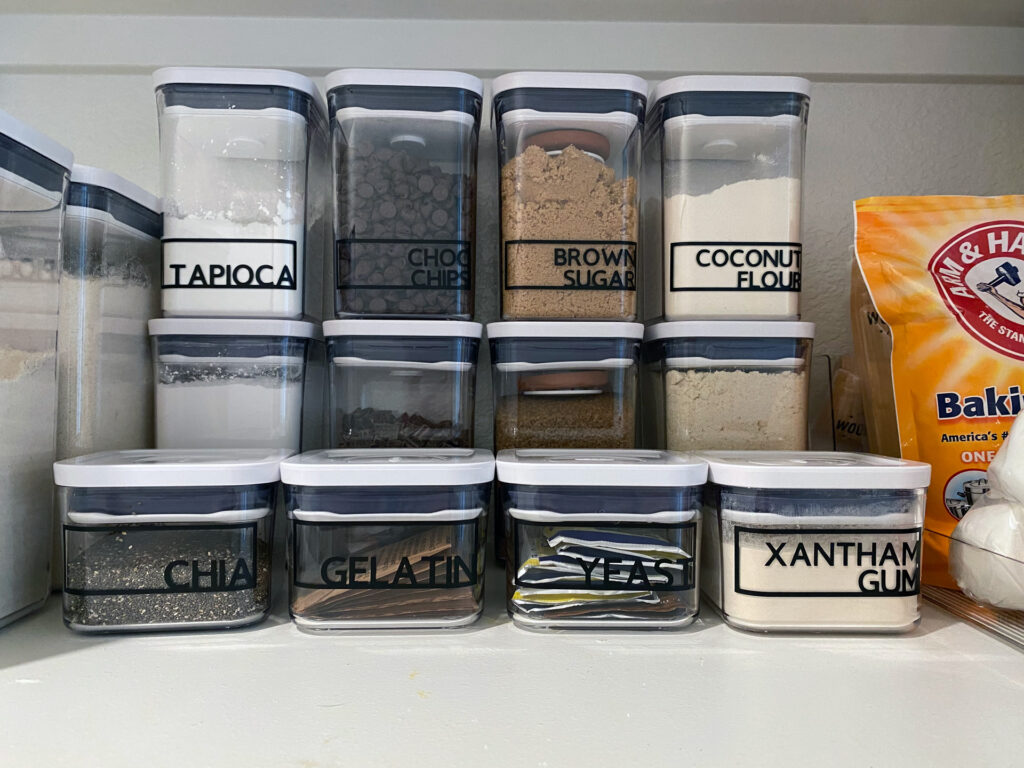
Used for dry goods like flour and sugar, these plastic containers need to offer features like airtight seals. This helps keep the goods fresh and pesky bugs out (more on that later). I picked modular containers so I could stack them rather than having everything splayed out across the shelf. - Plastic sorting bins and step up shelves
I used to work in retail and out of that experience grew a fondness for aesthetically-pleasing product displays. These plastic sorting bins and shelves helped me line up like products and keep them all symmetrical. I like to pretend that I had my own little mini convenience store in the house. - Woven soft baskets
All the one-off boxes and packages that had no other place were hidden in these baskets. These were things that really just didn’t fit into other categories, like a random bag of chips or a candy bar. The baskets also added a nice softness to the room, where everything else was hard plastic or heavy metal. - Rotating turntables
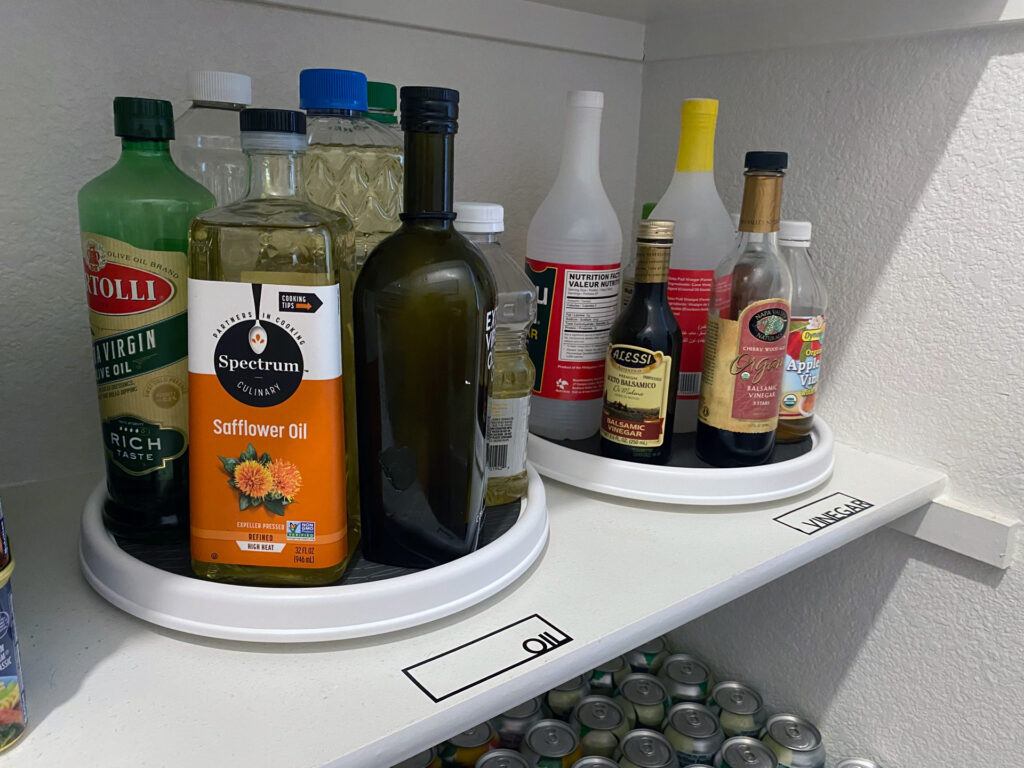
Also sometimes referred to lazy susans, these turntables were items of different types that I accessed frequently. I got two — one for oils and one for vinegars. - Reusable container and food wrap sorter
Last, but not least, I had to find something to sort all our food storage options. I settled on a stand for our foil, sandwich bags, and plastic wrap, and a divider for our plastic container lids.
Step 5: Put everything in its place
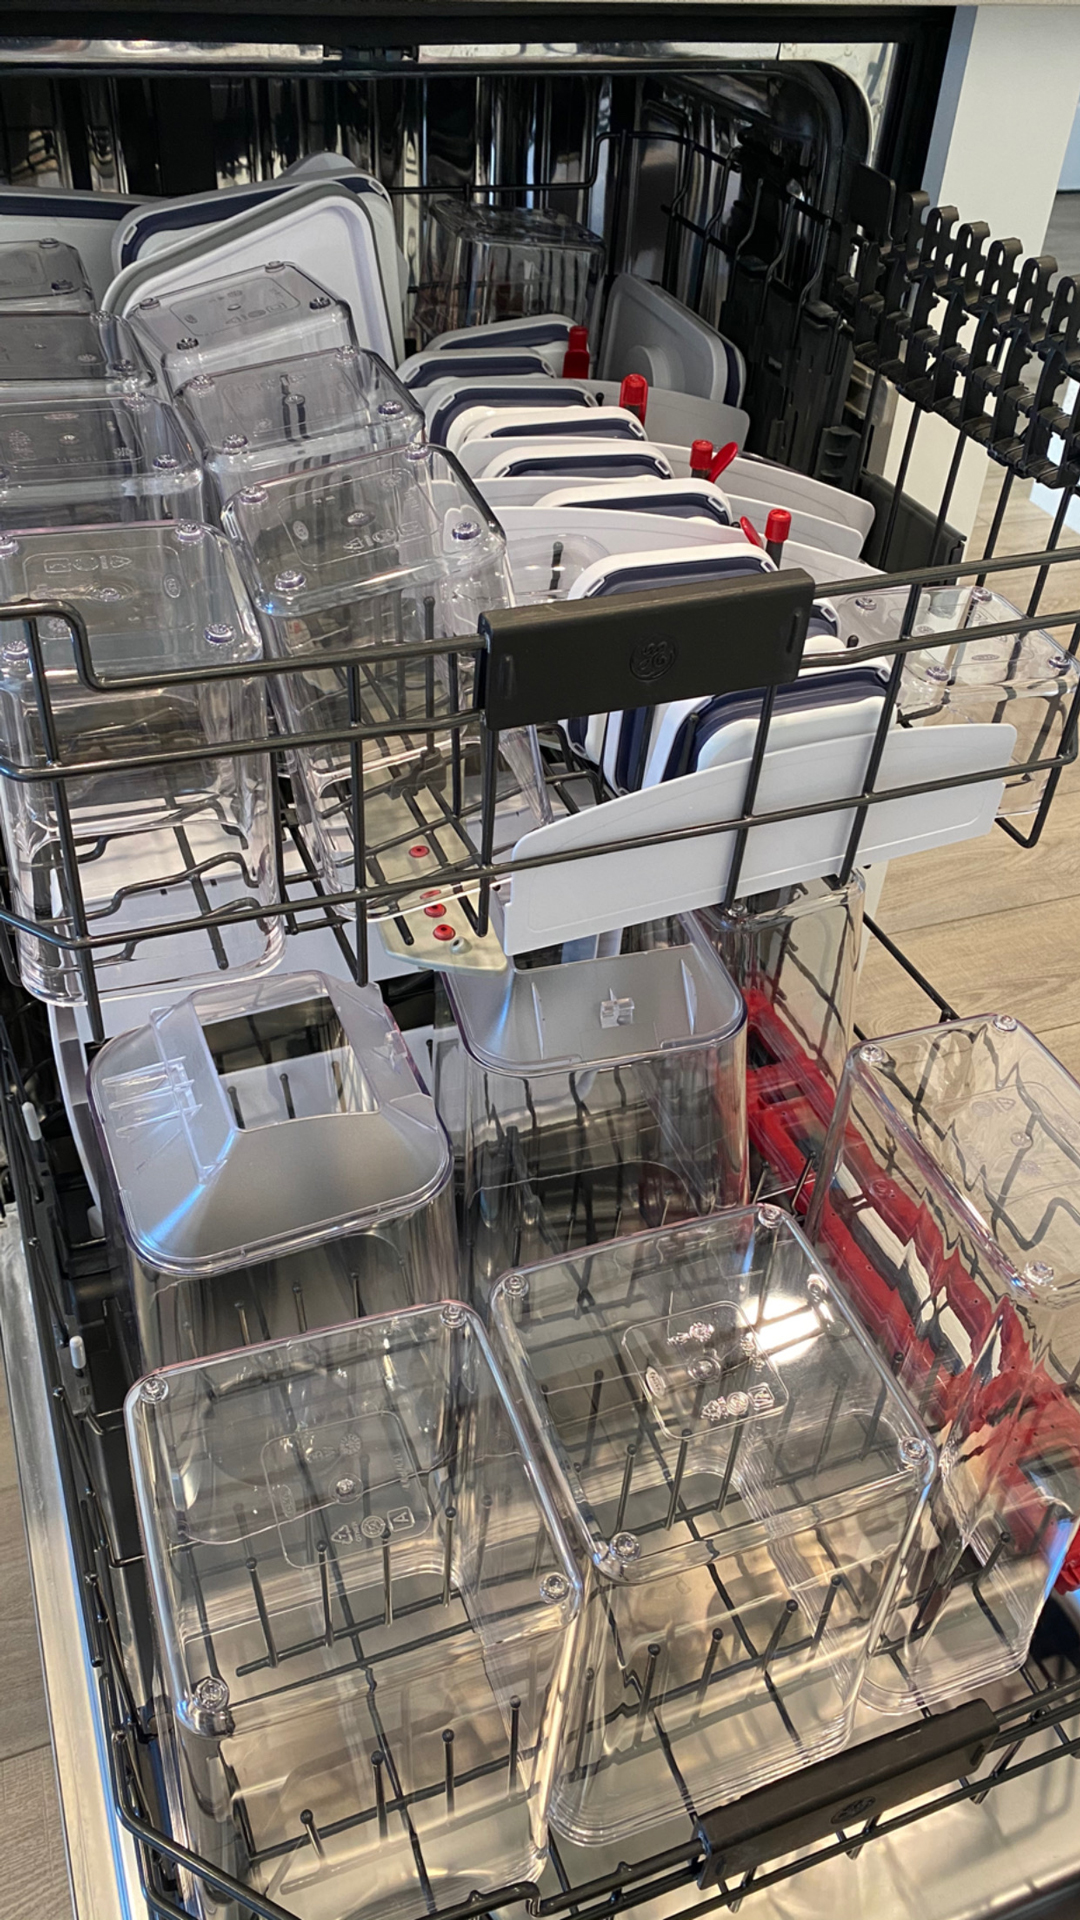
With my containers in hand, all I had to do was put everything back into the pantry. I cleaned the plastic containers and then filled them with all the dry goods. Then, I put away all our pots and pans and other servingware. After putting those on the shelf, I laid out the dry goods containers and all the other bins and baskets. Now that I could see where all the food was going to go. Since it was already sorted from Step 3, it was easy to put it all into place.
Step 6: Label all the things
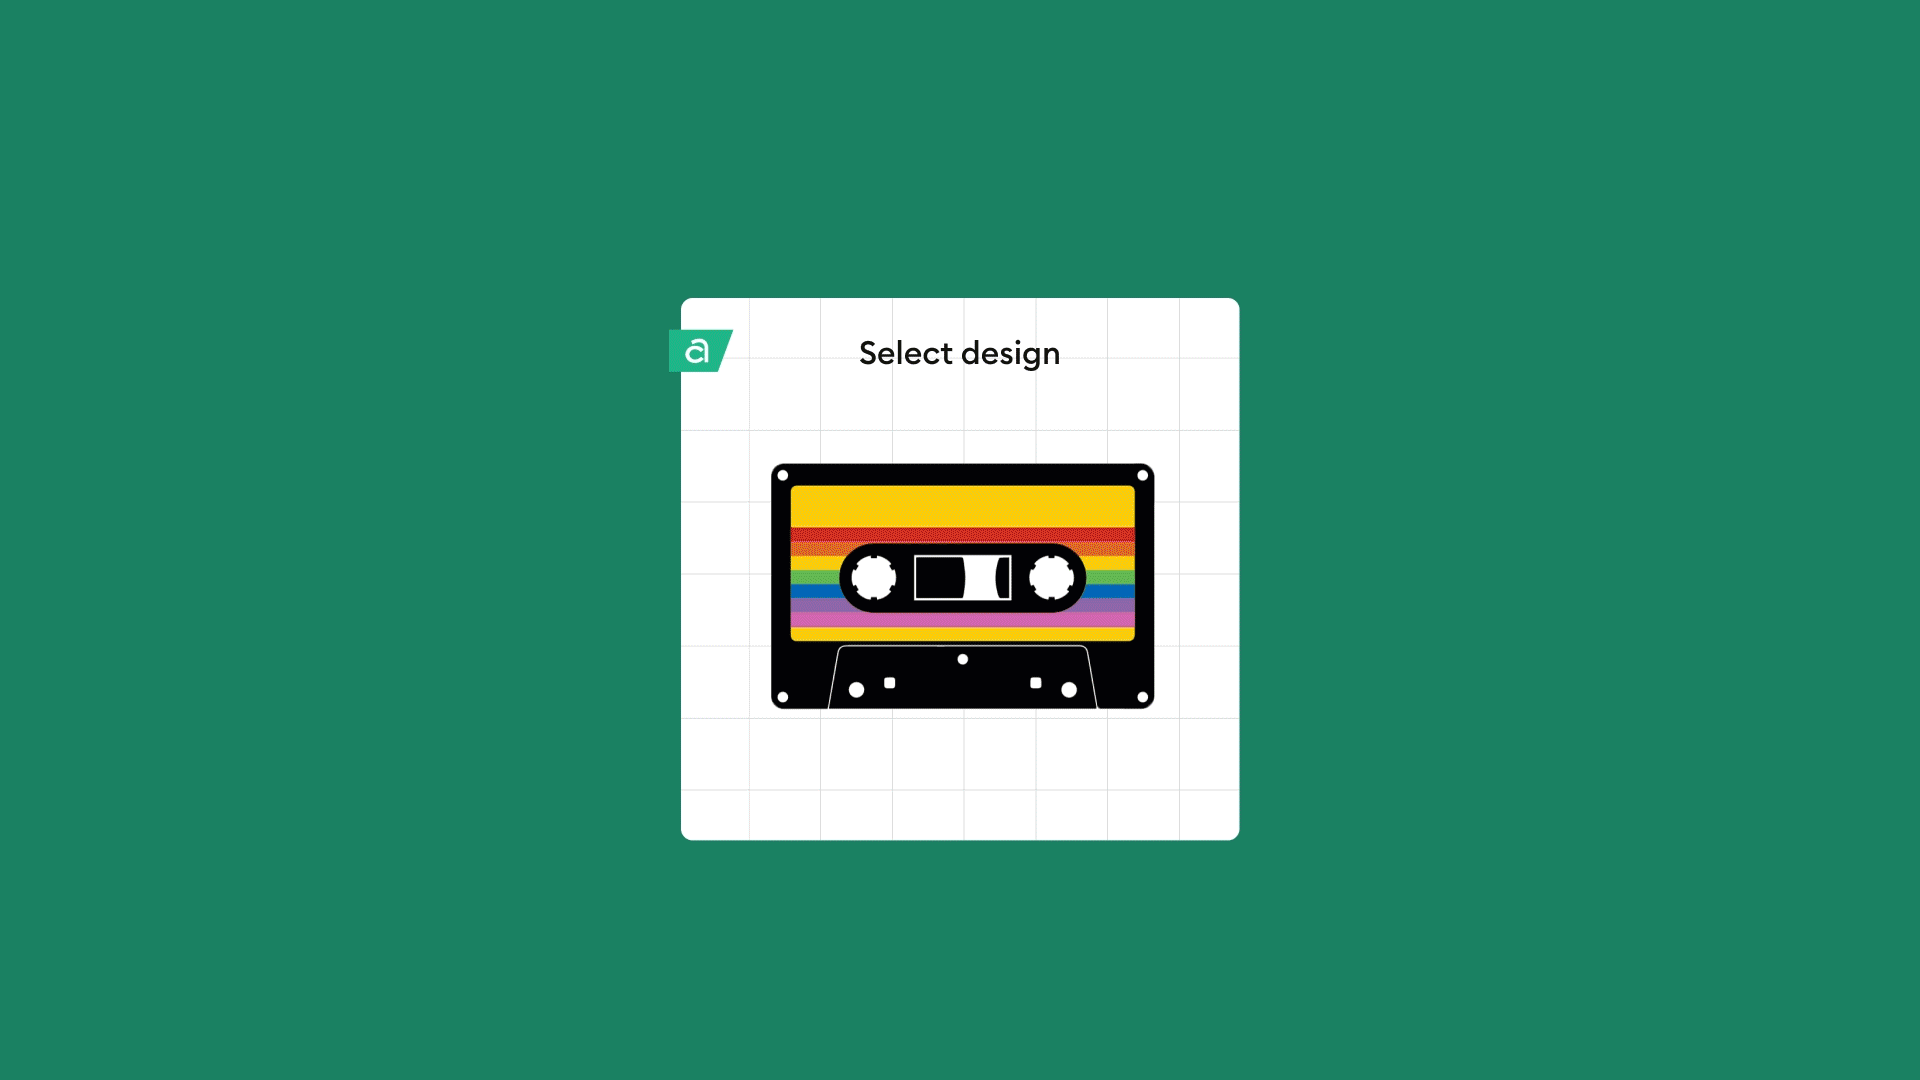
Now that the pantry was back in order, my next step was to make sure that I wasn’t the only person in the family who knew where everything went. Here’s where I broke out my Cricut machine. In Cricut Design Space, I started browsing the different ready-to-make label designs. I found a few styles that I loved, but I decided to use them as inspiration for making my own instead.
I typed out all the words that I would need to create. For those that are curious, I used the Futura font. However, there are hundreds of fonts available in Cricut Design Space if another style is more interesting to you.
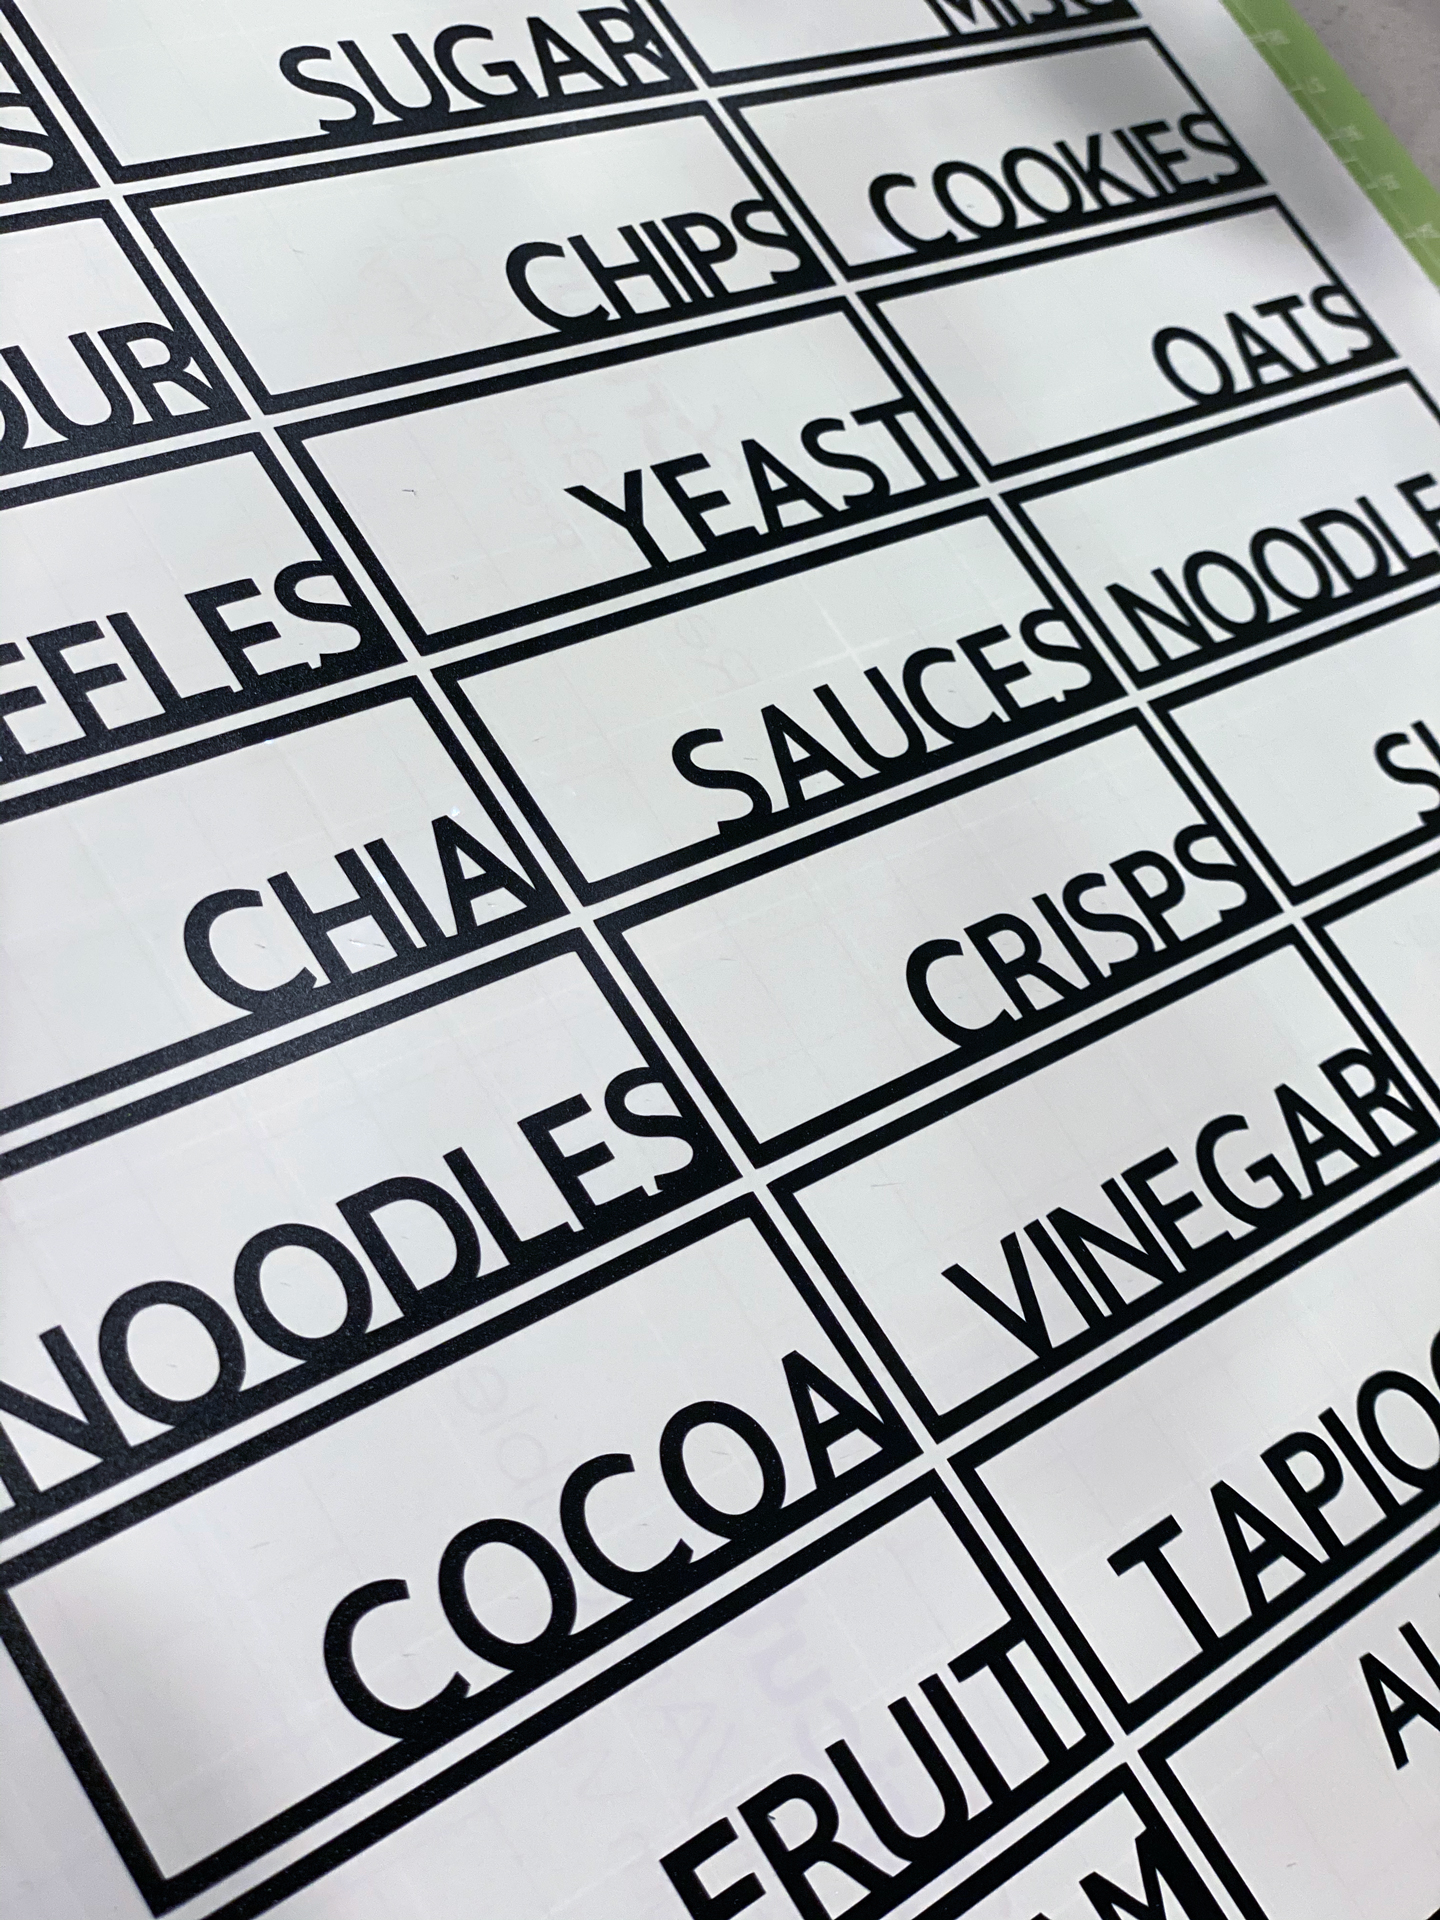
Once my words and designs were finished, I clicked “Make It” in Cricut Design Space. Off my Cricut machine went to cut everything out with precise perfection. When it was done, I peeled off the excess vinyl, and got the labels ready to transfer onto my containers and shelves. The result was incredible.
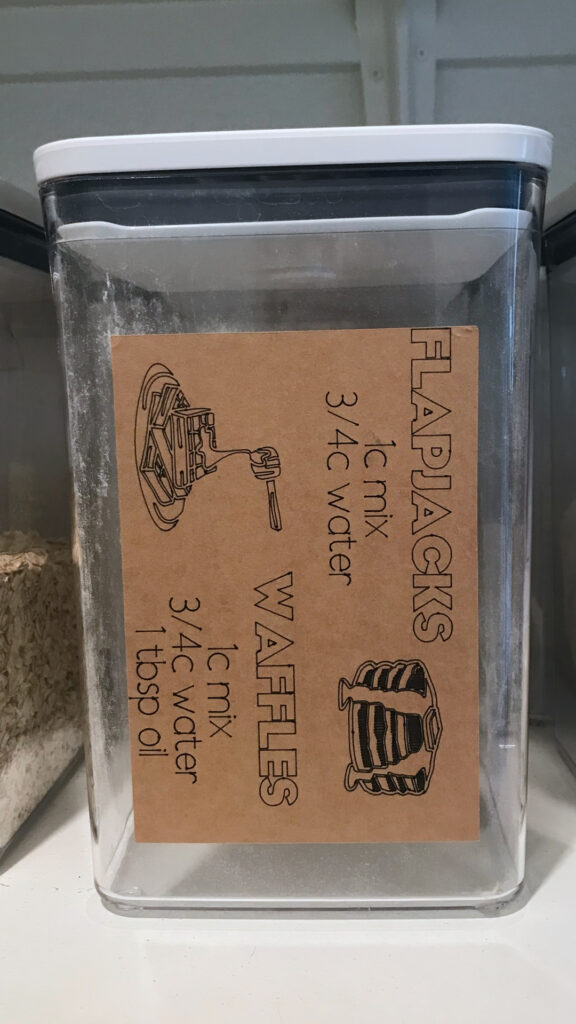
Pro tip: For goods like pancake and waffle mix whose boxes have directions, make labels for that as well. I put all the preparation instructions on a larger label and placed it on the back of the containers. Because a Cricut machine can cut and write, I decorated the instructions a little bit with some fun waffle and pancake graphics.

Step 7: Enjoy and MAINTAIN
It was finally done! Though several things made me stop and start, causing the overall project to take longer than necessary, I couldn’t be happier that I did this. It was clean and uncluttered and made me rethink my approach to buying food to prevent future messes.
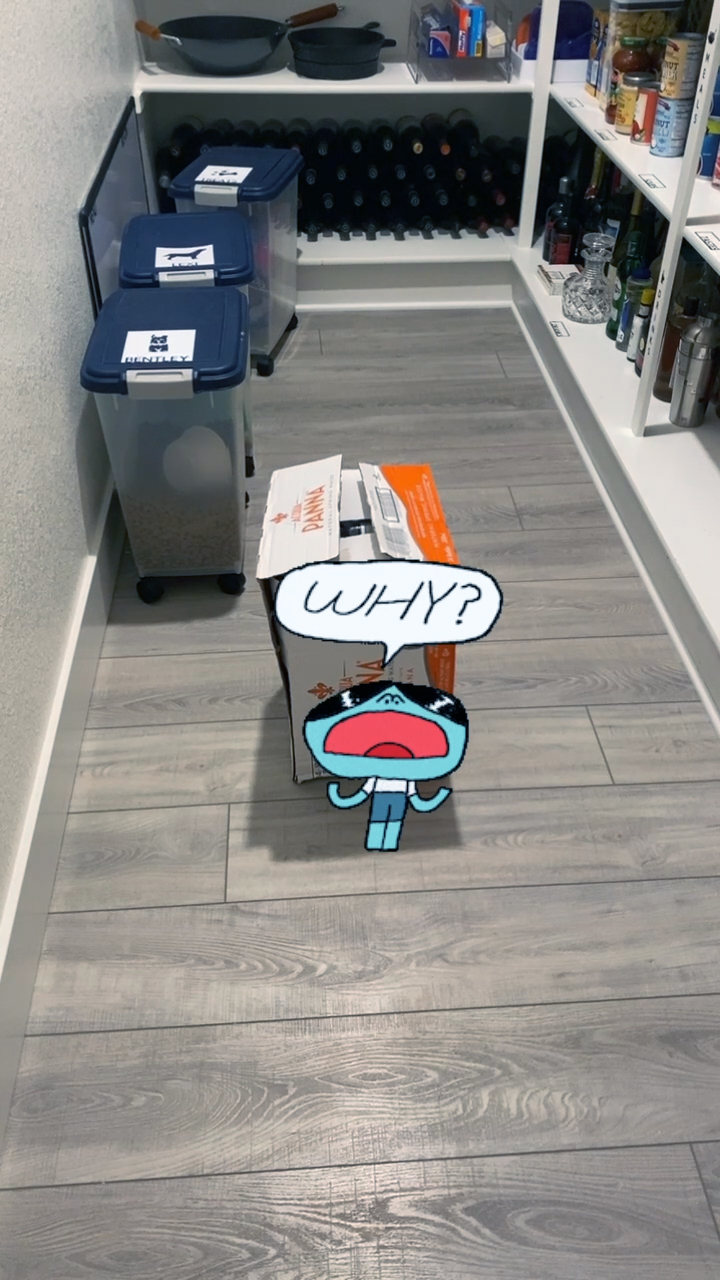
Now to maintain the organization. My partner learned the hard way that placing a box of sparkling water in the middle of the newly organized pantry was not the way to maintain it.
A note about timing
I mentioned earlier that organizing my pantry happened at the perfect time.
I live in a relatively new area within a region that historically was considered farmland. Many of the farms are still around, and it makes for a great place to enjoy locally grown goods. What I did not know or appreciate when we moved in (and when I was working on the pantry) were the nuances around harvesting.
Unbeknownst to me at the time, one of the local farms was harvesting their produce. Meanwhile, the winds in the area had been wild — blowing between 10-25 miles throughout the month. Because of the urban growth of the area, there were many pockets of housing developments sandwiched in between acres of farmland. What did that mean? Well, that local farm apparently had an issue with red flour beetles — a pest known for being a great flier that feed on grains and other dry goods. And those wild winds carried them from the harvesting farm across miles of town and into the homes of unsuspecting pantry users. Our entire neighborhood became infested.
Thankfully and serendipitously, my newly organized pantry made it incredibly easy to inspect all of our food items. While it took months to actually get rid of these pests entirely (which I think we have, but I get nervous every time I see a speck of dirt on the shelf), the clear containers and organized space helped me maintain my sanity in more ways than one. Now, I can simply enjoy the fruits of our labor and buy those tasty new things that pop up on that store’s shelf!
Show us what you did to organize your pantry
Now that you’ve peeked into my pantry, I’d love to see yours! How did you organize cabinet, closet, pantry, or shelf space? Share your ideas with others using #cricut on social.