Make your own crib mobile
Skill level
Intermediate
Sometimes what you find in a store doesn’t quite meet your expectations or aesthetic dreams. That’s why making it yourself can be so satisfying. I’ve had quite a number of friends and family members bring in new additions to their own families recently. Of course, this gave me plenty of reasons to visit the baby registries and aisles over the past few months for things like baby clothes, diapers, or a crib mobile.
One thing I’ve noticed is that their themes are all so similar — and it’s because the options they have are basically all the same. Every store has the same thing — woodland characters, color-coordinated pom-poms, safari animals, planes, rocket ships, or shapeless blobs.
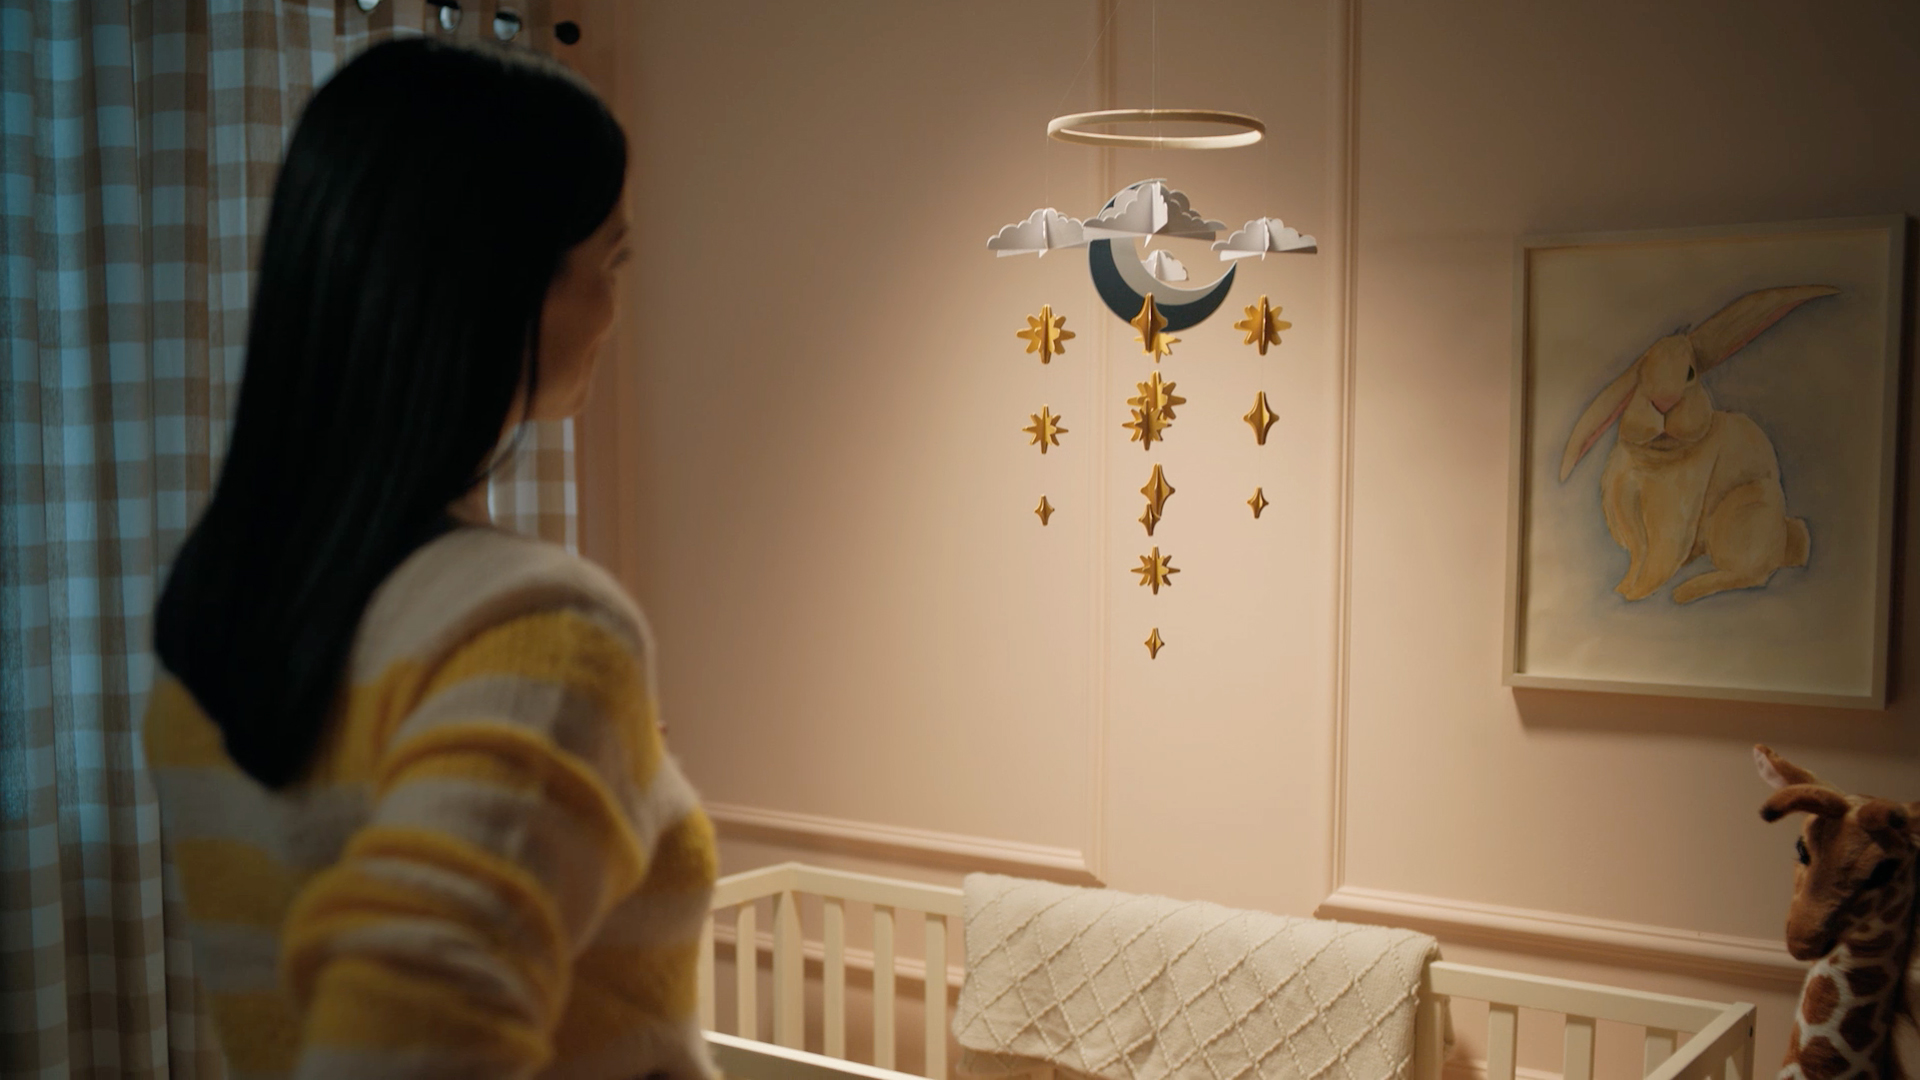
What if you had your own vision? What if instead of basing your baby’s room on what happens to be available for a registry, you had an empty canvas and could build out your own fantasy — and your baby’s new universe? If the sky’s the limit, maybe that crib mobile could be made of stars and clouds of your own design.
That’s exactly what I explored with this Moon and Stars Mobile from Cricut Design Space.
Supplies needed
Print this list
Moon and Stars Crib Mobile
Step 1: Get your design ready
This Cricut Design Space project is ready to go, but to edit the design, just click “Customize.” This lets you take each piece of the design and change it up — resize it, replace shapes, add additional features, or otherwise make it your own.
Step 2: Start cutting
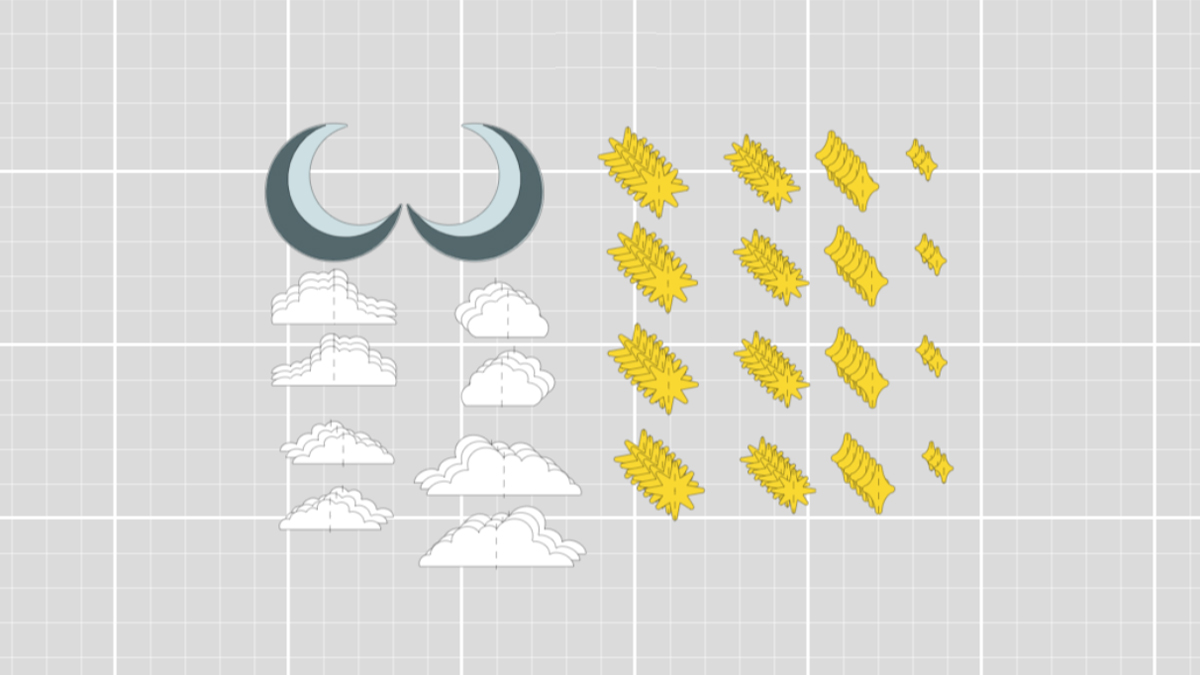
Place your cardstock on the mat, and insert the first tool into Slot B of your machine. Note that you’ll need both the cutting blade and a scoring tool for this step, so be ready to swap tools in the middle of cutting. The scoring tool helps create lines in your cardstock that make it easier to fold.
Repeat this step for each cardstock color you use.
Step 3: Assemble your materials
Remove your cardstock from the cutting mat, then start folding each cut out along the scored lines as needed. Use regular adhesive or glue to attach paper materials to each other (like the stars and clouds). For this 3D look, take matching pieces and glue them together along the folded edges. The project contains three matching pieces of each cloud and star.
Using super glue, attach each piece of paper to one end of a monofilament string. Use a separate string of monofilament for each cutout. Attach the other end of each string to an embroidery hoop and arrange until each piece is hanging in the way you like it. Make sure to balance each piece so that the hoop lays horizontally flat when everything is hanging down.
Pro tip: When removing cardstock from a cutting mat, turn the mat upside down so that your cardstock is face down on a firm surface. Then, holding down the paper with one hand, start folding back your cutting mat so that you’re pulling it off the cardstock. This prevents your cardstock from curling.
Step 4: Enjoy your crib mobile
That’s it! Now you can hang the mobile in a safe place, and enjoy the view!


Related Making


Search How-To
I want to make...