An easy personalized notebook in 3 steps
In about 30 minutes or less, make a personalized notebook that shows off your personal style with a Cricut cutting machine.
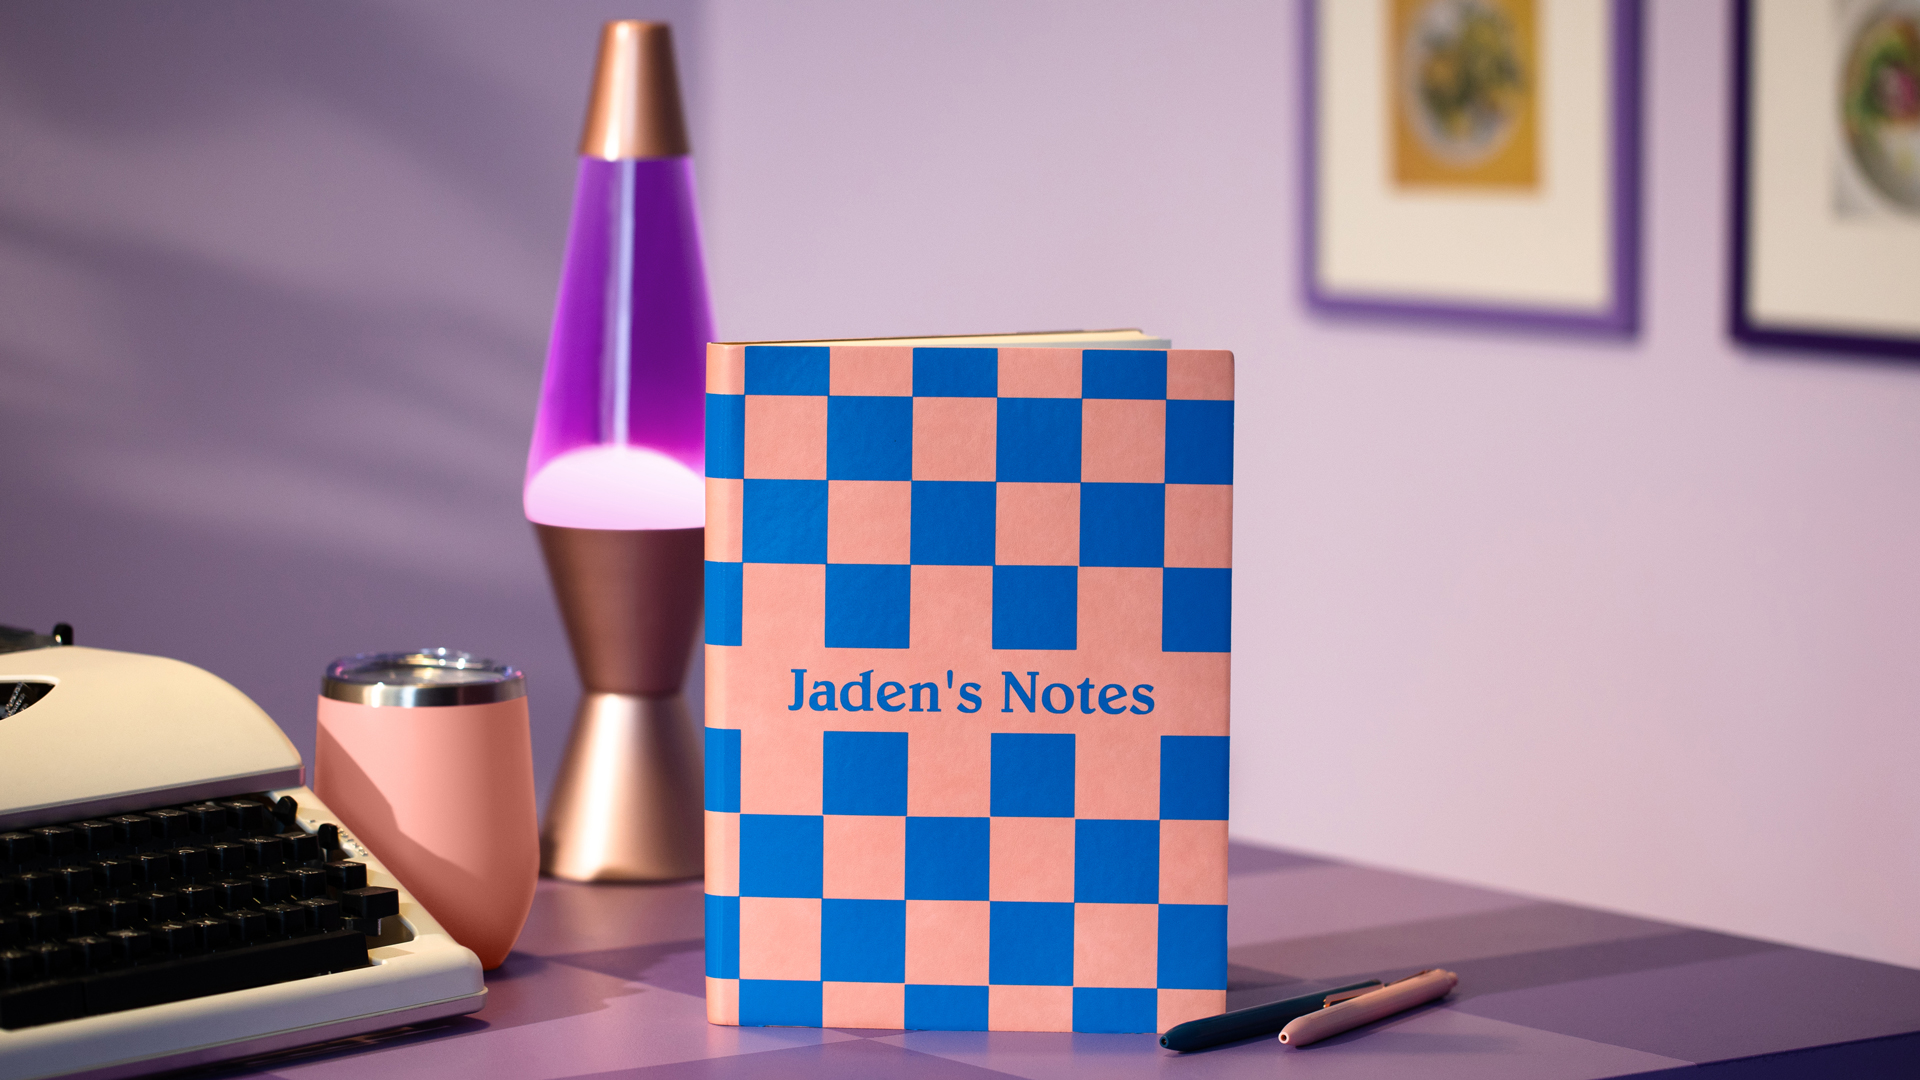
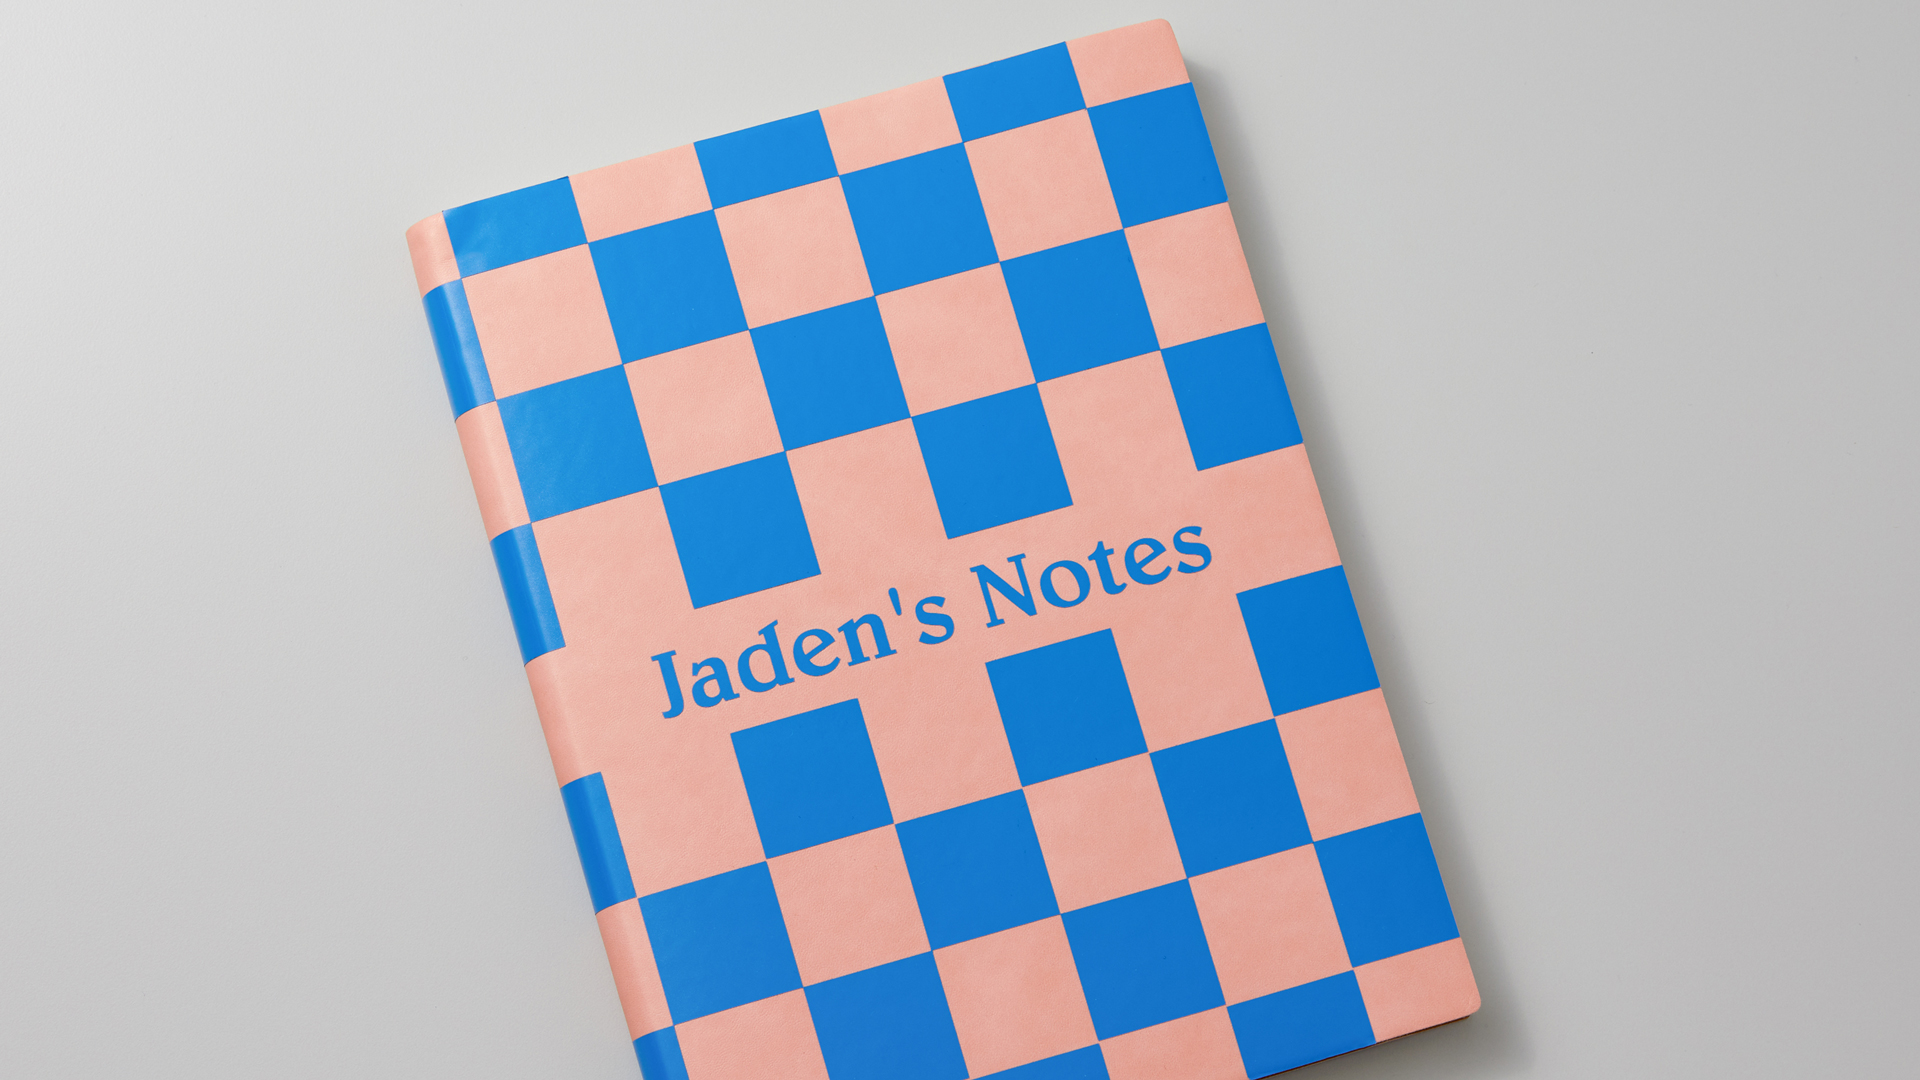
If The Queen’s Gambit made it to your Netflix watch list, this personalized notebook may be calling your name. This checkered design adds some fun and flair to otherwise plain journals, and fits people into chess, checkers, or even fashion.
Whether for yourself, a friend, or as a new item in your online store, this personalized notebook is easy to make without looking like a rookie project.
Check it out!
Supplies needed
Print this list
Personalized Notebook
Step 1: Prep your design
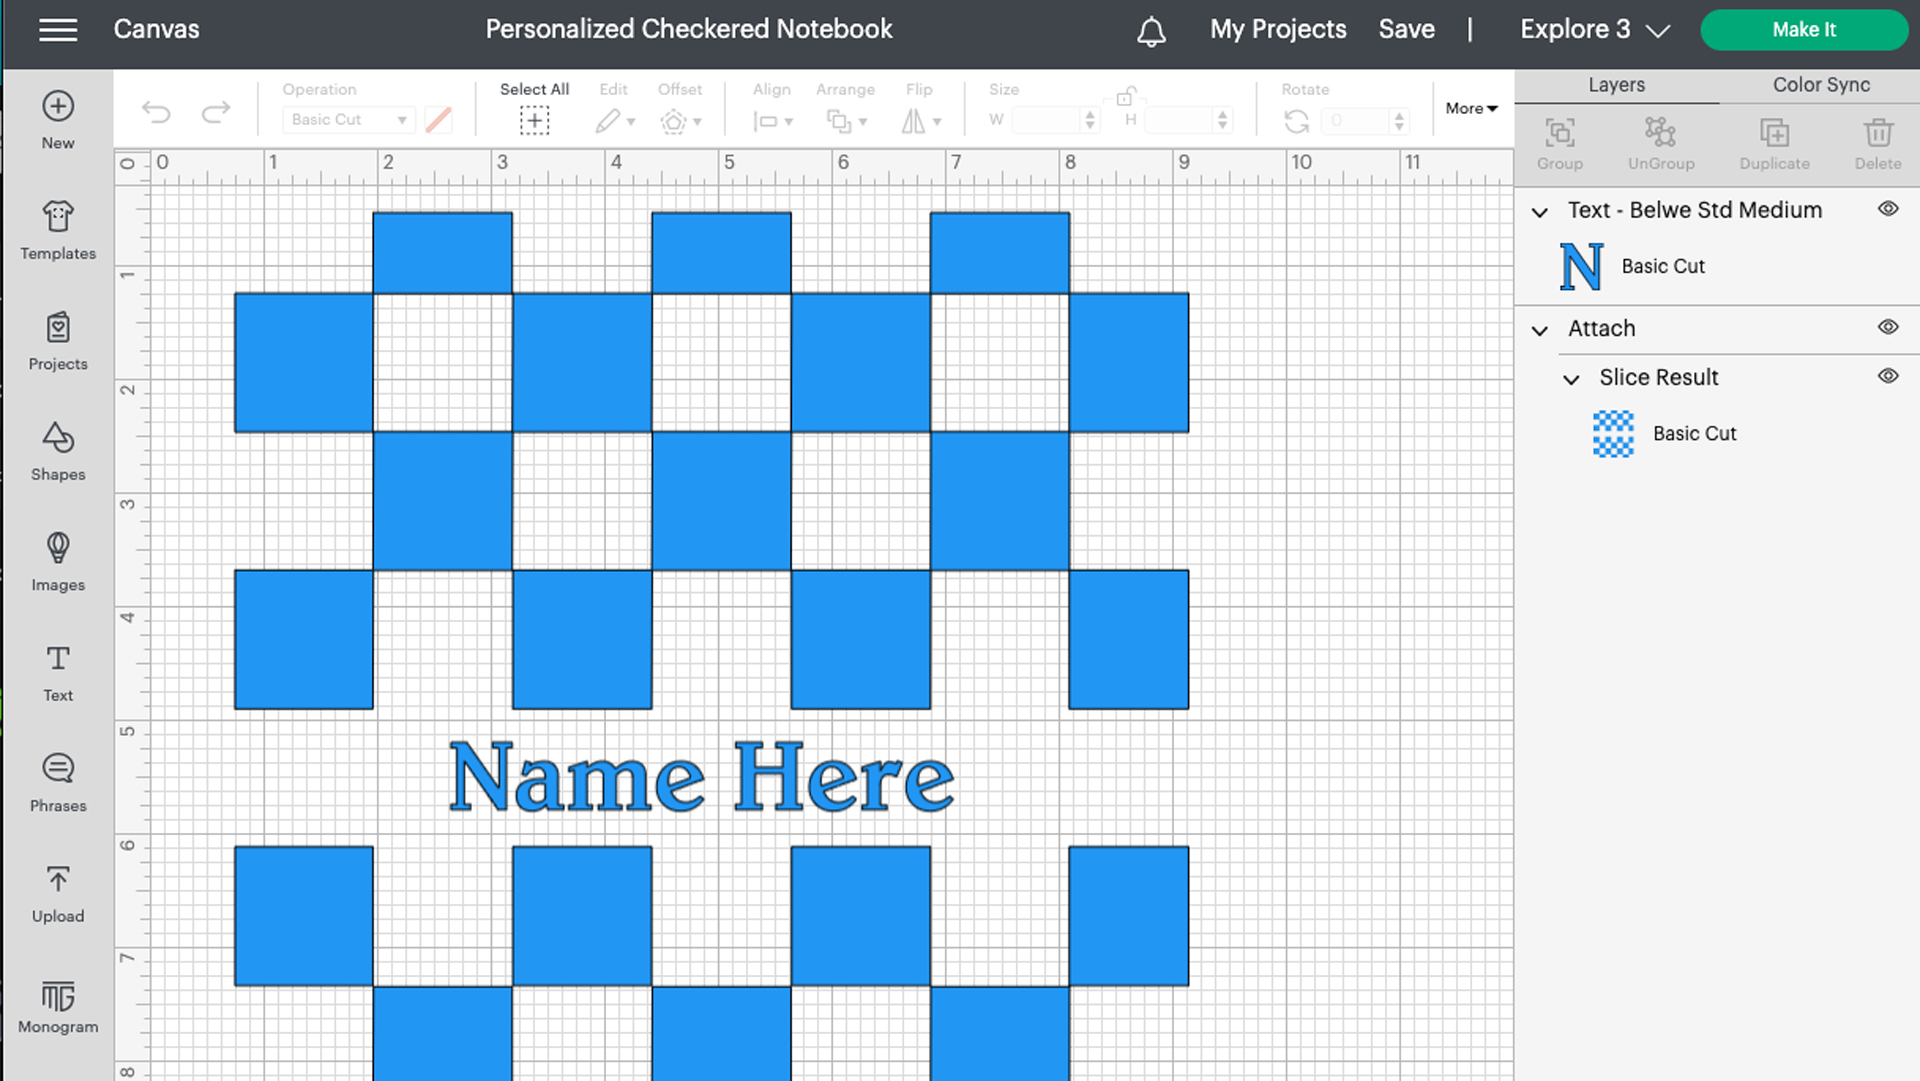
To get started, check out this customizable design in Cricut Design Space. While this particular ready-to-make project is set up perfectly for an 8″ x 10″ notebook, you can resize it to fit whatever size book you want to personalize. We even put placeholder text where the name goes — just use the Text tool to edit.
Before you start cutting with your Cricut machine, select the name and checkered design and click “Attach” so everything stays in place. Learn more about attaching text in the Cricut Help Center.
Something to keep in mind: While we show a specific font and blue material in Cricut Design Space, you can use any font or color material you want. That’s the beauty of personalization! Make it your own.
Step 2: Cut your materials
Now you’re ready to start cutting. If you’re using Cricut Smart Vinyl, place that in your machine and use the prompts in Cricut Design Space to get going. If you’re using regular adhesive vinyl, use the green StandardGrip mat to put your materials through the cutting machine.
Once the material is cut, remove excess material using a weeding tool.
Pro tip: When weeding, start from the inside of your design and work your way outwards. This way, you can be sure you don’t remove pieces that are actually supposed to be there.
Step 3: Transfer the vinyl
Next, pull out your transfer tape and place it over the entire design. It’s okay if it’s a little wrinkled, or if you have to use multiple pieces of transfer tape. The important thing is to just have enough to cover your design from edge to edge so that you can pull up your vinyl all at once. After you’ve placed your transfer tape over your weeded vinyl, you’ll use a scraper tool to burnish (rub) the transfer tape down anyway so wrinkles and layers of transfer tape don’t really affect usability at all. Burnishing helps the vinyl to stick to your tape, making it easier to lift your vinyl off of the white backing without accidentally messing up any part of the design.
Once you’ve pulled off the vinyl from the backer, use the transfer tape to place your cut vinyl onto your notebook. Then use the scraper tool again to rub the transfer tape and vinyl onto your notebook cover. Check for bubbles in your material and rub from the inside of your design outwards to push wrinkles and bubbles away.
By the way, you’ll notice that the transfer trip has a grid-like pattern on it. Use that grid to help you place the vinyl onto your notebook as straight as possible.
Enjoy your new personalized notebook!
That’s it! Just three steps to making a personalized notebook. Now you (or a friend you’ve made this for) can finally use it!

You Might Enjoy…