Make and sell custom clay earrings with Cricut
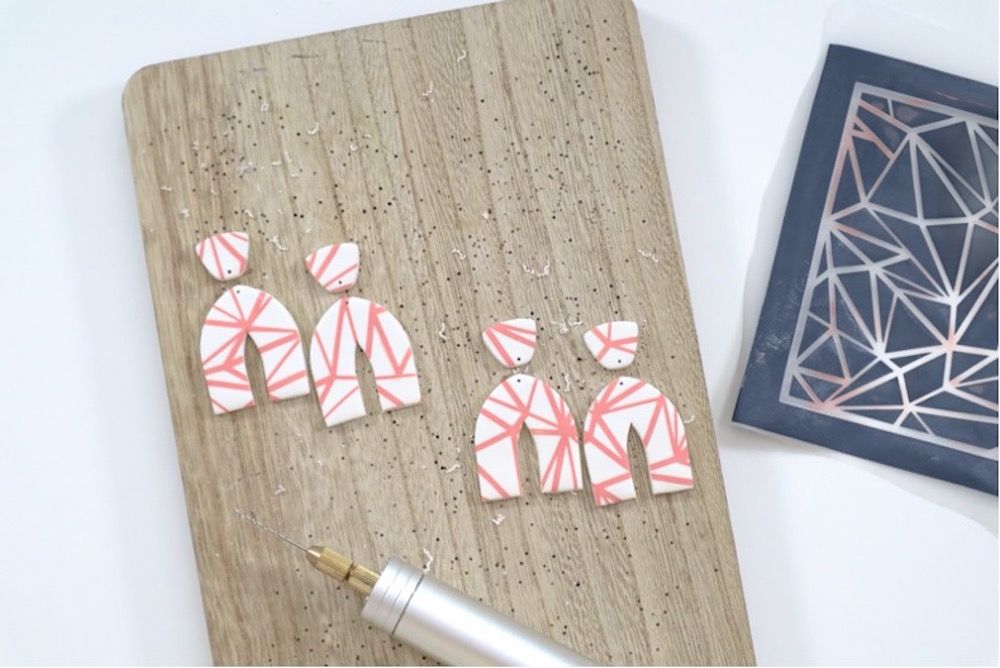
Cristina de la Cruz, creative crafter and founder of Modern Flower Creation, teaches you how to make and sell gorgeous polymer clay earrings with help from Cricut machines and materials.
I have been obsessed with polymer clay earrings for the longest time! I first decided to try making my own back in December of 2019, and I am so happy I did because it kept me busy during the pandemic. Polymer clay is amazing to create with because you can personalize color options and it works well with stencils made with a Cricut machine. It’s simple to make reusable stencils by using iron-on vinyl and fabric mesh – I’ll show you how!
Polymer clay jewelry is really on-trend right now and it’s a lower-cost craft that is really easy to use as a stepping stone into the world of handmade crafts to sell. With help from a Cricut machine, iron-on materials, and unique inspiring designs, any crafter can create their own one-of-a-kind product.
You can find many patterns on Cricut Design Space, including the one I used, to add texture and dimension to handmade polymer clay earrings. This project is super easy, so let’s walk through the steps.
Supplies needed
Polymer clay earrings
Step
First, select a pattern to cut with your Cricut machine.I use the Cricut Explore Air 2. For this project, you’ll be using iron-on material, not adhesive vinyl, so make sure that you place your material shiny side down on the mat.
Step
Once you have the cut completed, weed out the extra material from the space that you want the paint to replace.It’s important to be careful with the smaller pieces when weeding! You want to capture all the fine details of your pattern so that there’s a clean, uniform look when applying it to your clay earrings.
Step
Next, use a Cricut EasyPress to adhere the iron-on material onto the fabric mesh.I used the Cricut heat guide to check for the correct temperature and timer setting for the EasyPress, which was 280°F and 30 seconds. I strongly recommend placing a sheet of cardstock or parchment paper between your EasyPress mat and the iron-on material, to protect the mat from any accidents.You now have a reusable stencil!
Step
Now, place your stencil on top of a rolled piece of clay.Use acrylic paint and a squeegee to place an even coat of paint on the stencil, making sure to cover the entire design. Once your stencil is covered with paint, gently pull to lift one side of the stencil and you’ll see the gorgeous design on your clay!
Step
Once the paint is dry, it’s time to get your jewelry molds out.Press your jewelry mold on the clay to cut the clay into shapes. Then, peel away the excess clay.
Step
Bake your earrings.I baked my earrings in a preheated oven at 275°F for 15 minutes. Baking times may vary depending on the thickness of your clay, as well as the colors of the clay. Many clay manufacturers have baking tips and instructions on their website, so be sure to research your brand before baking!
Step
You now have trendy, colorful clay earrings to sell (or wear)!
Take pictures and begin selling your handmade crafts online, or at local pop-up shops and markets. Have fun creating unique clay earring stencils with your Cricut!
Search How-To
I want to make...


