How to make custom welcome signs with Cricut
Skill level
Beginner

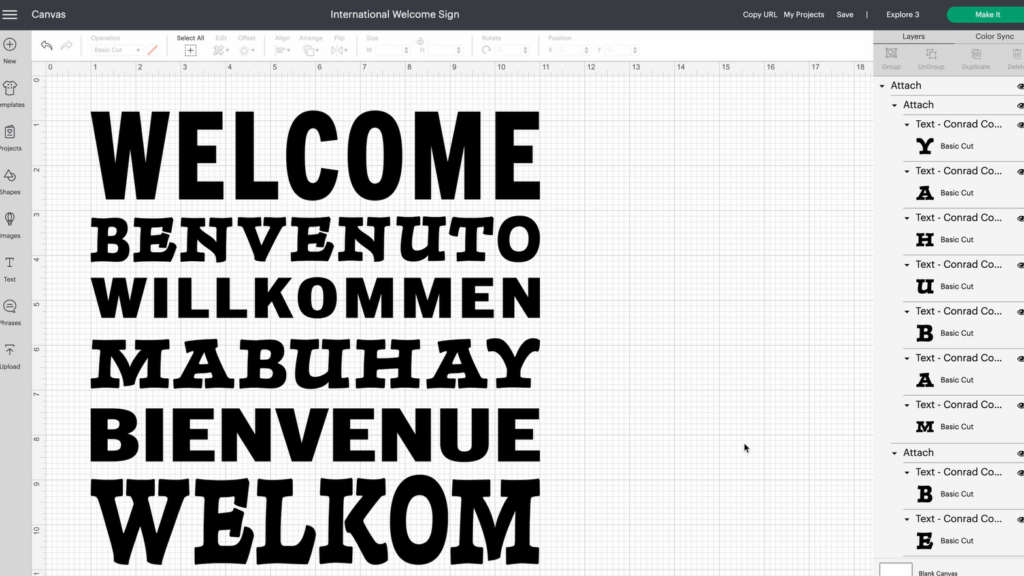
One of the best ways to make your home a more inviting place is with a welcome sign! With this wonderful project, you can greet your friends and family in 8 different languages, so that everyone feels welcome. If you like this project and want to make your own, you can find it on Design Space here: Welcome Sign.
Supplies Needed
Print this list
Make a welcome sign with Cricut
Step 1
When you click on the design space project and click make it, the welcome sign words will be placed on your canvas. From there, you will want to make sure that the size of your image is the size you want it to be. Once you are satisfied with your design, you will click the green “make it” button in the top right corner.
Step 2
You will see a screen that previews your design and where you pick what material you’re using. Natasha is using removable smart vinyl, but select the material you will be using. Then you will load the material into your machine, making sure to follow the guides on both sides.

Press the load button and let your machine measure the material. Once the go button lights up, press go and your machine will start cutting.
Step 3
Once your machine is done cutting, you will remove your material. Then you will grab your weeding tool to start the weeding process.

Weeding refers to removing material from the backing, that doesn’t show up in your design.
*Helpful tip: when you have a larger design like this one, you can use your scissors to trim off the material you’ve already weeded so it doesn’t get in your way.
Step 4
Once you’ve weeded away the excess material, it’s time to use transfer tape. Make sure you grab a big enough piece to cover your design. Line up the transfer tape with your design and press the transfer tape down. Then take your scraper tool and burnish your design. This makes sure that your design sticks to the transfer tape instead of the backing.
You will also want to flip your design and burnish on the back, just to make sure everything sticks! Once you’ve done that, you can trim the edges of your design so that it fits better on your piece of wood.
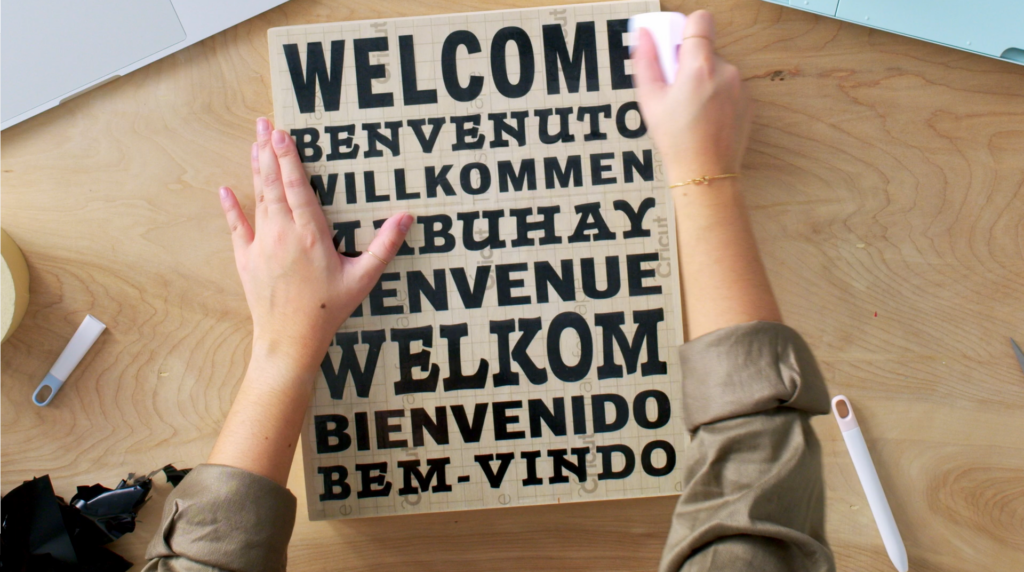
Step 5
Once your design is trimmed, it is ready to go on wood. For larger designs, Natasha recommends using the hinge method. Take some masking tape and tape your design down in the middle. Take one side and peel away the transfer tape so that your design sticks to the transfer tape, and not the backing. Once you’ve peeled away to the masking tape, cut off the backing so that your design sticks to the wood below.

Do the same thing to the other side, so the entire design sticks to the wood.
Step 6
Once you have transferred your design to the wood, burnish one more time. Once you are satisfied, peel off the transfer tape.
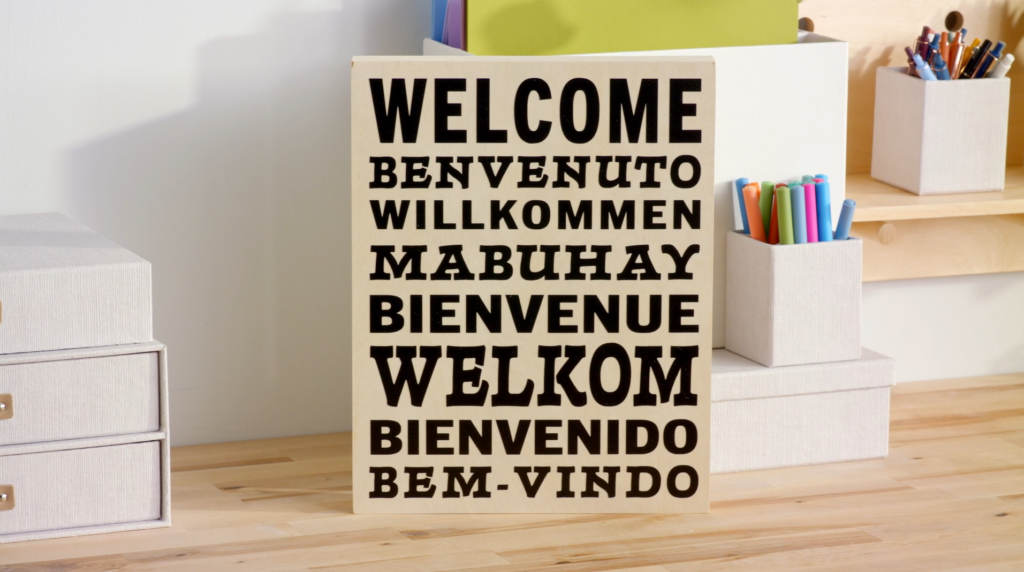
Get ready to greet everyone with your new welcome sign!
Now you can greet everyone with your new welcome sign, no matter what language they speak! Make sure to share your creations with us on social media by using #cricut.

Related Making


Search How-To
I want to make...