There are so many ways you can create with your Cricut. If you love Bullet Journalling, Joy from @joy.margot on Instagram shares her top tips for using a Cricut with bullet journalling spreads.
Over to Joy…
Fancy trying your hand at bullet journalling but feeling intimidated by everyone else’s Pinterest-worthy spreads? Maybe you’re already a bullet journaller, but want to up your game? Perhaps you’re spending hours hand-drawing and lettering your spreads and want to know if there’s a shortcut? Fear not, I got you! I’ve been a Cricut user since 2019, and a bullet journaller since November 2020, and there’s nothing I love more than combining the two!
First things first, if you’ve got absolutely no idea what I’m talking about…
What IS a bullet journal?
It’s a totally customisable calendar-and-journal-in-one, designed to declutter the mind, and keep everything in one organised place. It was developed by Ryder Carroll in the late 1990s although he didn’t share it publicly until 2013.
Everyone’s bullet journal looks a little different but they’re most commonly used for short and long-term planning, reminders, to do lists and tracking goals, achievements and habits.
I have both a Cricut Joy™ and a Cricut Maker™, and these projects use a mixture of both. I’ll indicate which machine can be used for each project.
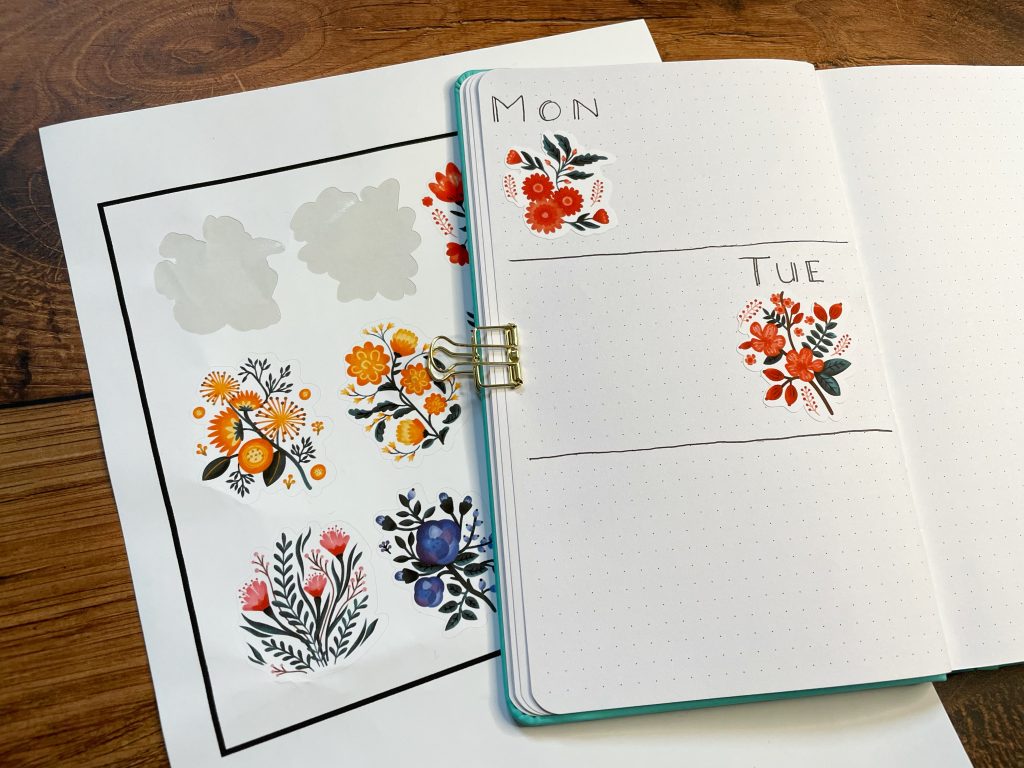
Print Then Cut Stickers
There are a few different ways to make stickers with a Cricut, depending on the model you have. Firstly there’s Print then Cut stickers, for which you’ll need a printer and either a Cricut Explore Air™ 2, Cricut Explore™ 3 or Cricut Maker™ or Cricut Maker™ 3. Design Space has a HUGE collection of Print then Cut images designed for making stickers, or you can upload your own designs. I love using an “Image Set” to create a themed collection of stickers to use in my journal.
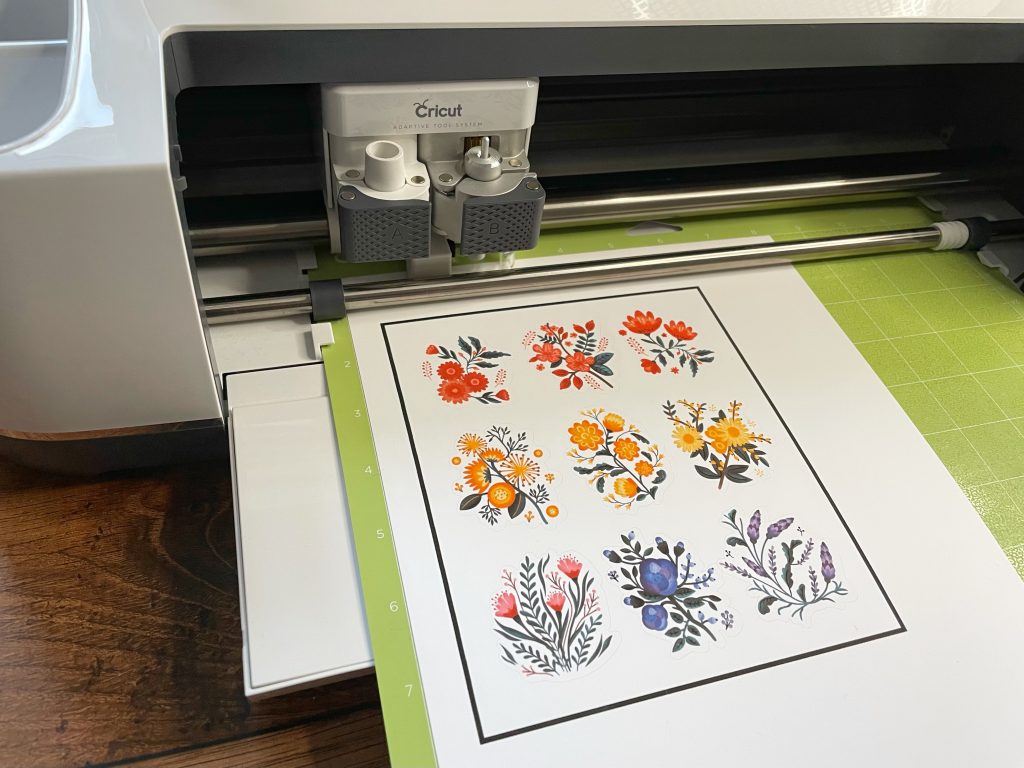
Search for the type of image you’d like to use (e.g. “flower”, “cat” or “skull” – there’s something for everyone!) and tick “Operation Type / Print then Cut” in the left-hand filter menu to find print then cut images. Once you’ve found an image you like, click the three dots above it, followed by “view image sets” to find all images in that collection.
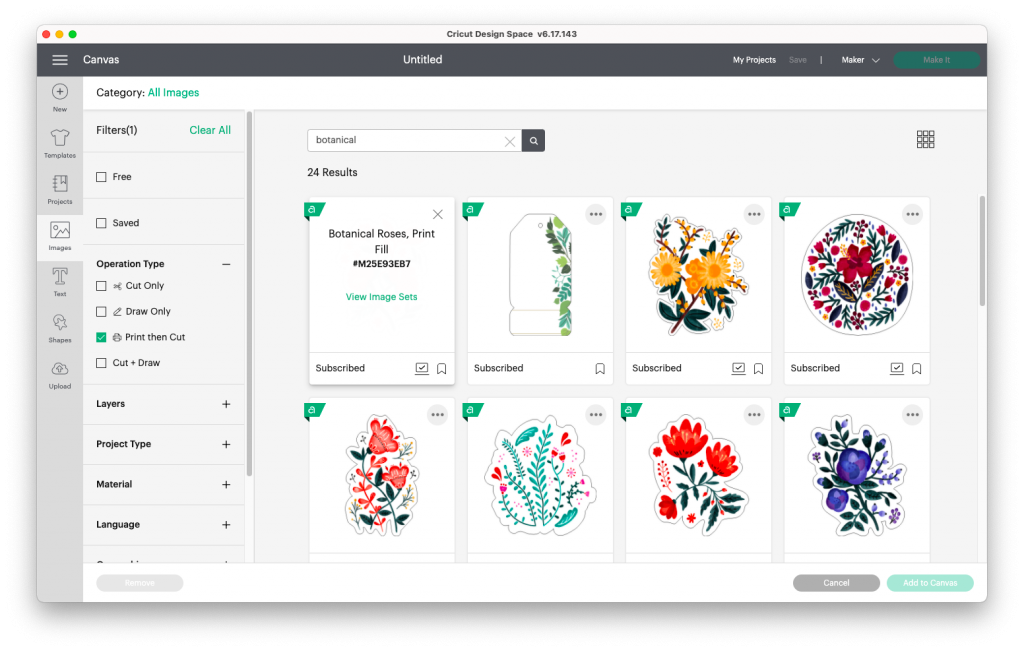
These colourful botanical designs are a firm favourite of mine! I also use them for decorating letters and sealing envelopes.
Alternative Stickers
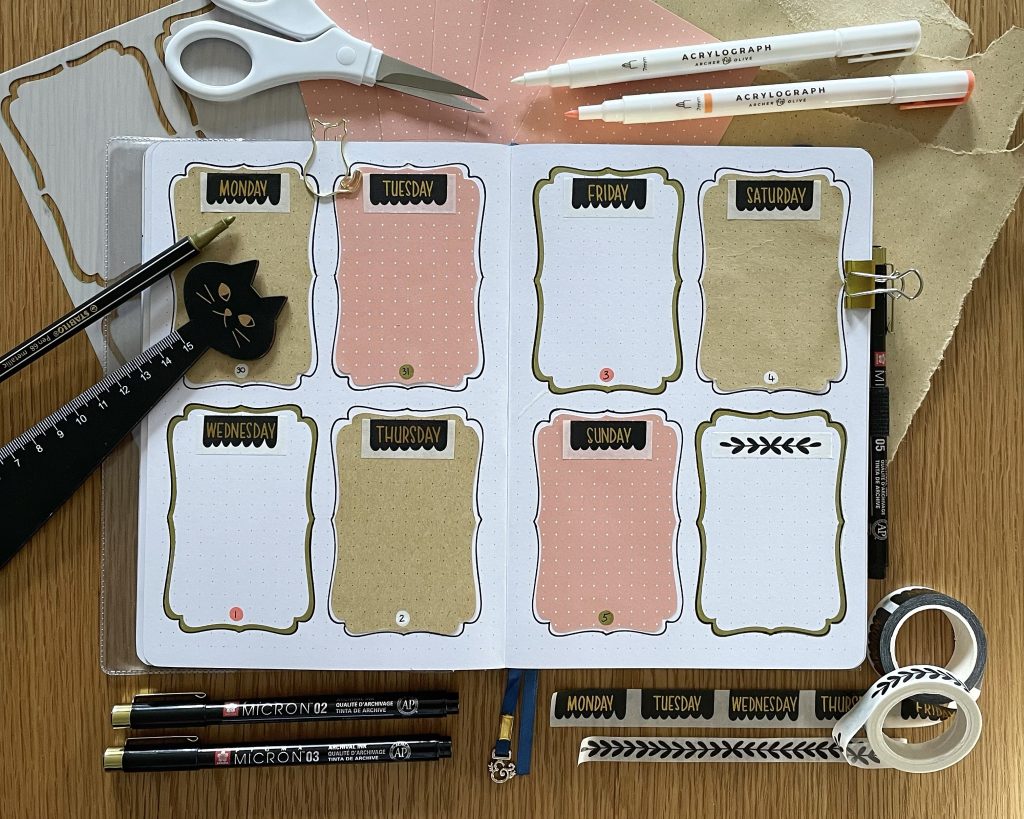
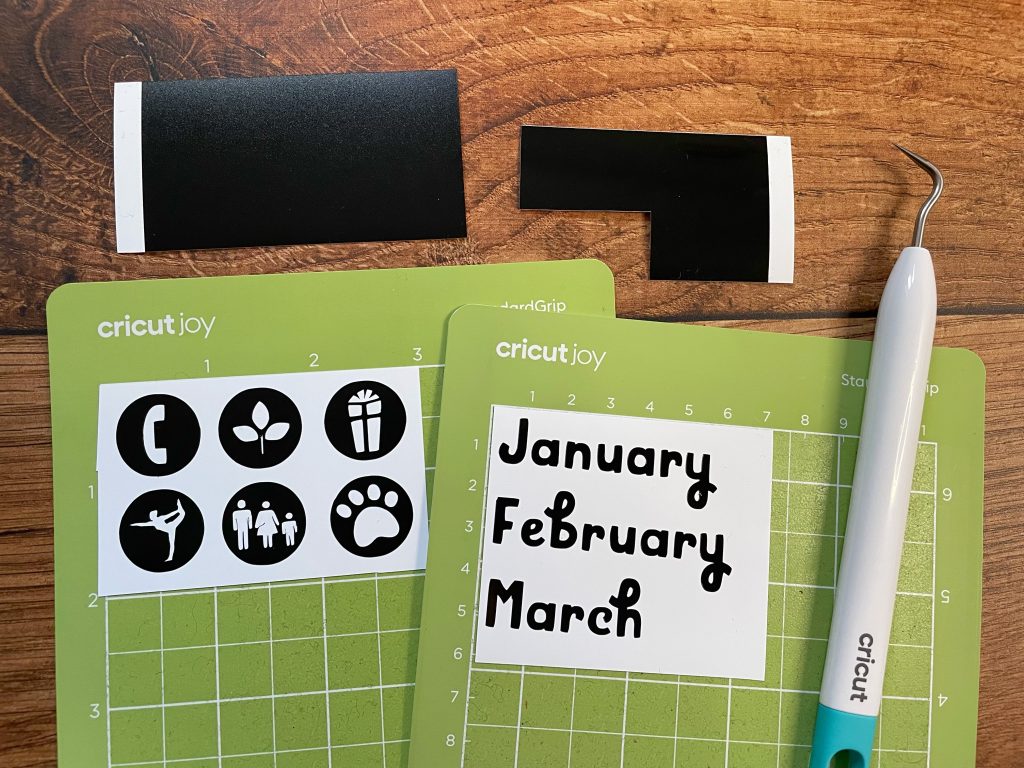
The Cricut Joy can’t create Print then Cut images, but you can create stickers with Smart Labels™ and the Cut + Draw function. Again, there’s a wonderful collection of images on Design Space, or you can create your own. Just select “Operation Type / Cut + Draw” images from the left-hand menu to see already created cut and draw images.
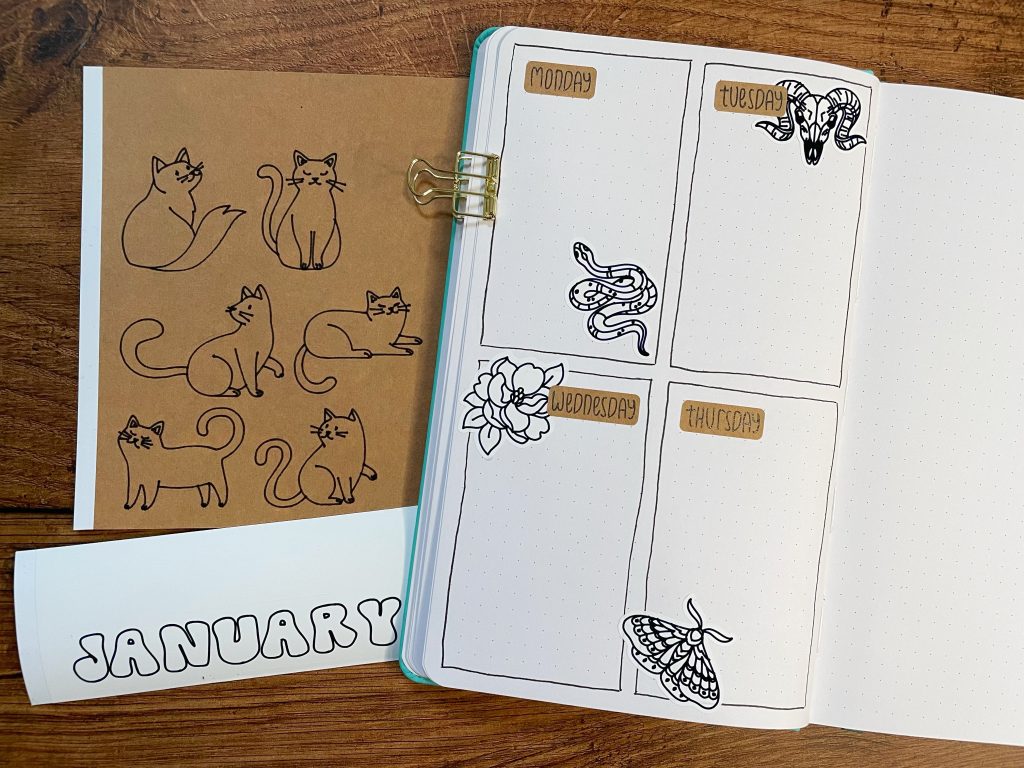
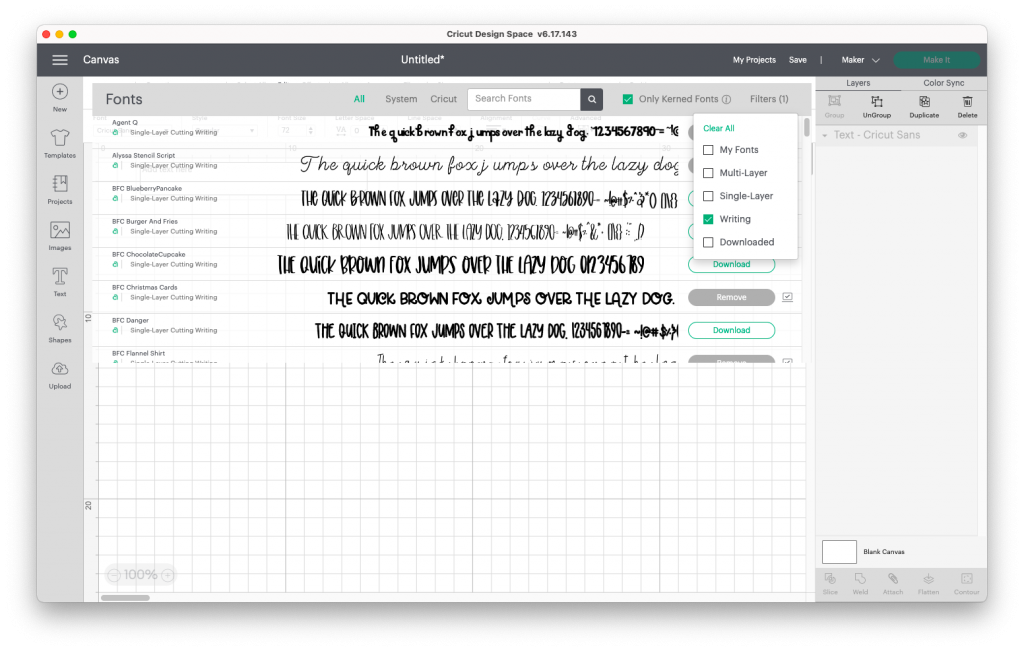
Smart Labels come in a choice of Cricut Joy™ Smart Label™ Writable Vinyl – glossy white vinyl or Cricut Joy™ Smart Label™ Writable Paper – kraft paper. The days of the week I’ve used here are available as Design Space images, or you can create your own using any of the writing fonts. From the font menu, click “filters” then “writing”. This is oh-so-handy for creating beautiful lettering if you’re not a fan of doing it by hand, and it keeps your journal spreads looking consistent and neat.
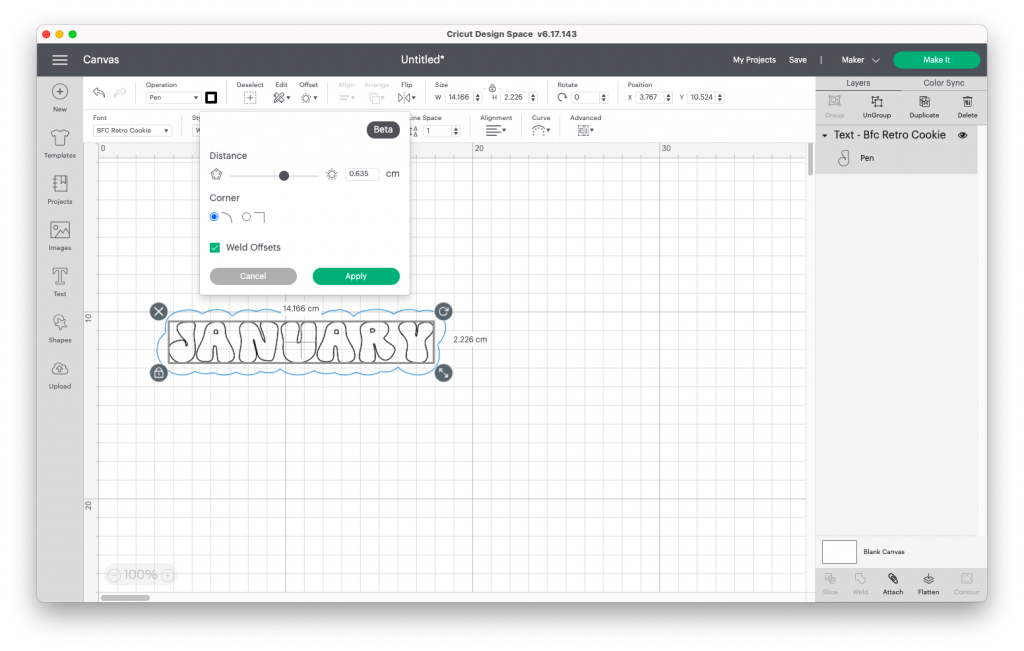
Once you’ve found your font, you’ll need to add a shape around it, or use the offset tool to cut a custom-shaped border. Don’t forget to attach them by using the ‘Attach’ tool in the right-hand corner for Desktop users or in the ‘Actions’ Menu on a tablet.
The final method for making stickers is to cut them from vinyl. This method is great for creating lovely bold titles or simple icon stickers. The latter work well for habit trackers or as reminders on your weekly spreads. This is also a great way of using up those pesky tiny vinyl scraps!
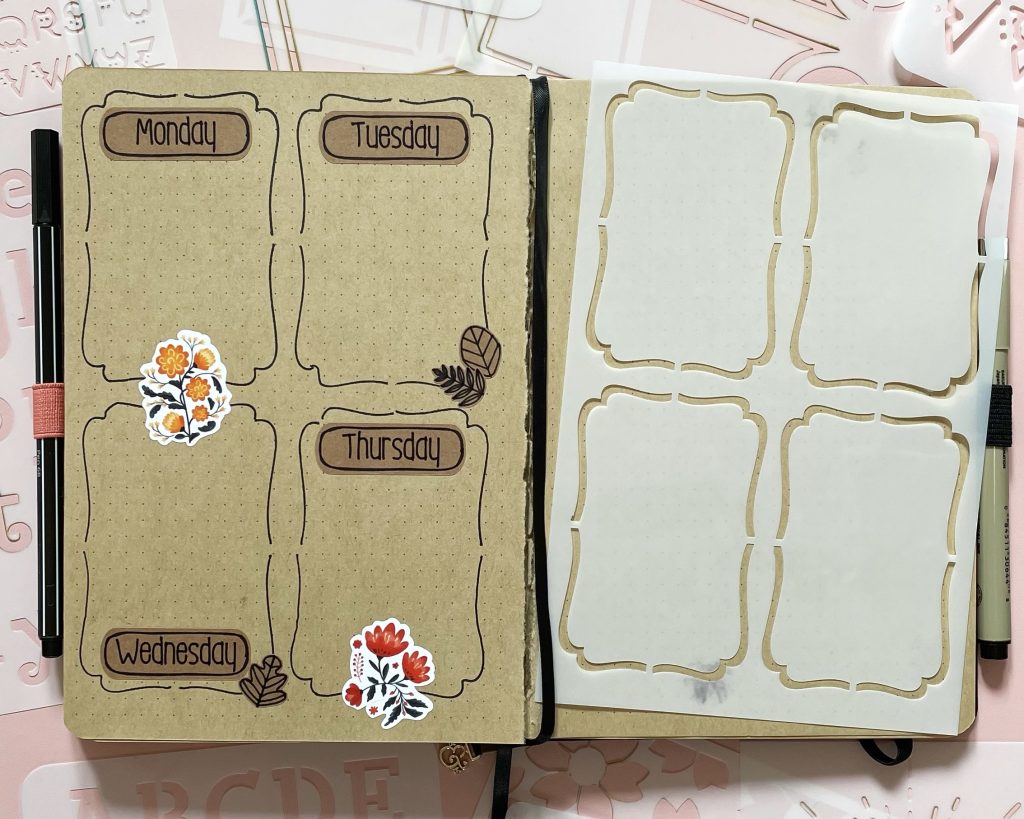
Stencils
This is possibly my favourite Cricut bullet journal project. It was completely transformative for me in my early days of journaling. Stencils can be made with a Cricut Explore Air™ 2, Cricut Explore™ 3 or Cricut Maker™ or Cricut Maker™ 3. You will need to use a StandardGrip Mat, fine point blade and mylar sheets.
In material settings, there is a setting to cut mylar which will need to be selected for cutting. (For Explore Air 2 users, turn your wheel to custom to browse material settings within Design Space.)
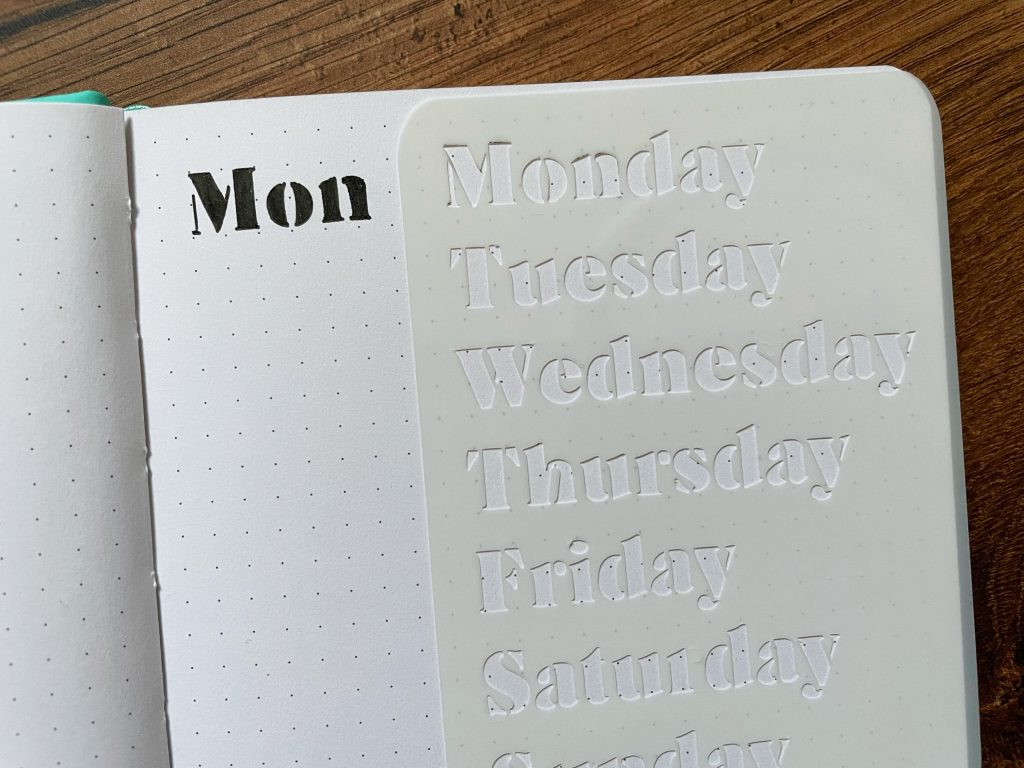
As always, Design Space has a wonderful selection of stencil images that can be used including florals and abstract designs. I recommend doing a test-cut with one of the simpler images to check your settings if you’ve not used mylar before.
Once you’ve cut your stencil, hold it in place with washi tape, adhesive putty or binder clips while you use it. A quick-drying pen works best, such as a fine liner or felt tip pen. I avoid gel pens and paint pens, as these can smudge under the stencil.
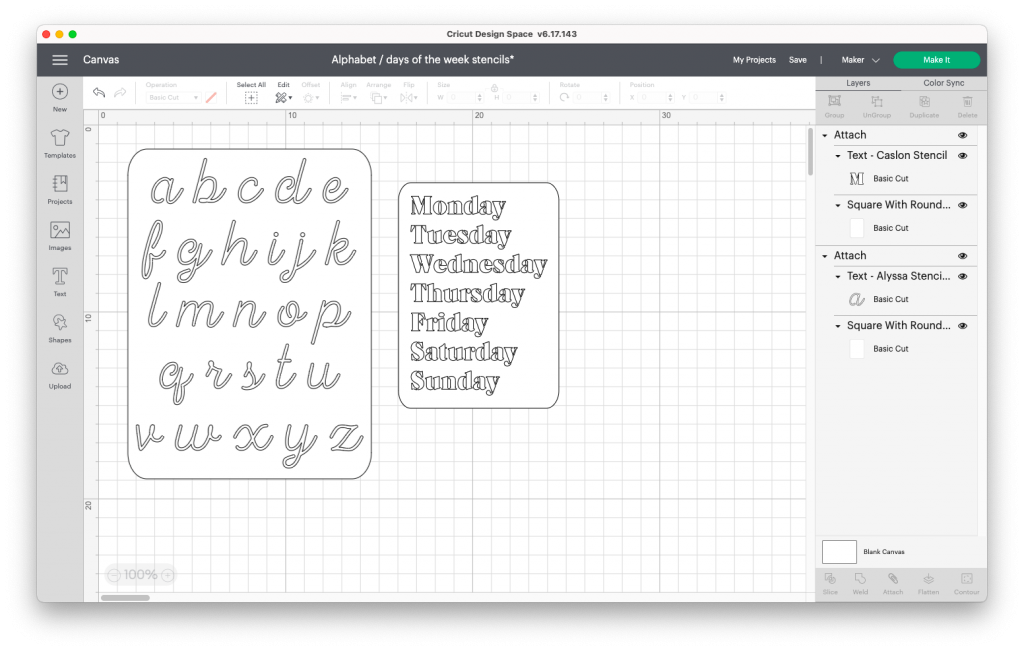
You can also cut text stencils with any of Design Space’s stencil fonts. I have a mixture of alphabet stencils, and words and phrases I use frequently. I have my favourite fonts cut in a few different sizes to make sure I’m covered for all my titling needs!
Stencil Top Tips
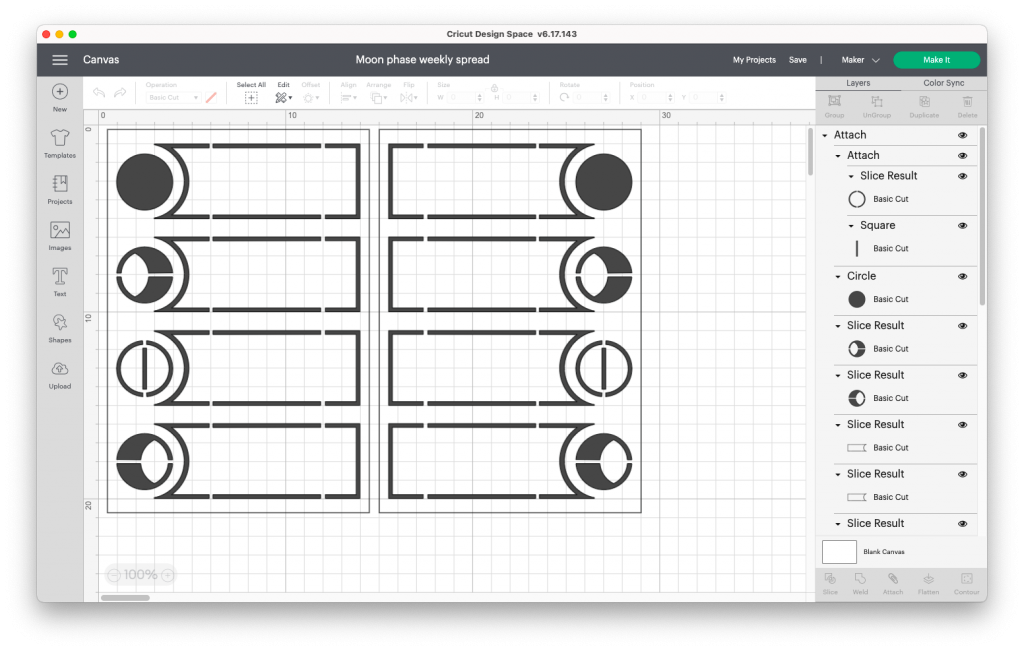
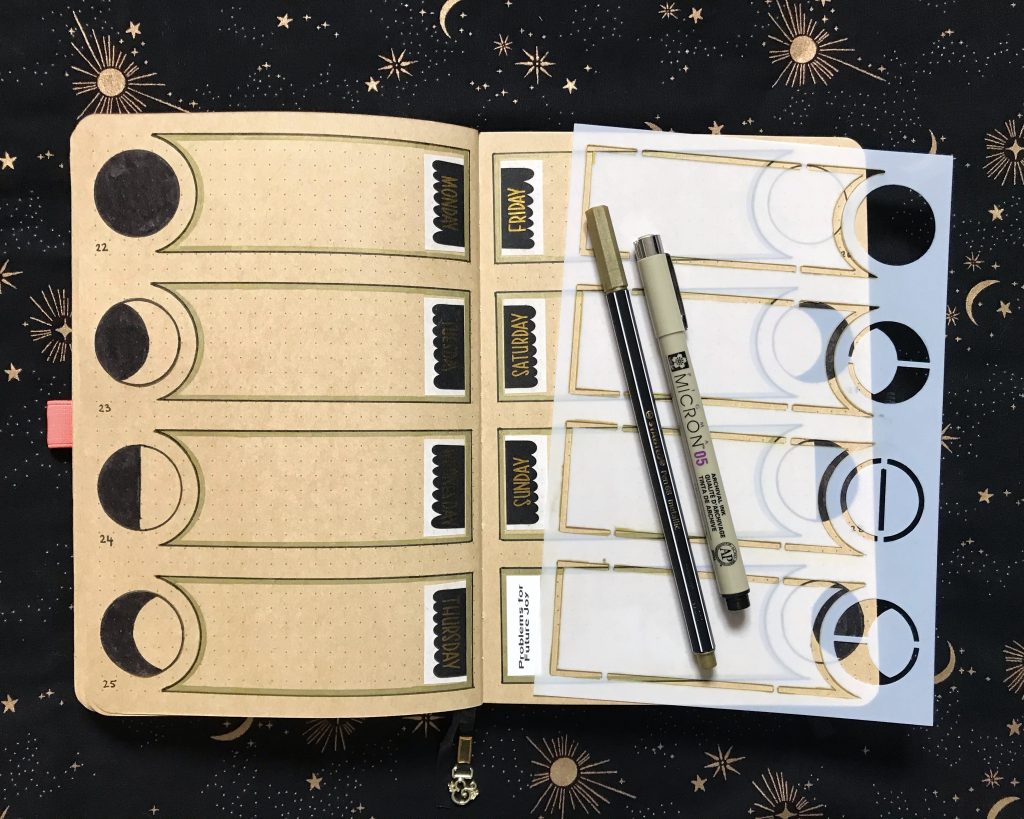
My favourite stencils to create are page layouts as I ALWAYS make mistakes when I draw them freehand in my bullet journal. Bear in mind that removing a large section of a stencil will make it less stable and more likely to move around while you’re using it. You can keep the centre of a stencil intact by holding it in place with little tabs, made by welding tiny rectangles to your design. I created this moon phase stencil just by welding and slicing circles and rectangles!

So simple, yet rather effective, if I may say so myself.
Stamps
I made my stamps with heavy chipboard which can be cut with the Maker or Maker 3.
I also used self-adhesive craft foam and permanent vinyl. You could also use non-adhesive craft foam and glue.
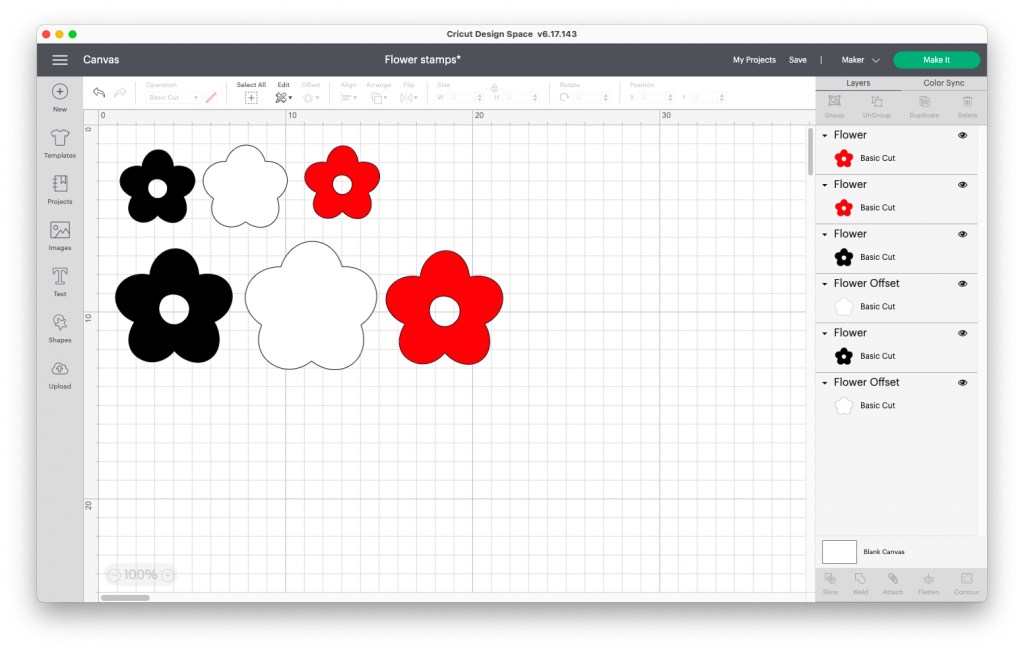
Cut your chosen stamp design from both craft foam and vinyl, then use the offset feature to create the chipboard template, as this needs to be slightly larger than your design.
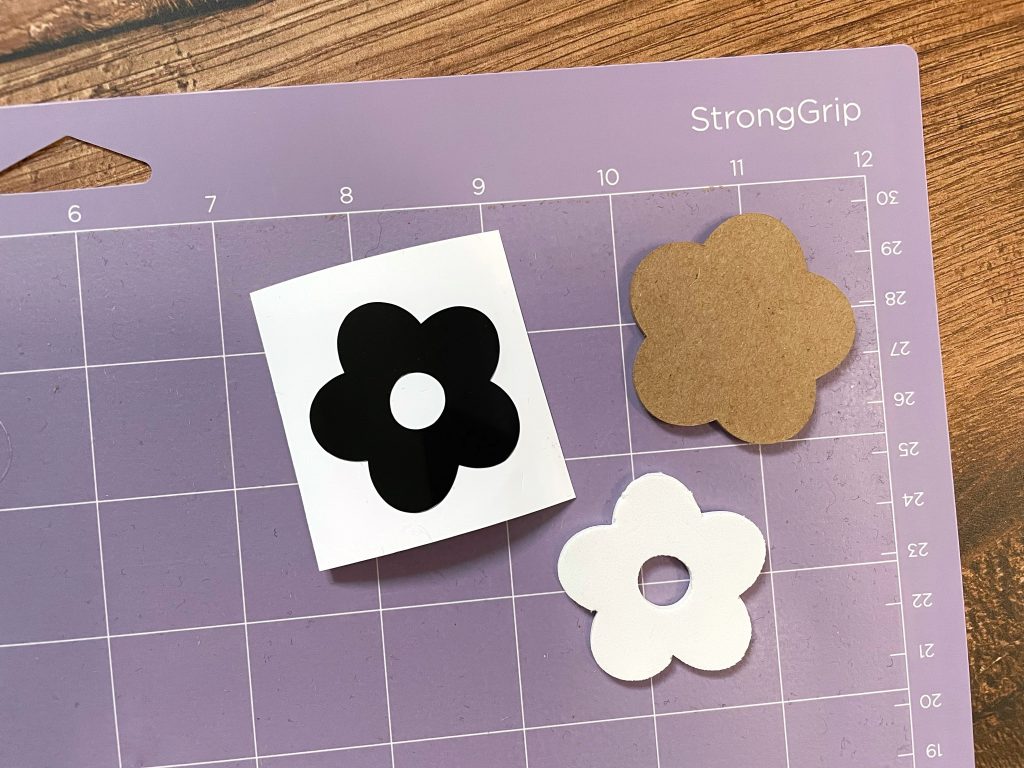
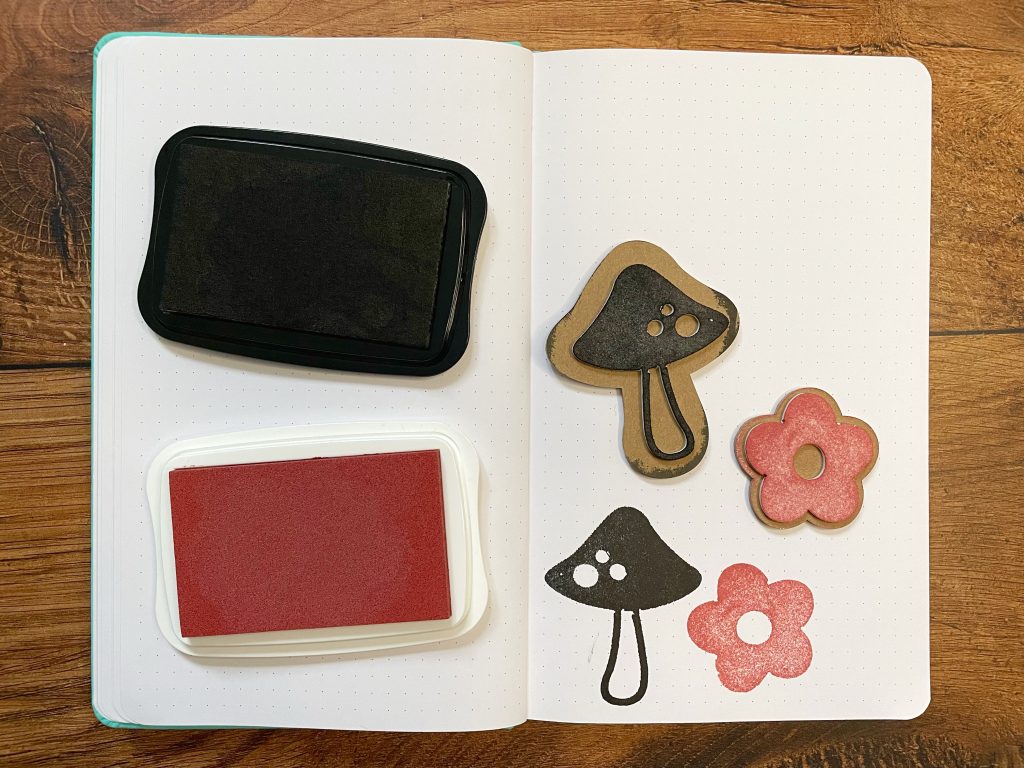
Stick the craft foam to one side of the chipboard, and the vinyl to the other. I found that simple shapes worked best, and I went for a retro flower and a mushroom.
Thanks for reading!
I hope that’s provided a little inspiration for how to use your Cricut in conjunction with your bullet journal. If you use any ideas from this blog post, I’d love to see them! I share lots more Cricut and journal content on my Instagram.. You can also check out #JoyMargotCricut and #JoyMargotJournal for content ideas too!
Find more inspiration
Thank you Joy for some amazing top tips!
You can find more inspiration for projects on our blog here.
Don’t forget to share with us on Instagram your creations using @cricut_uk.