How to publish your project in Cricut Design Space, edit your profile and share your project link with others.
We can all agree it’s exciting when we share our handmade projects with others. We love seeing makers take pride over their creations and want to help you to be able to share your amazing makes further with our community.
Did you know you can personalise your Design Space profile, follow others, publish projects and share those links with others?
We’ve created a step-by-step guide to get you sharing with the community.
Edit Profile
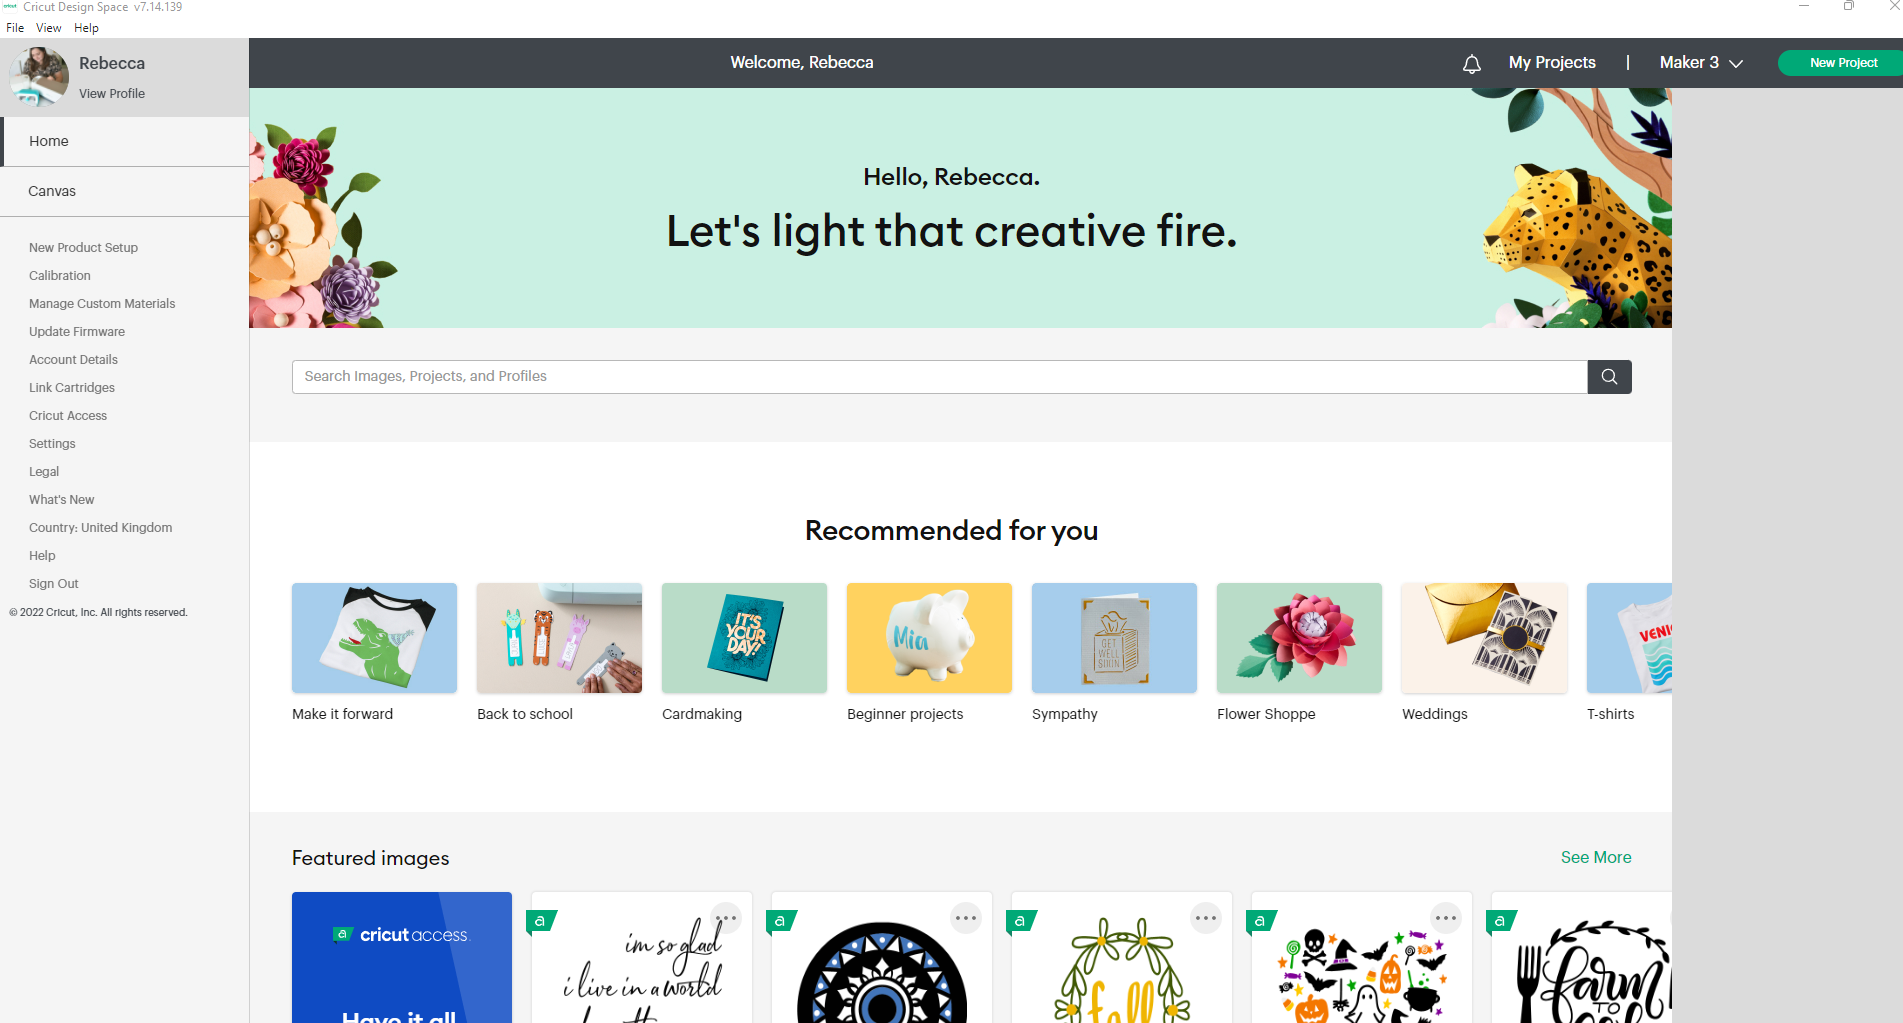
- From the home page, select the menu in the top left corner. This is called the ‘hamburger menu’.
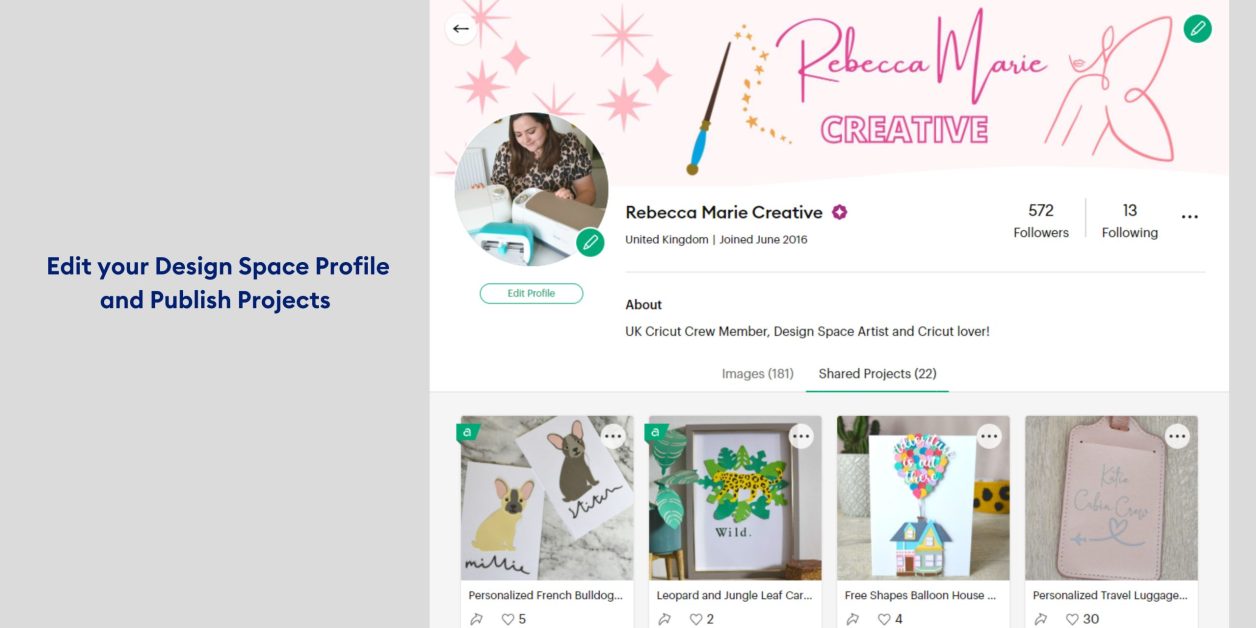
- Under your name, you will see ‘View Profile’. Select this.
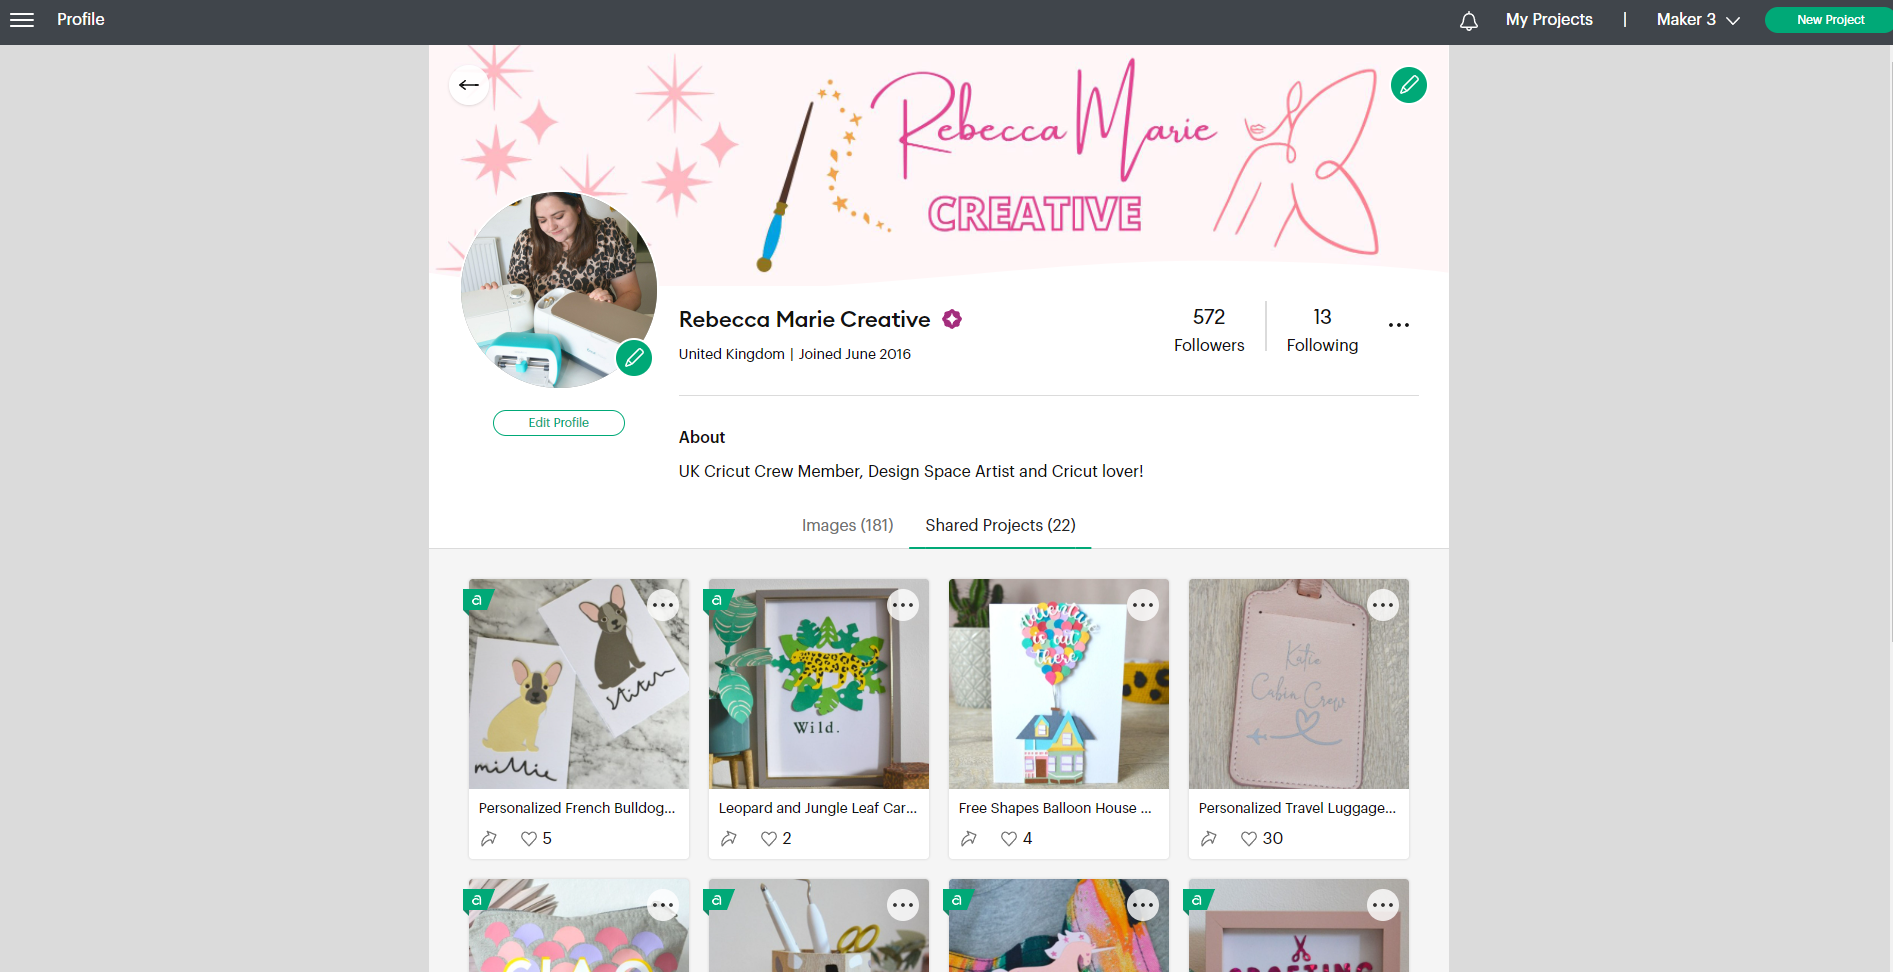
- In this profile area you can amend the banner, your profile image, and details about yourself. You can also find all of your shared community projects too.
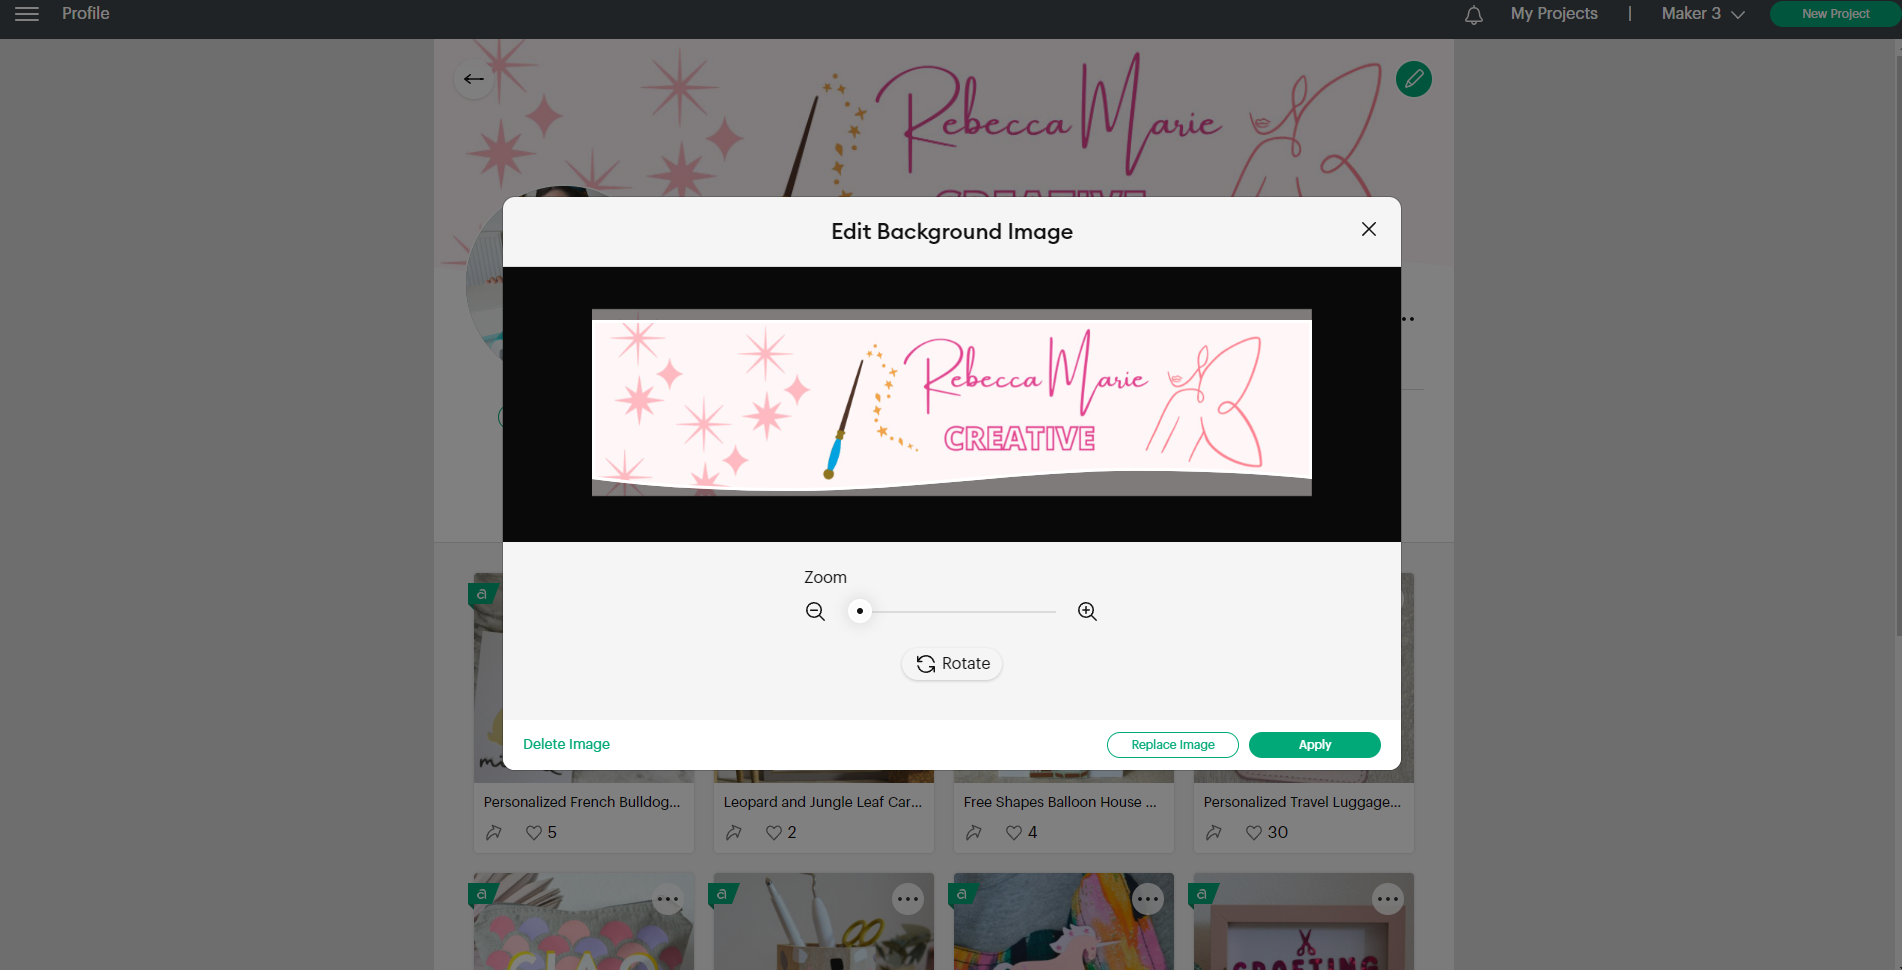
- Let’s begin by changing the banner. Click the green pencil icon to edit or upload a new banner image. Banner images should be 1020 x 246 pixels in size. If your image is bigger than this, you’ll be able to select the crop area within Design Space. Once uploaded, select apply to save your banner.
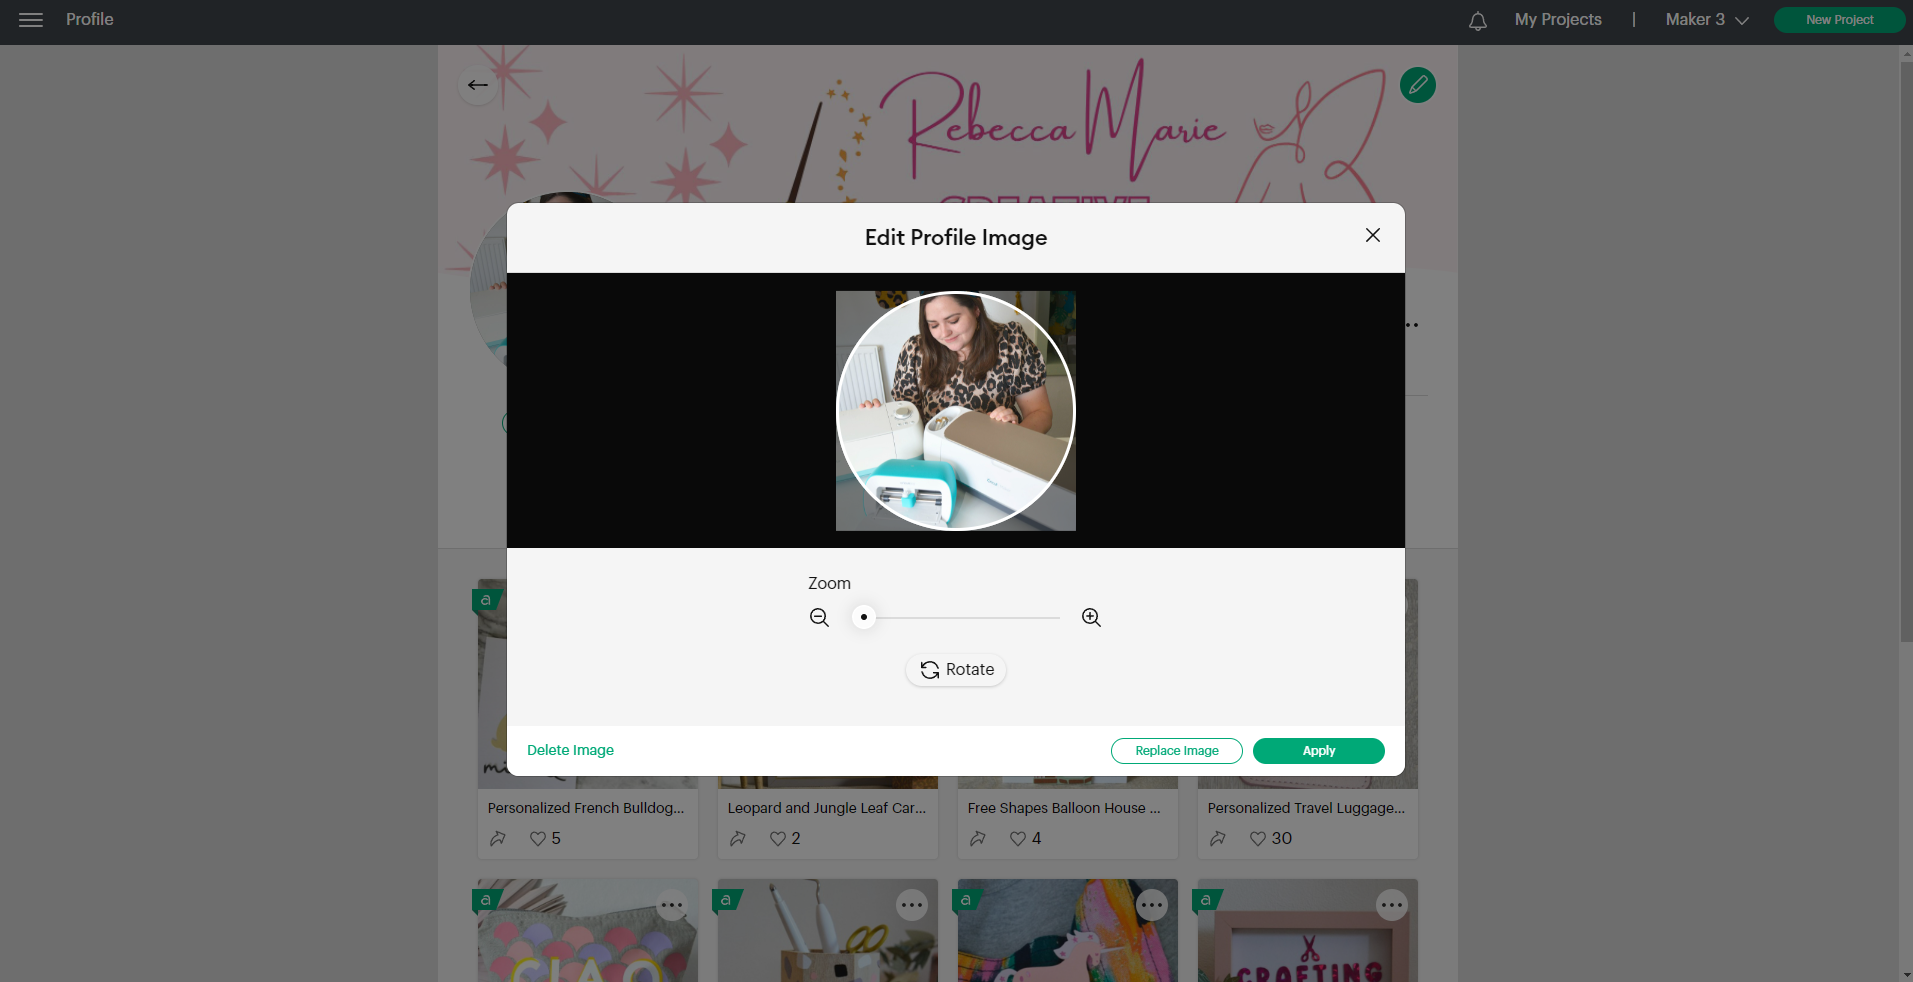
- Next, let’s change the profile image. Click the green pencil icon to edit or upload a new profile image. Images should be 200 x 200 pixels in size. Once uploaded, select apply to save.
- Now it’s time to edit the profile details. Select ‘Edit Profile’ then amend the options to suit you. You can change your profile name and in ‘Description’ you can add information about yourself, what you like to make and more. Select ‘save’ once you’re happy with your profile amends.

How to publish a project
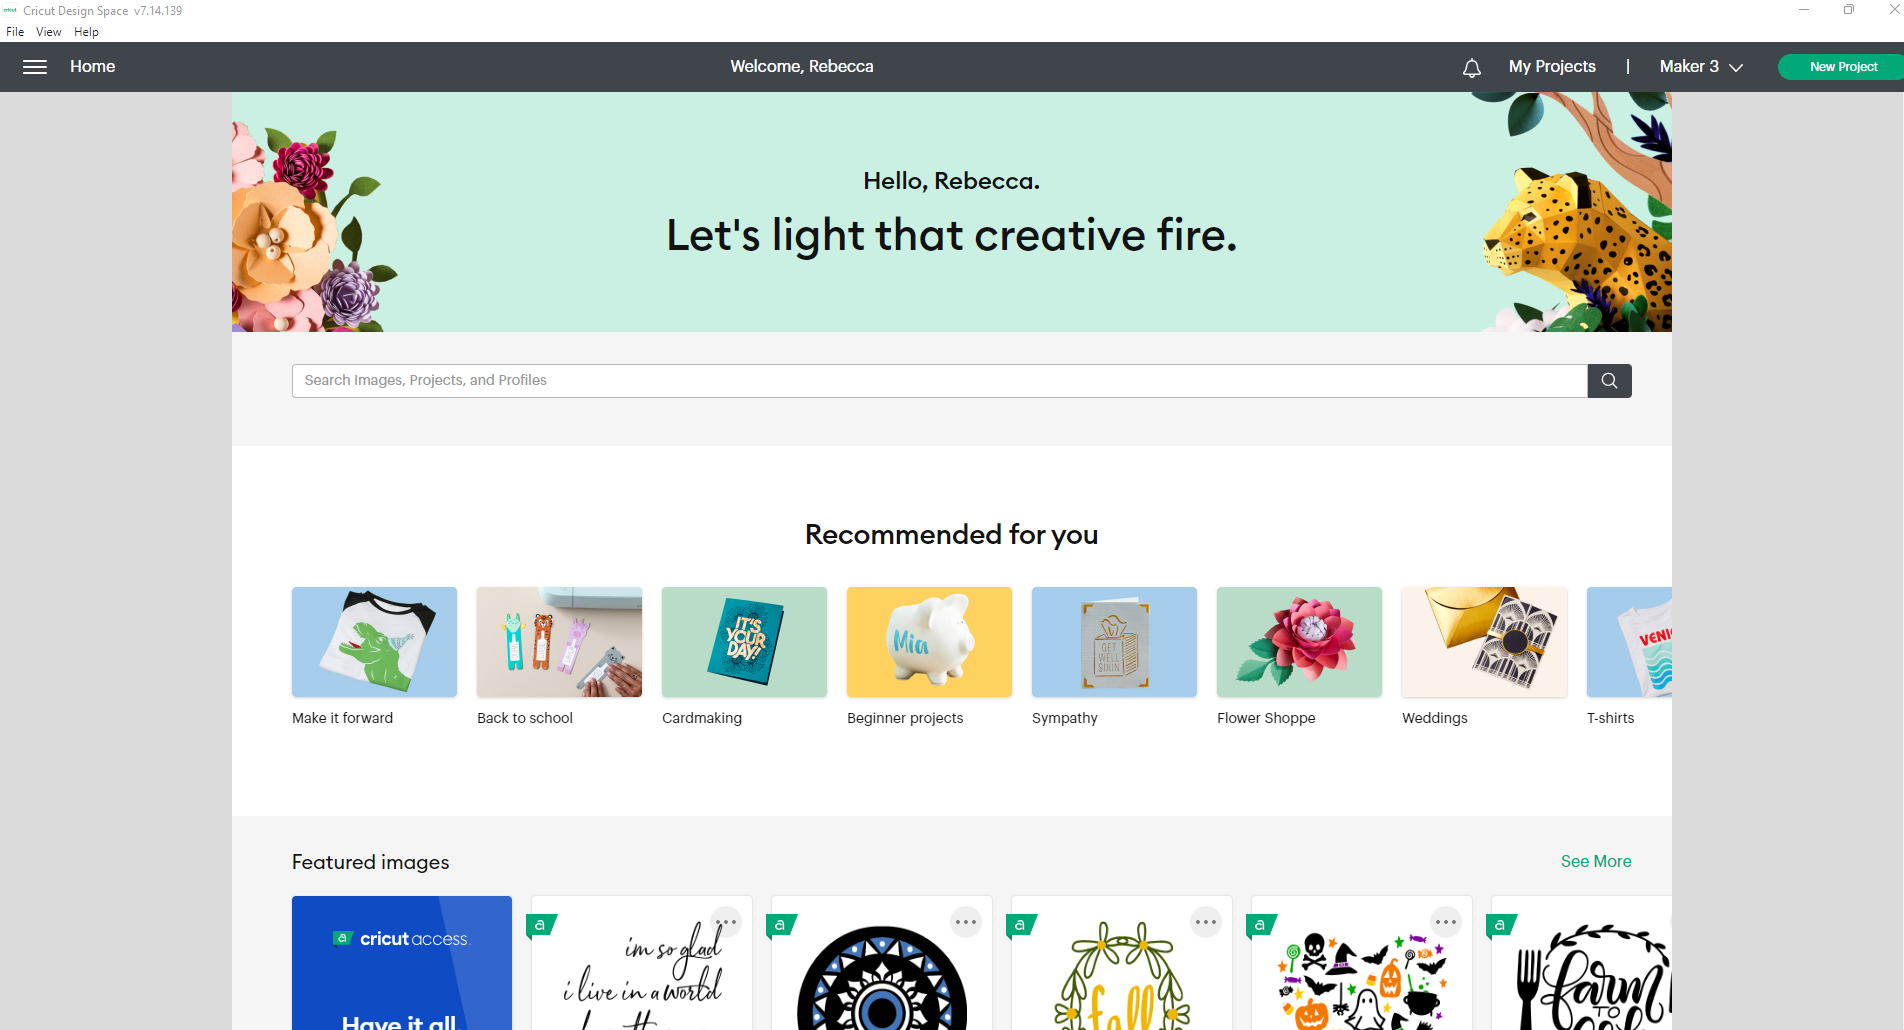
- From the home page, select ‘My Projects’ on the top banner. This will take you to where all your saved projects are.
- Find the project you want to publish and click the three dots in the top right corner of the project.
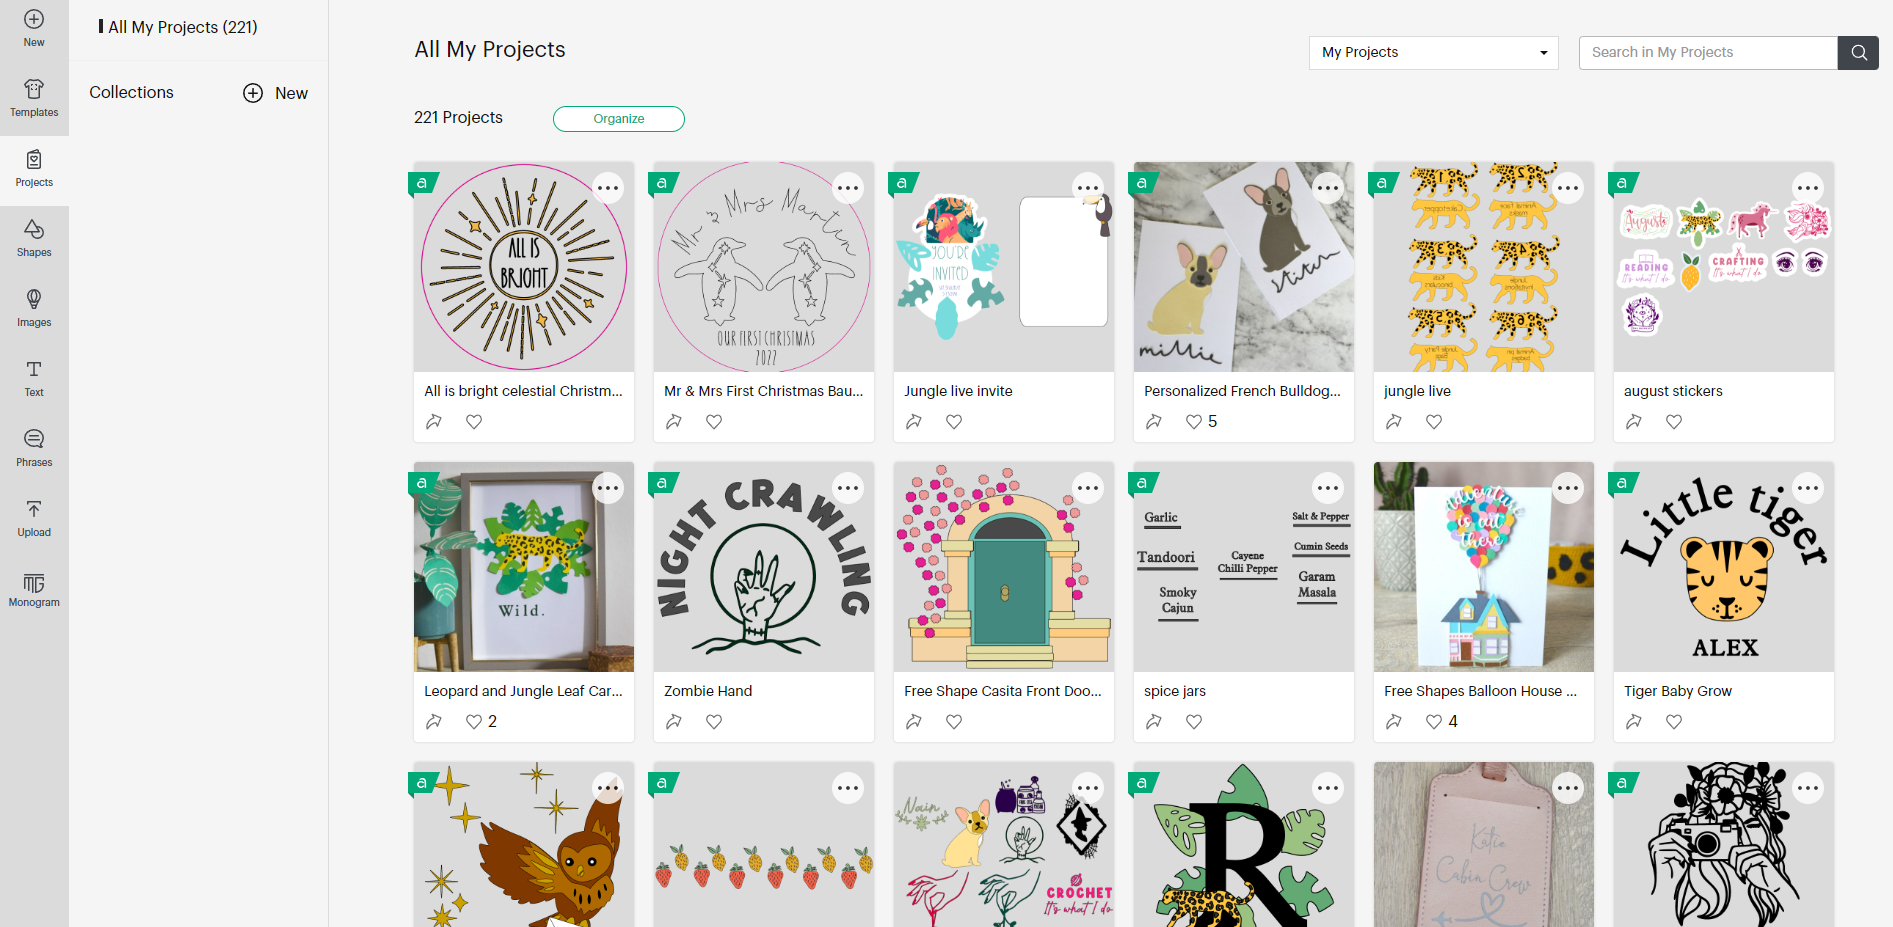
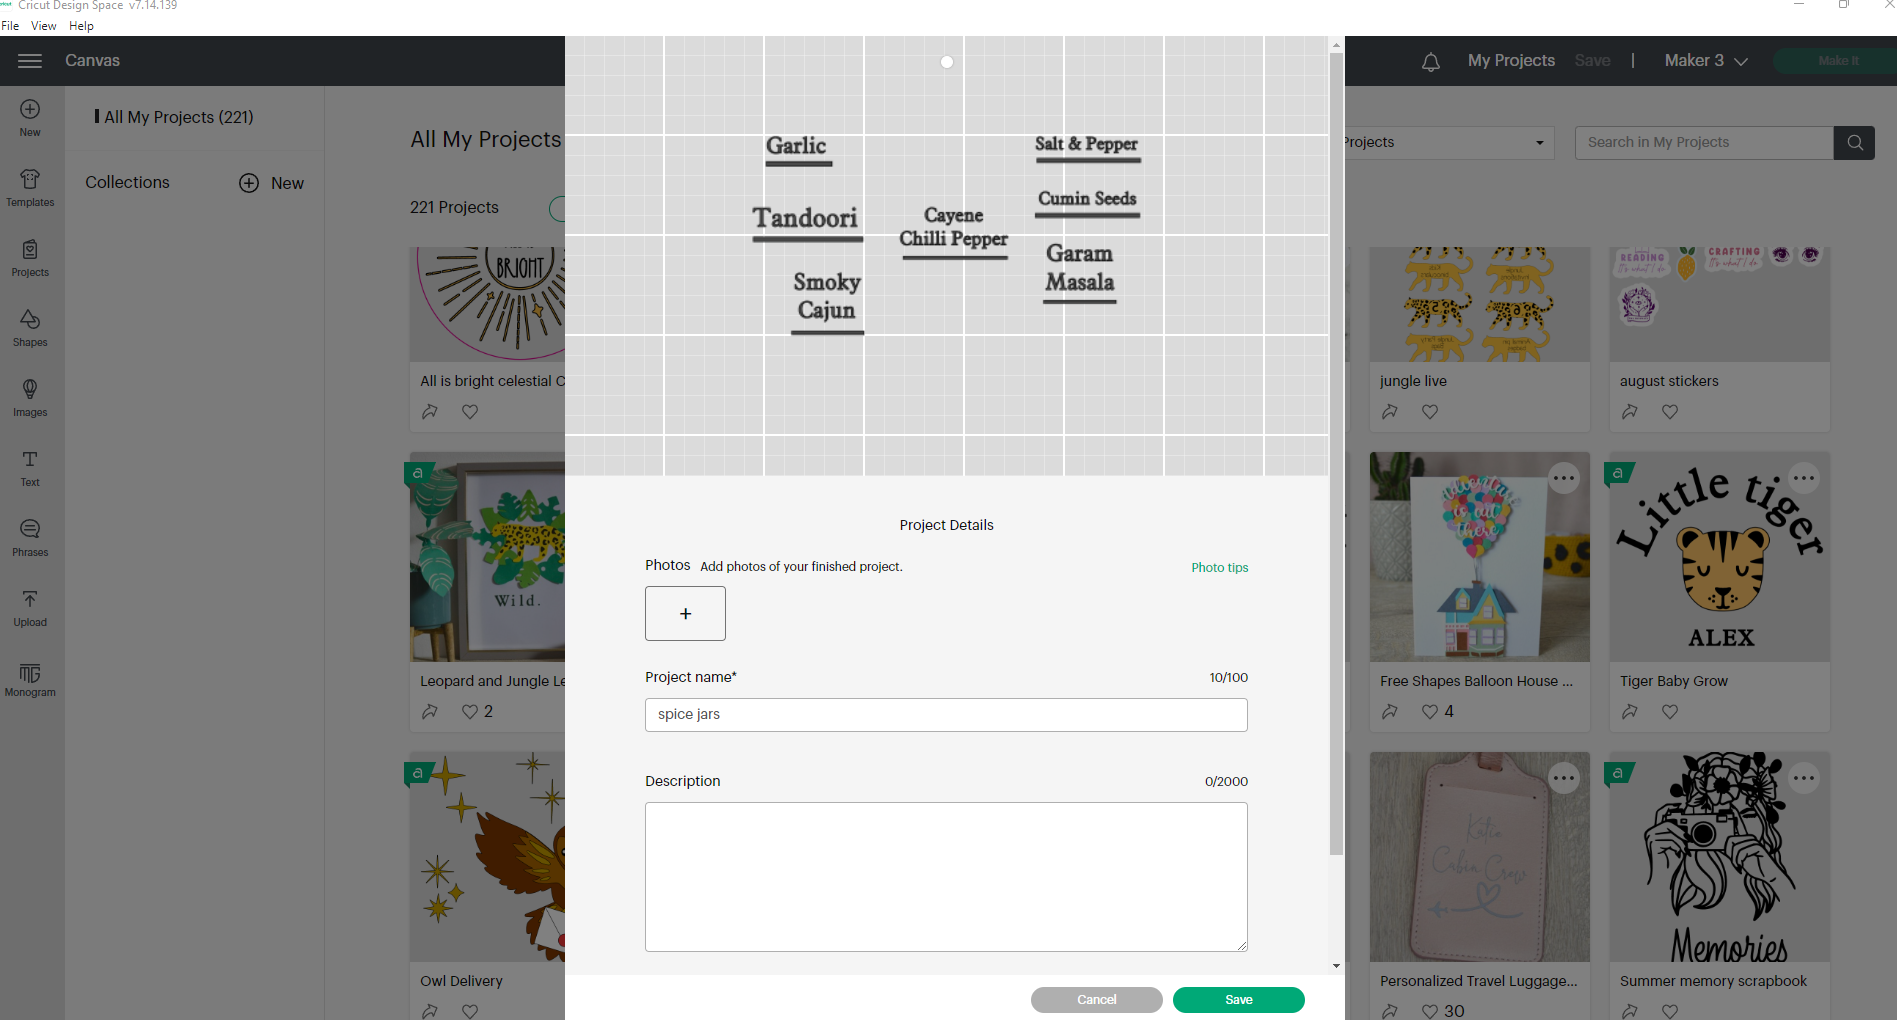
- You will see a few different options. Select ‘Edit Project Details’.

- You can now amend the project so that it has all the information someone might need to know. You can add photos of your projects so that makers can see what the finished project will look like. To do this, select the + icon to upload. Landscape or square images are best for project images.
- You can add multiple images which will be shown on the top banner of the project.
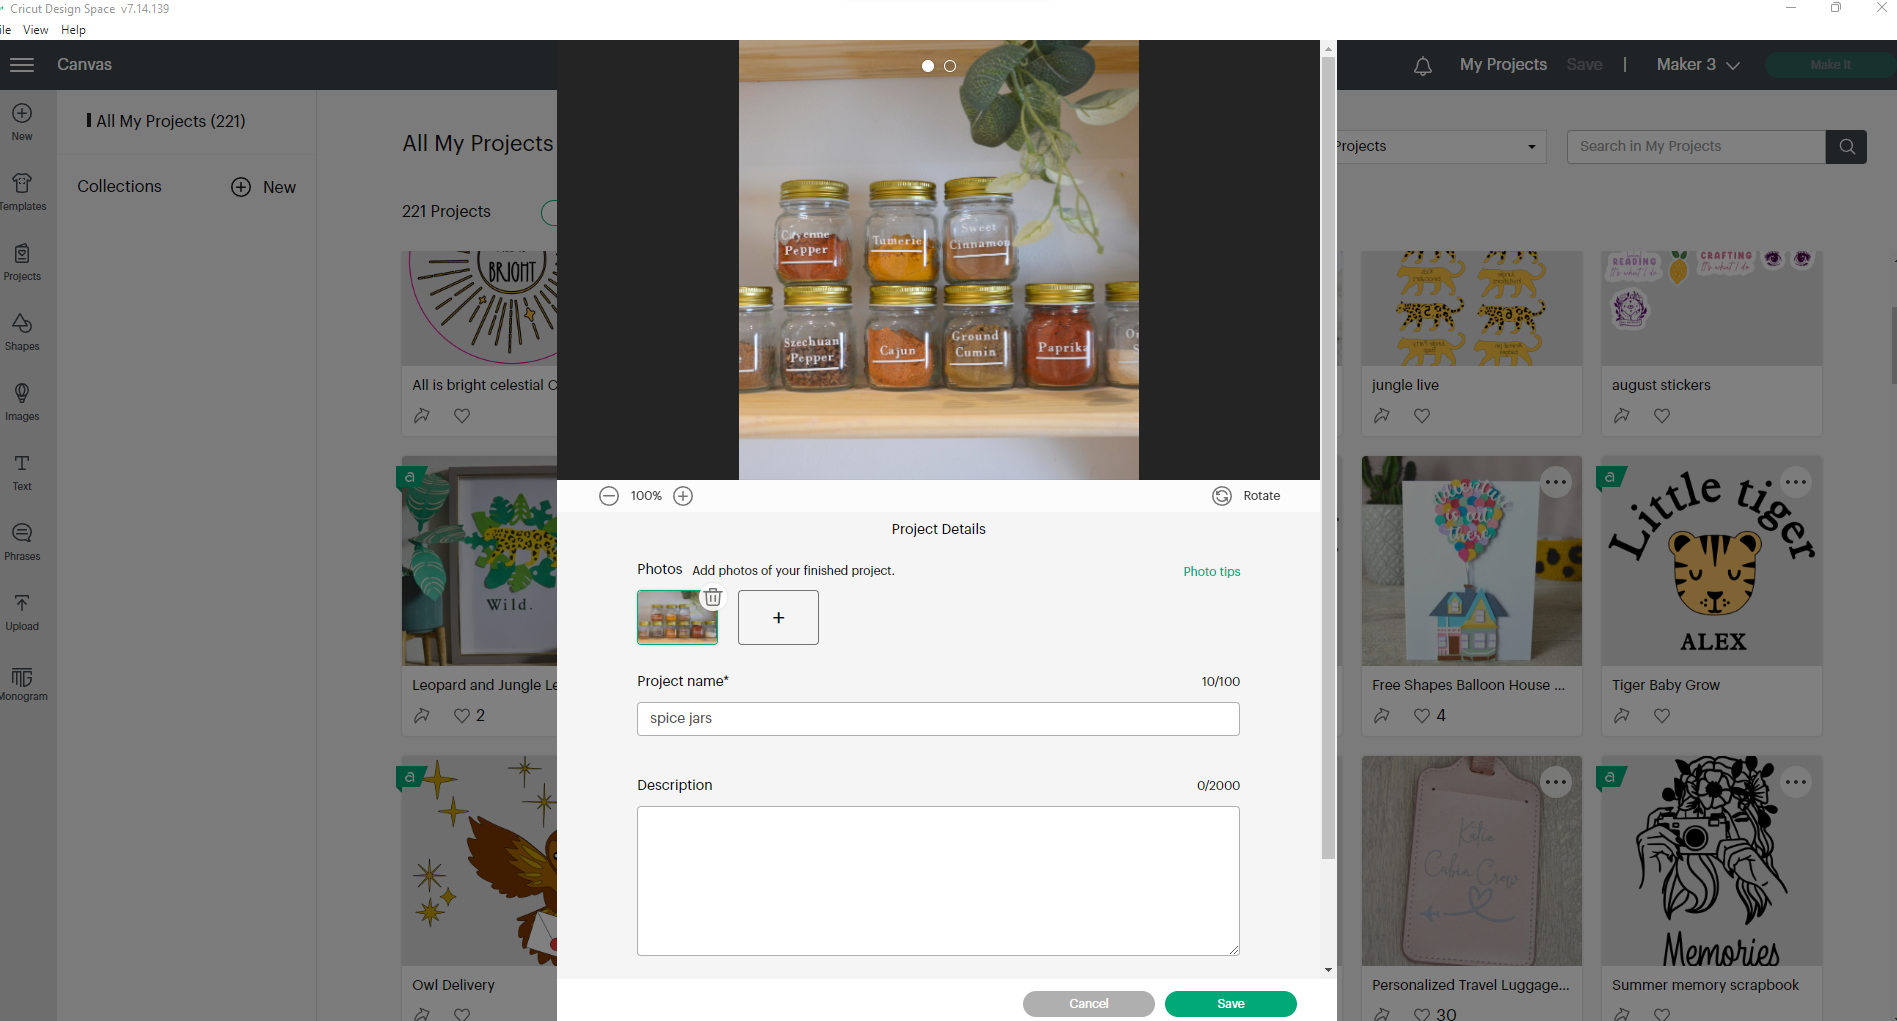
- Next, amend the project name to something appropriate for the make. Make sure to use keywords that might help someone find the project.
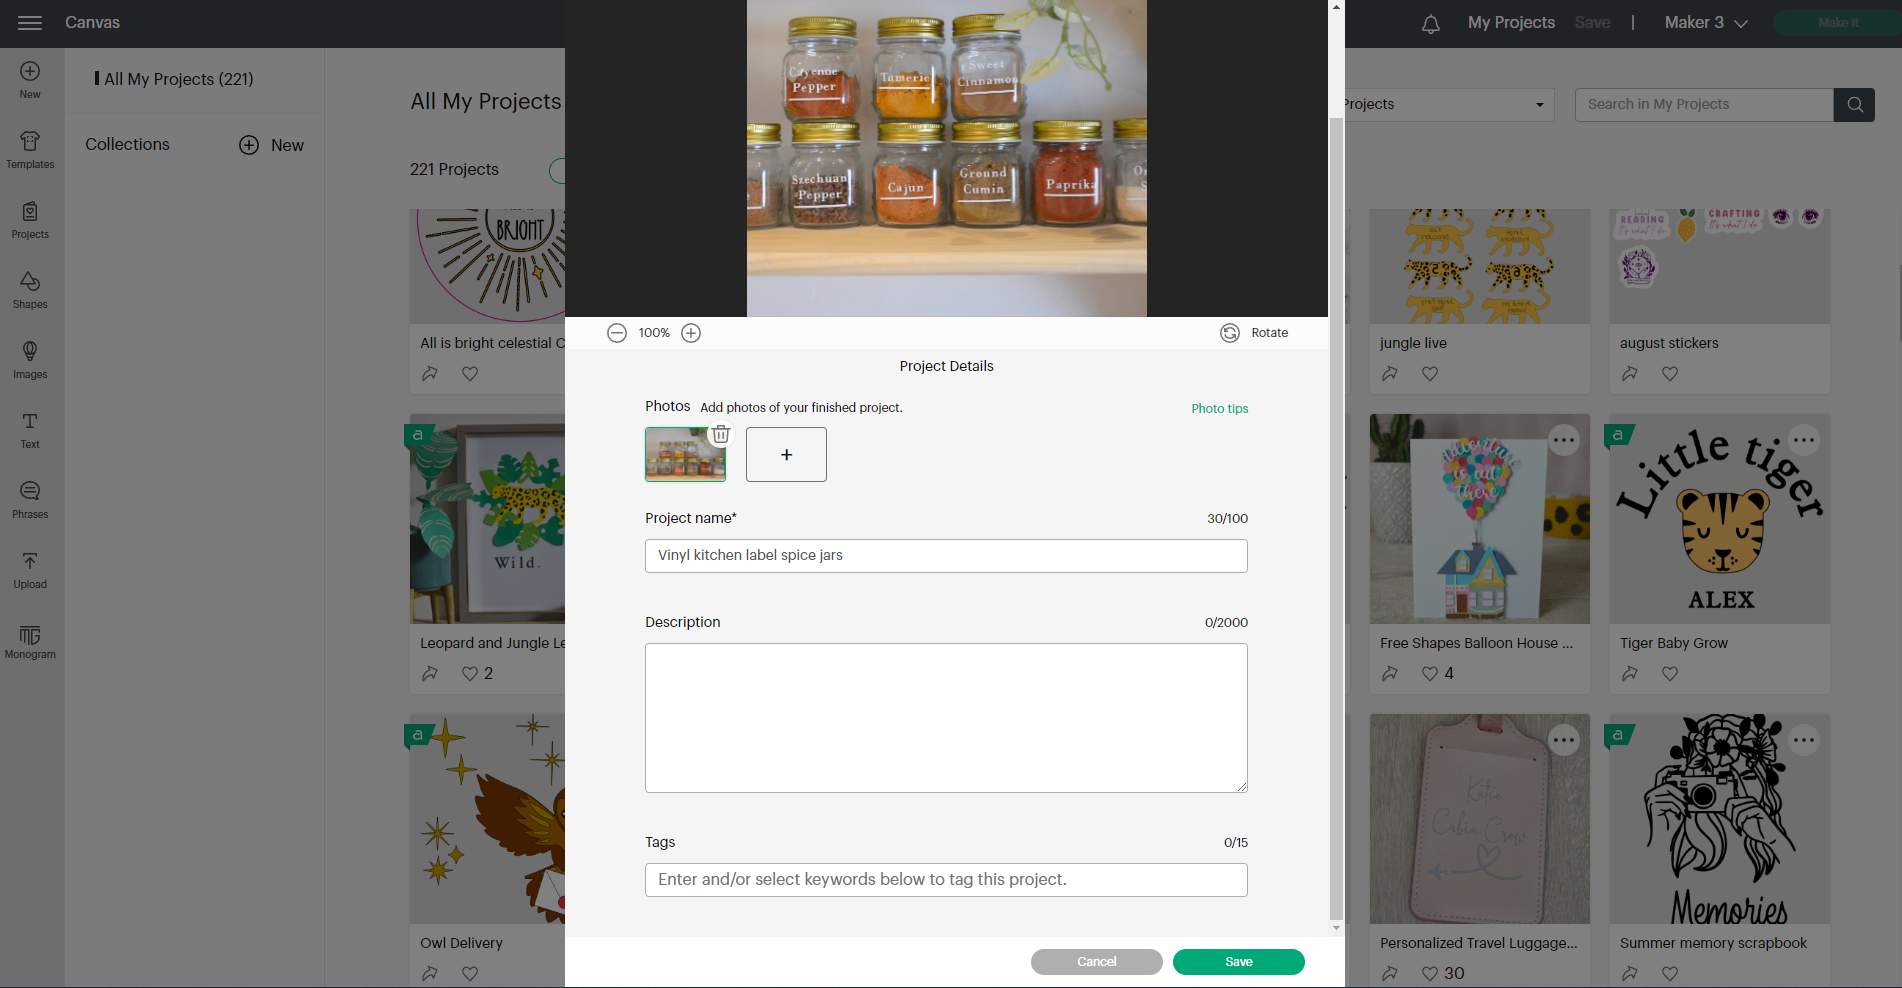
- Under description, let the maker know anything you think is important to know. You could recommend which materials to use, any additional instructions for assembling, or top tips for making the project stand out.
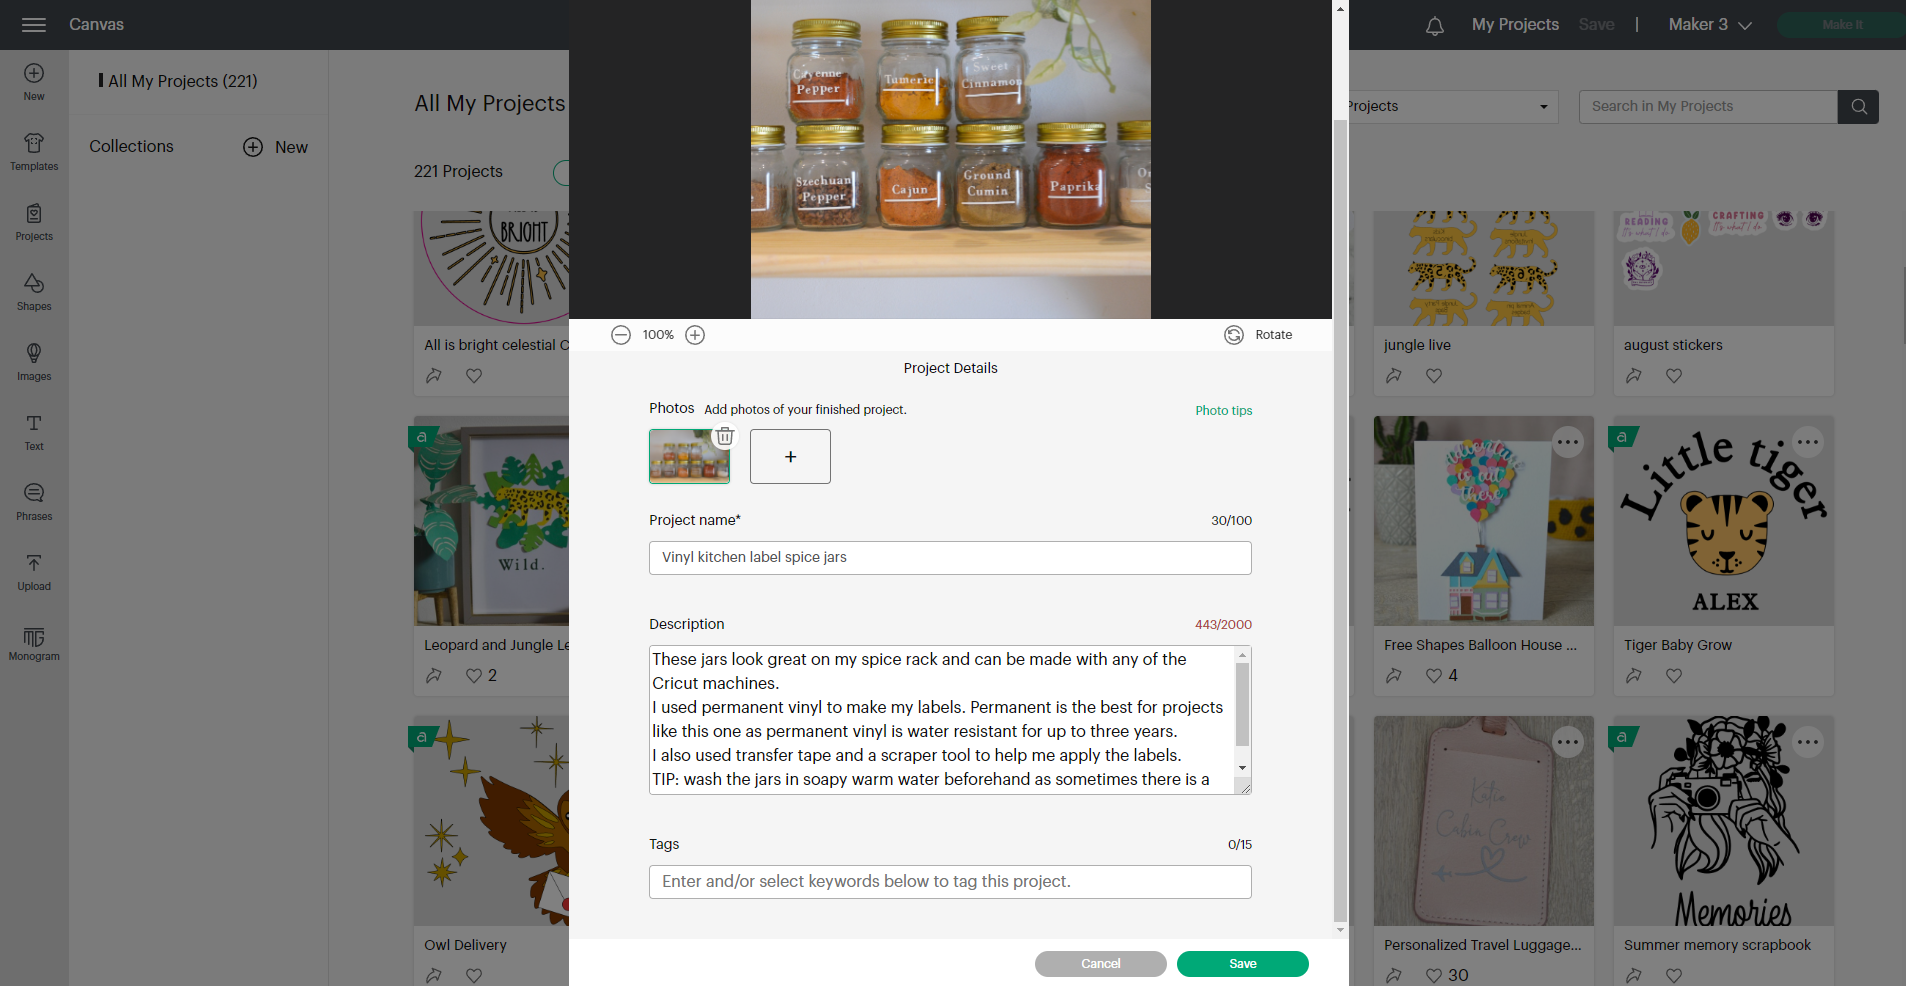
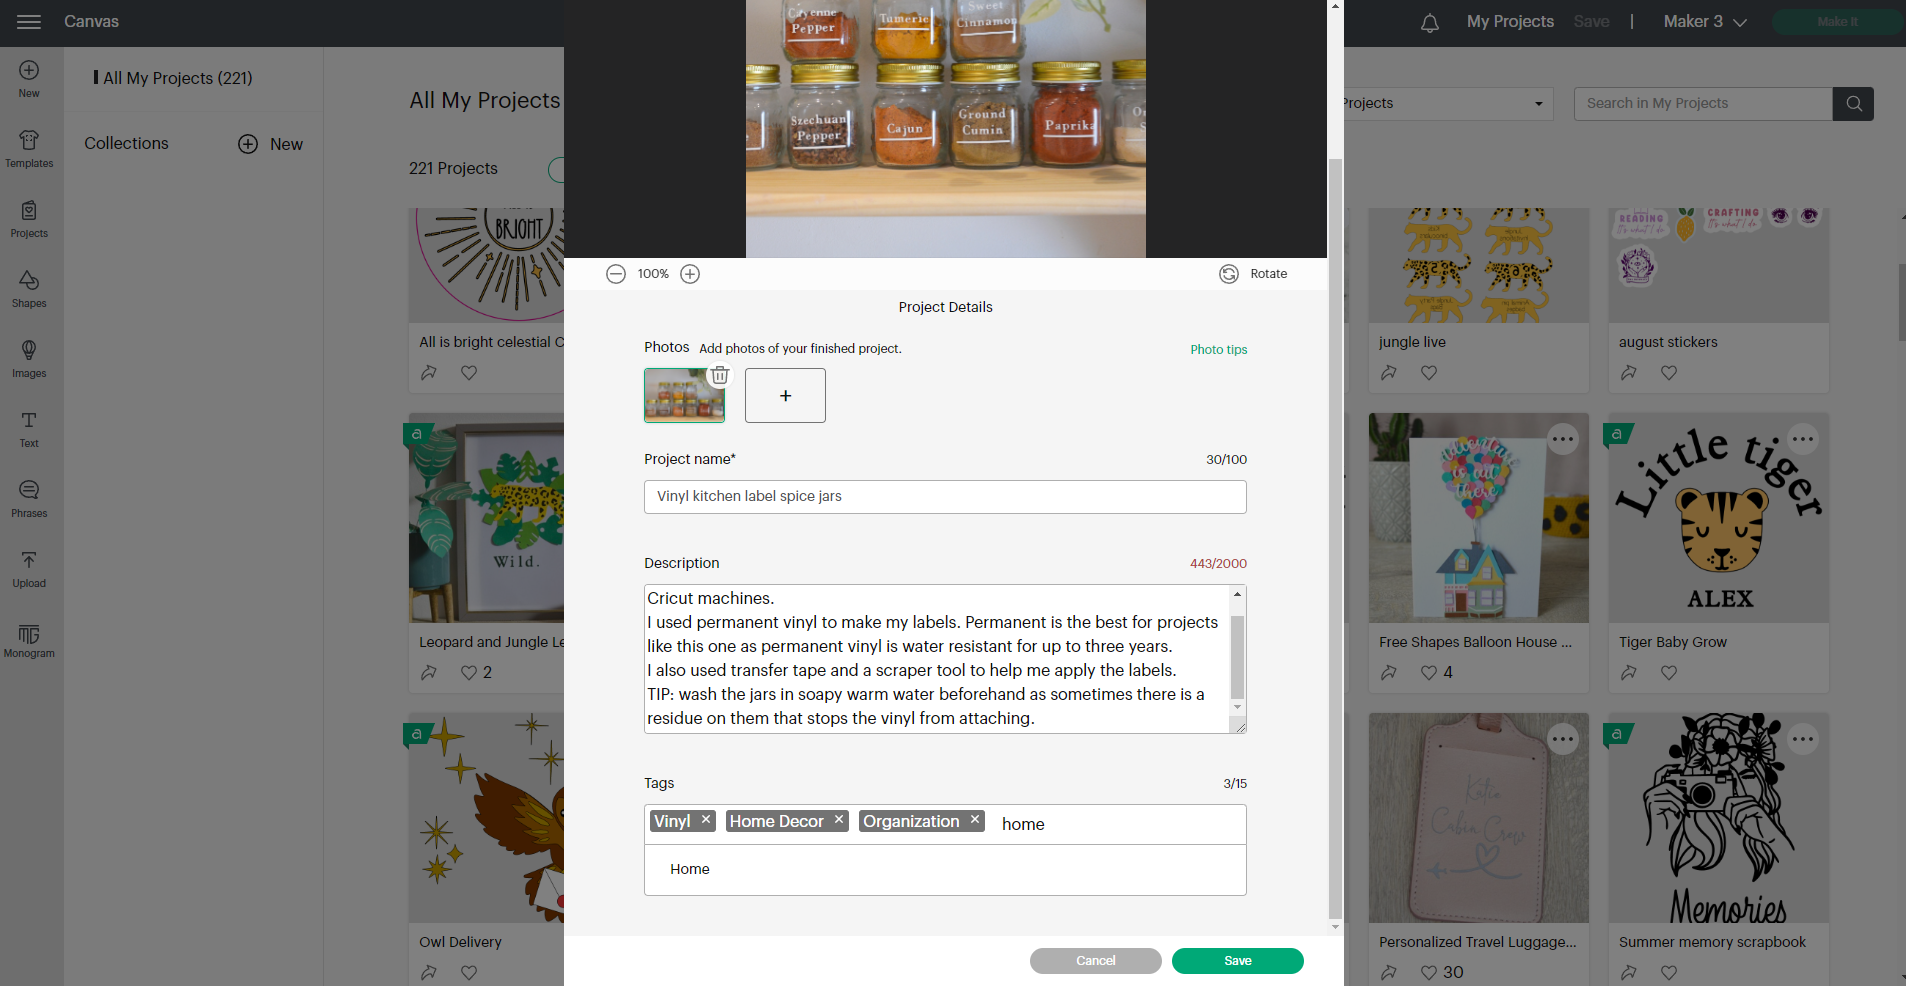
- You can then add up to 15 tags. These help people find your project so be sure to use relevant tags. Start typing a keyword and if the tag is available it will appear for you to select.
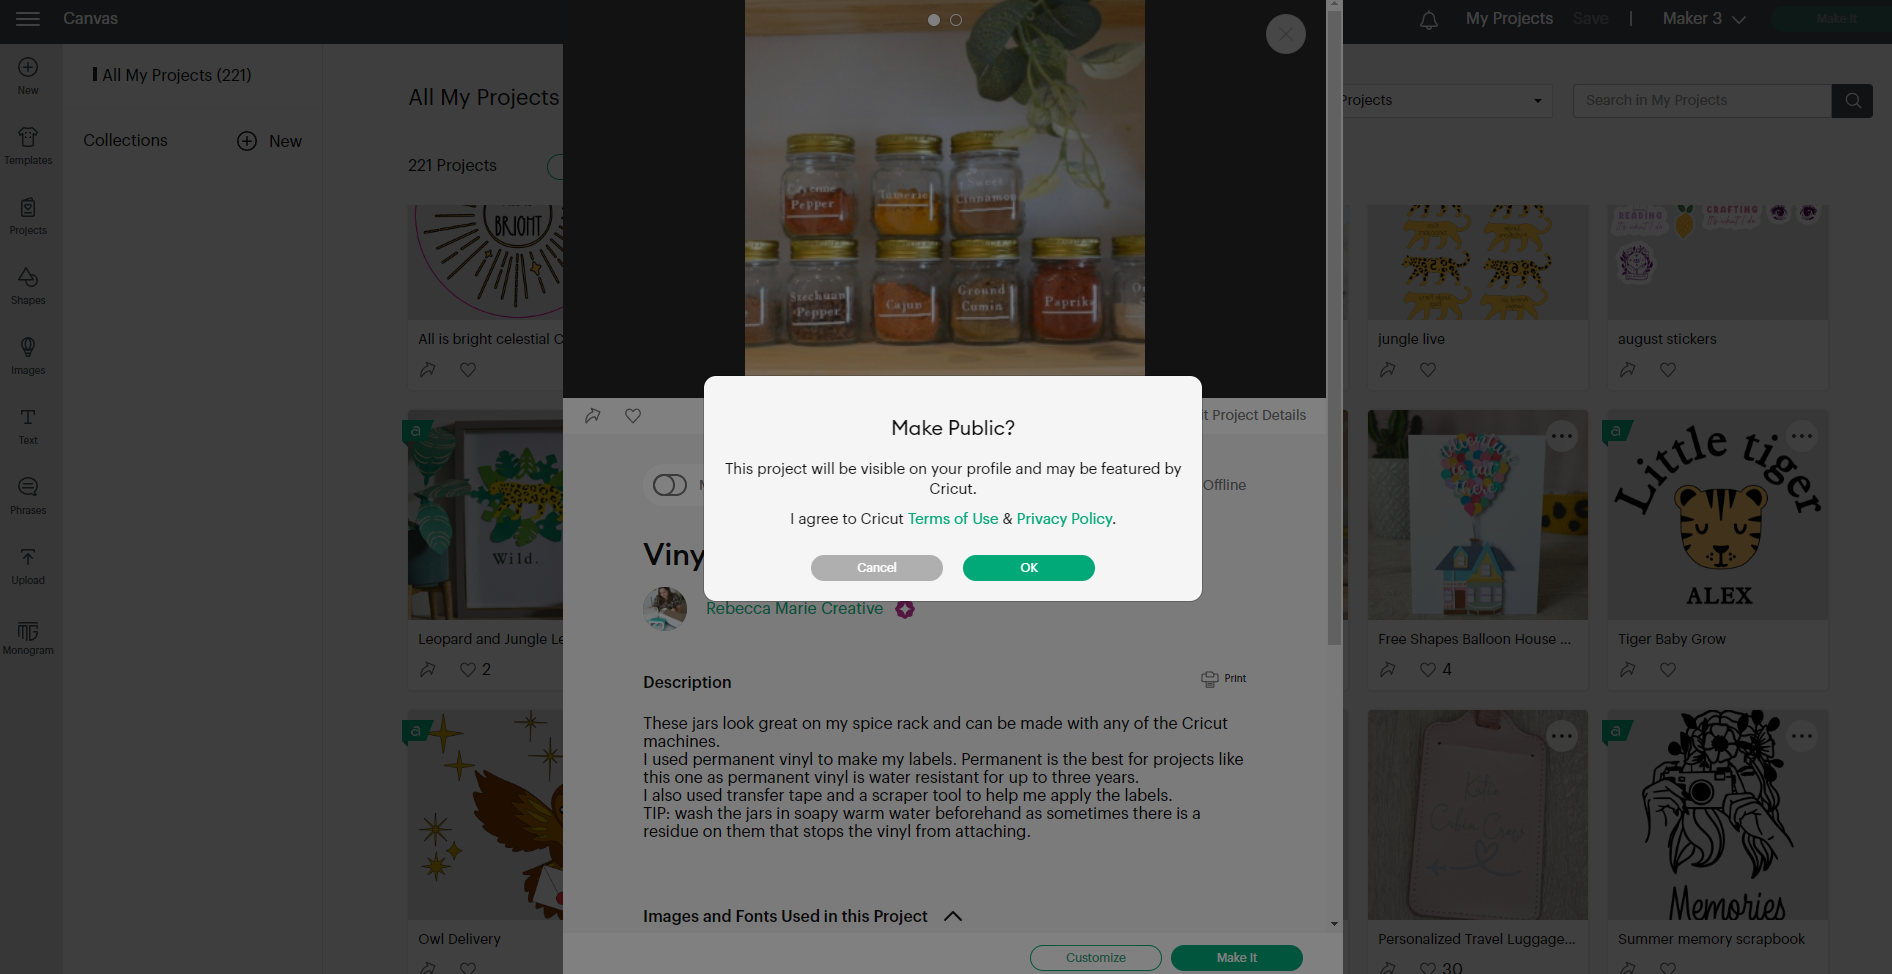
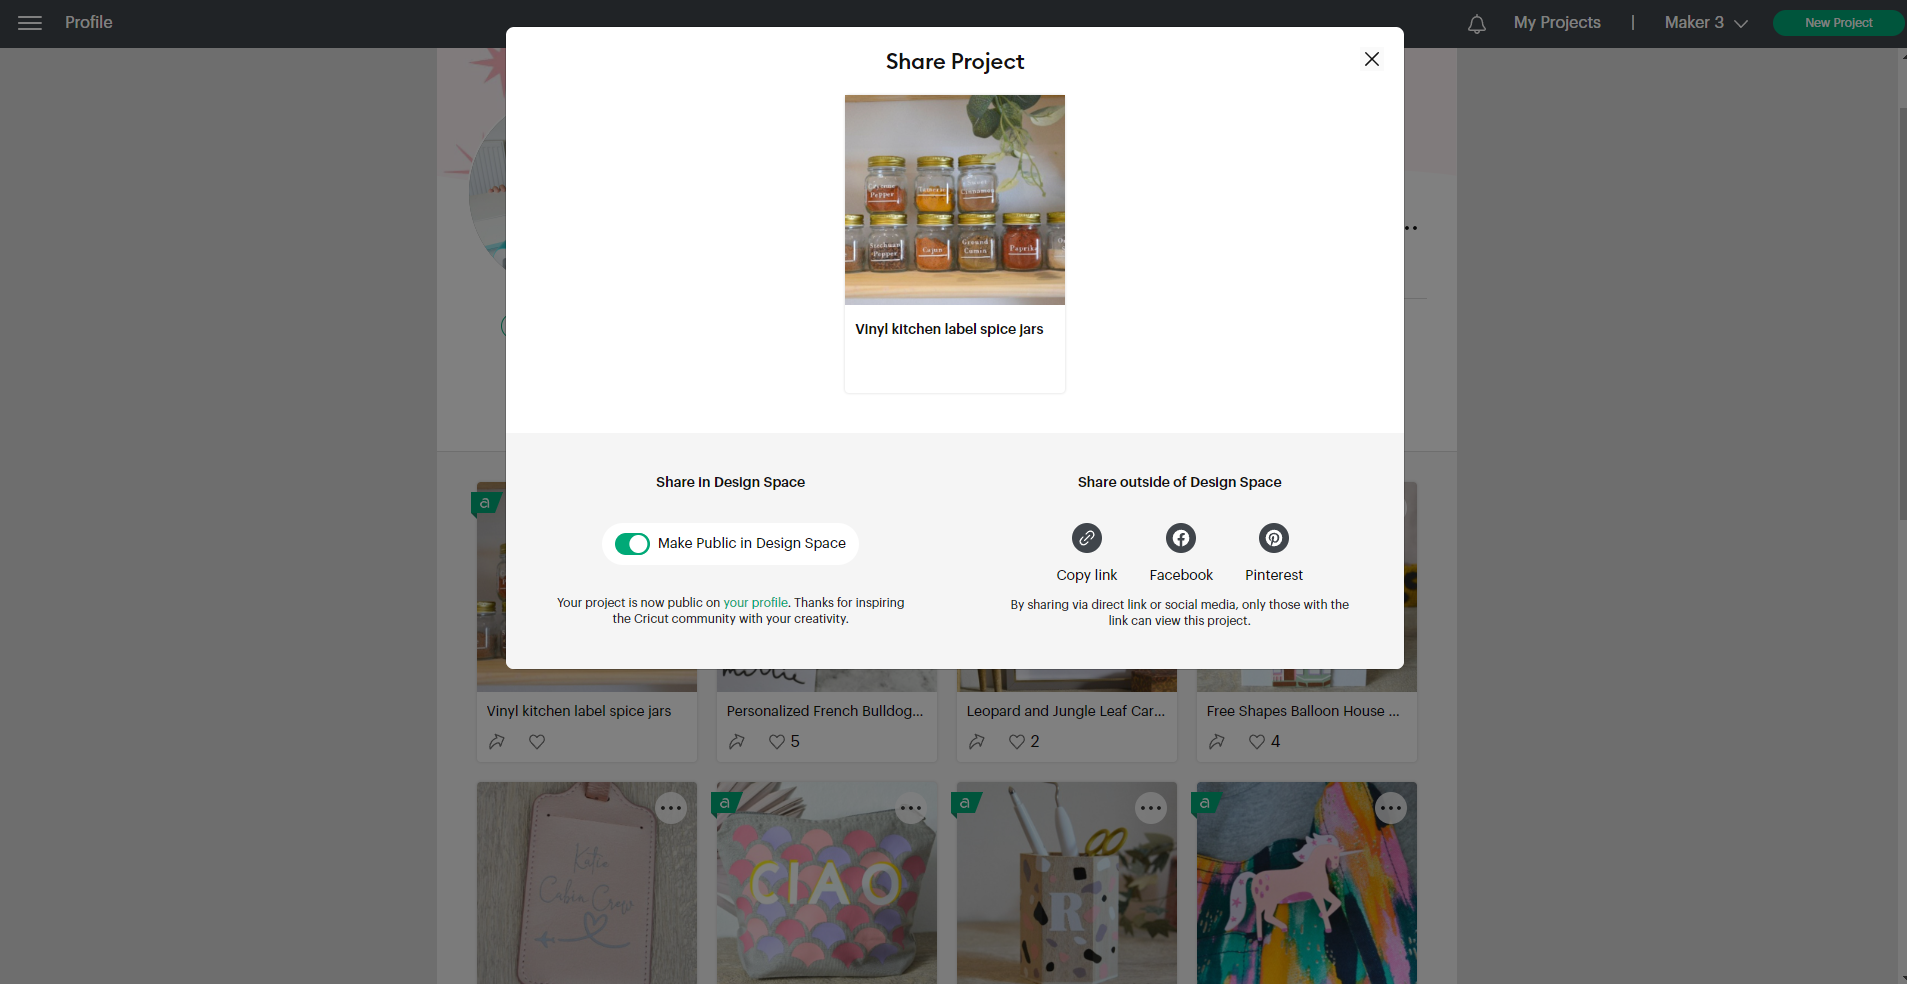
- Once happy, click save. You have now saved all the details to make your project perfect. We now need to publish it and get your project out into the world!
- To publish, select the project and you will see there is an option above the project title called ‘Make Public in Design Space’. Turn this on and it will ask you if you want to make this public.
- Hooray! Your project is live! To check that it is published to the community, head back to your profile page by going to the top left corner hamburger menu and selecting, ‘View Profile’.
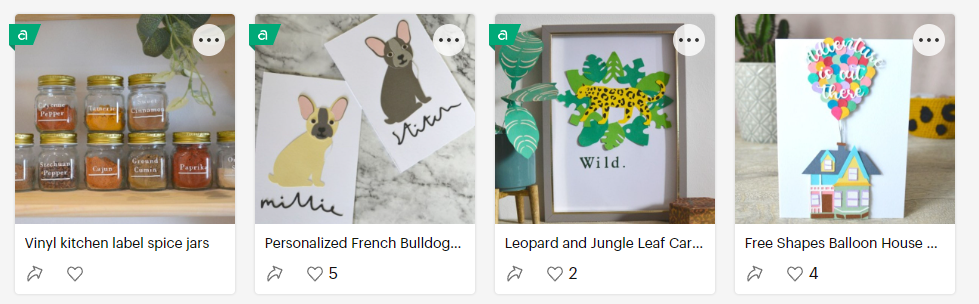
- Under ‘Shared Projects’ you will find all your projects that are shared with the community.
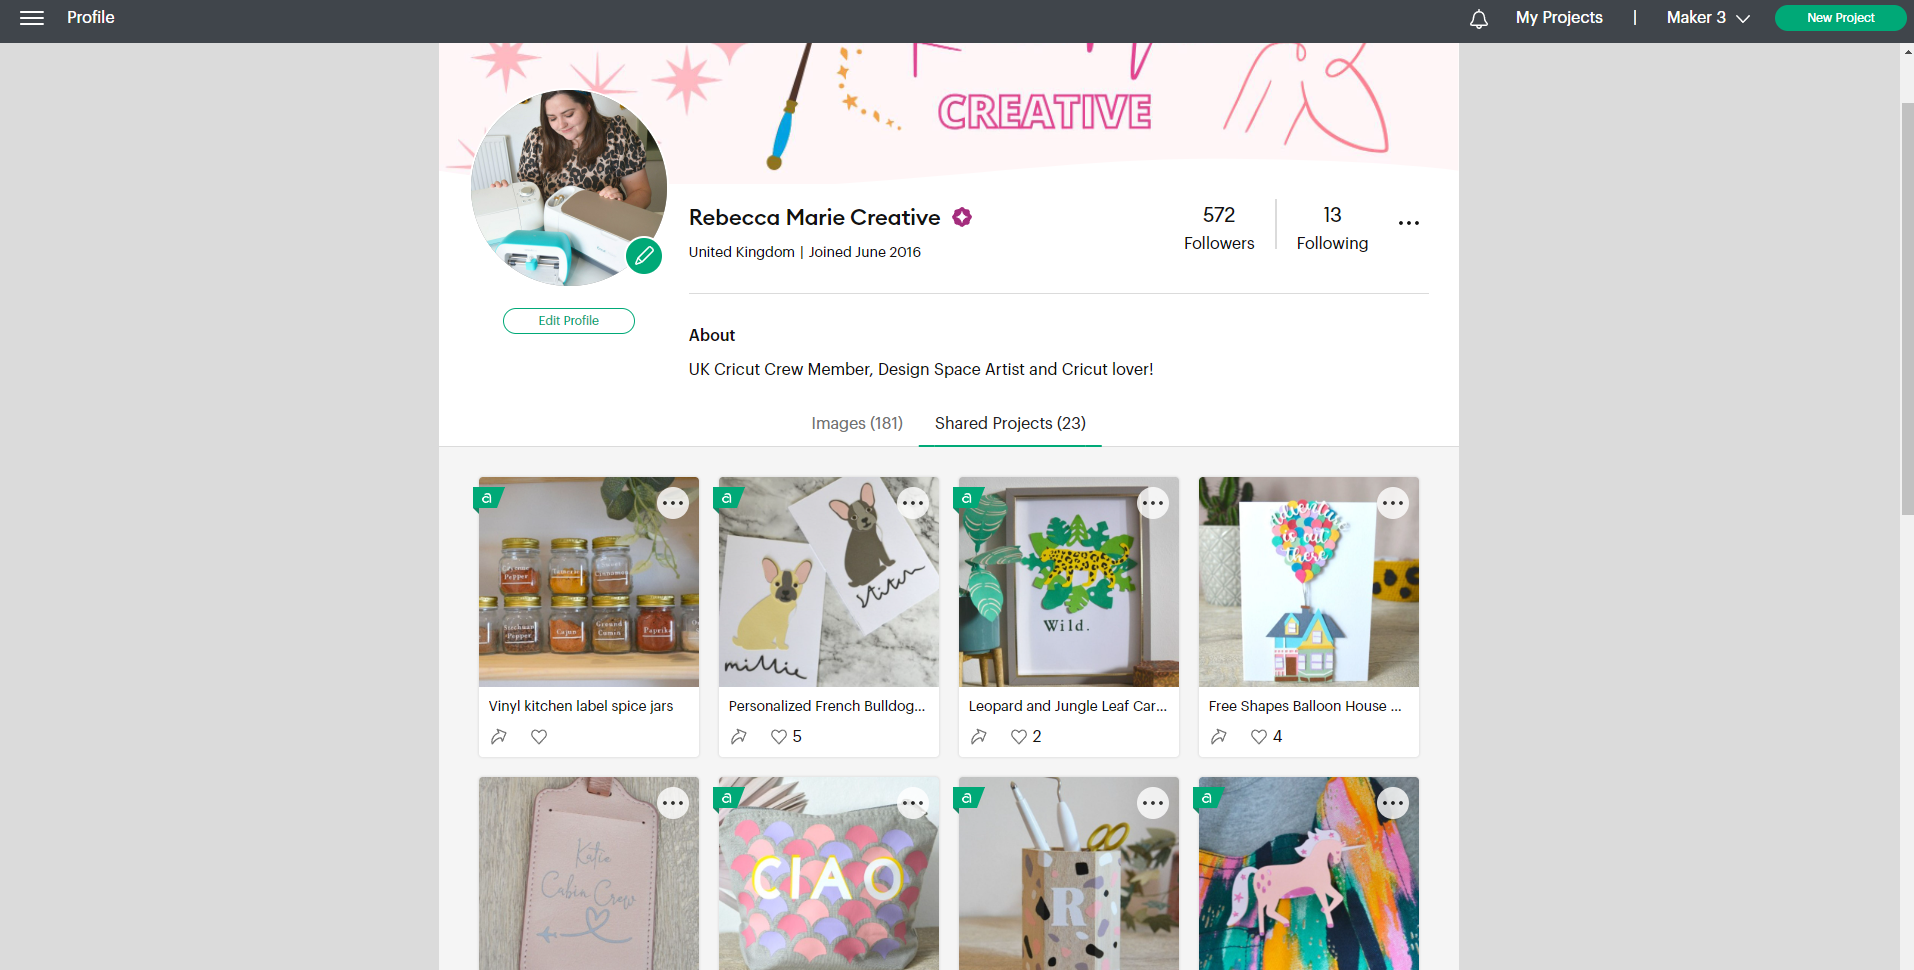
- Other makers can then like and save your projects. They might even follow you so they can keep seeing all your recently uploaded projects.
Sharing your project
You have edited your project and published it! The last thing to do is to let the world know about your new amazing project.
- In your profile area, you will see a little arrow icon underneath each project. This is the share icon!
- An option box appears so you can select how you want to share. You could copy the link and share this on your blog, website, or Instagram Stories! You can also share directly on Facebook and Pinterest too!
Letting people know about your project is a great way to get new followers and it means they can like and save your projects to make whenever they like.
So what are you waiting for? Head to Design Space and start making today!
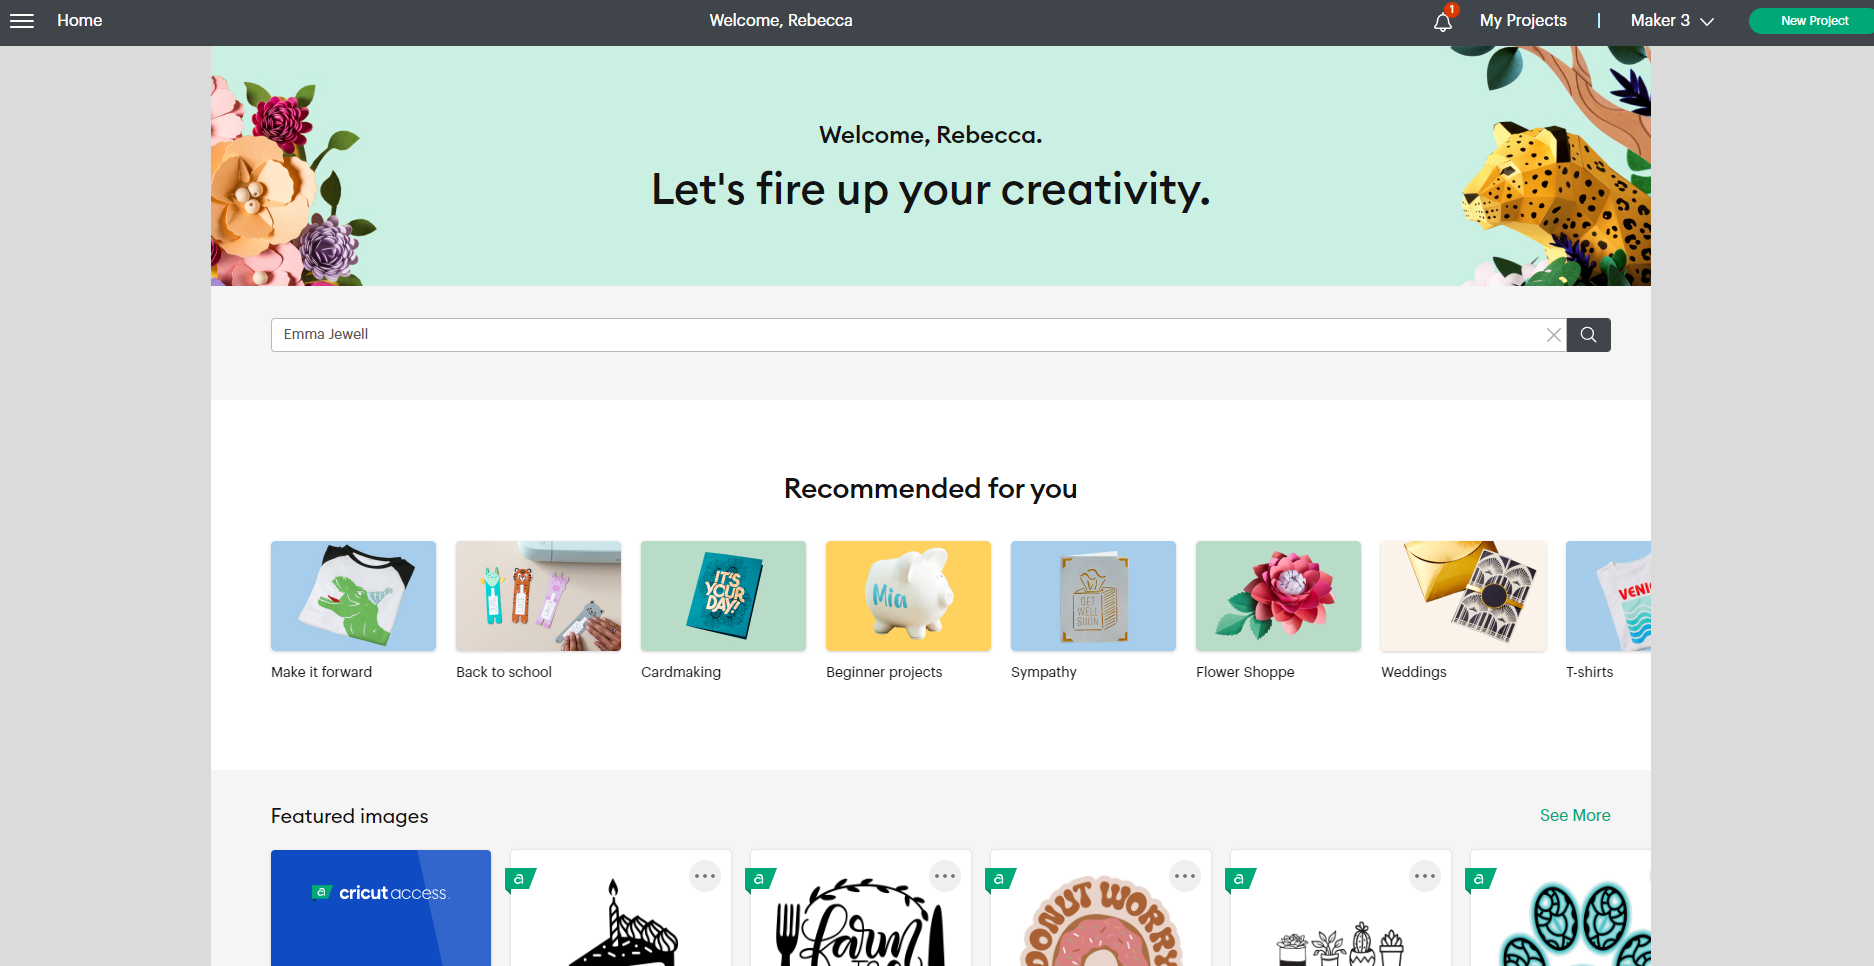
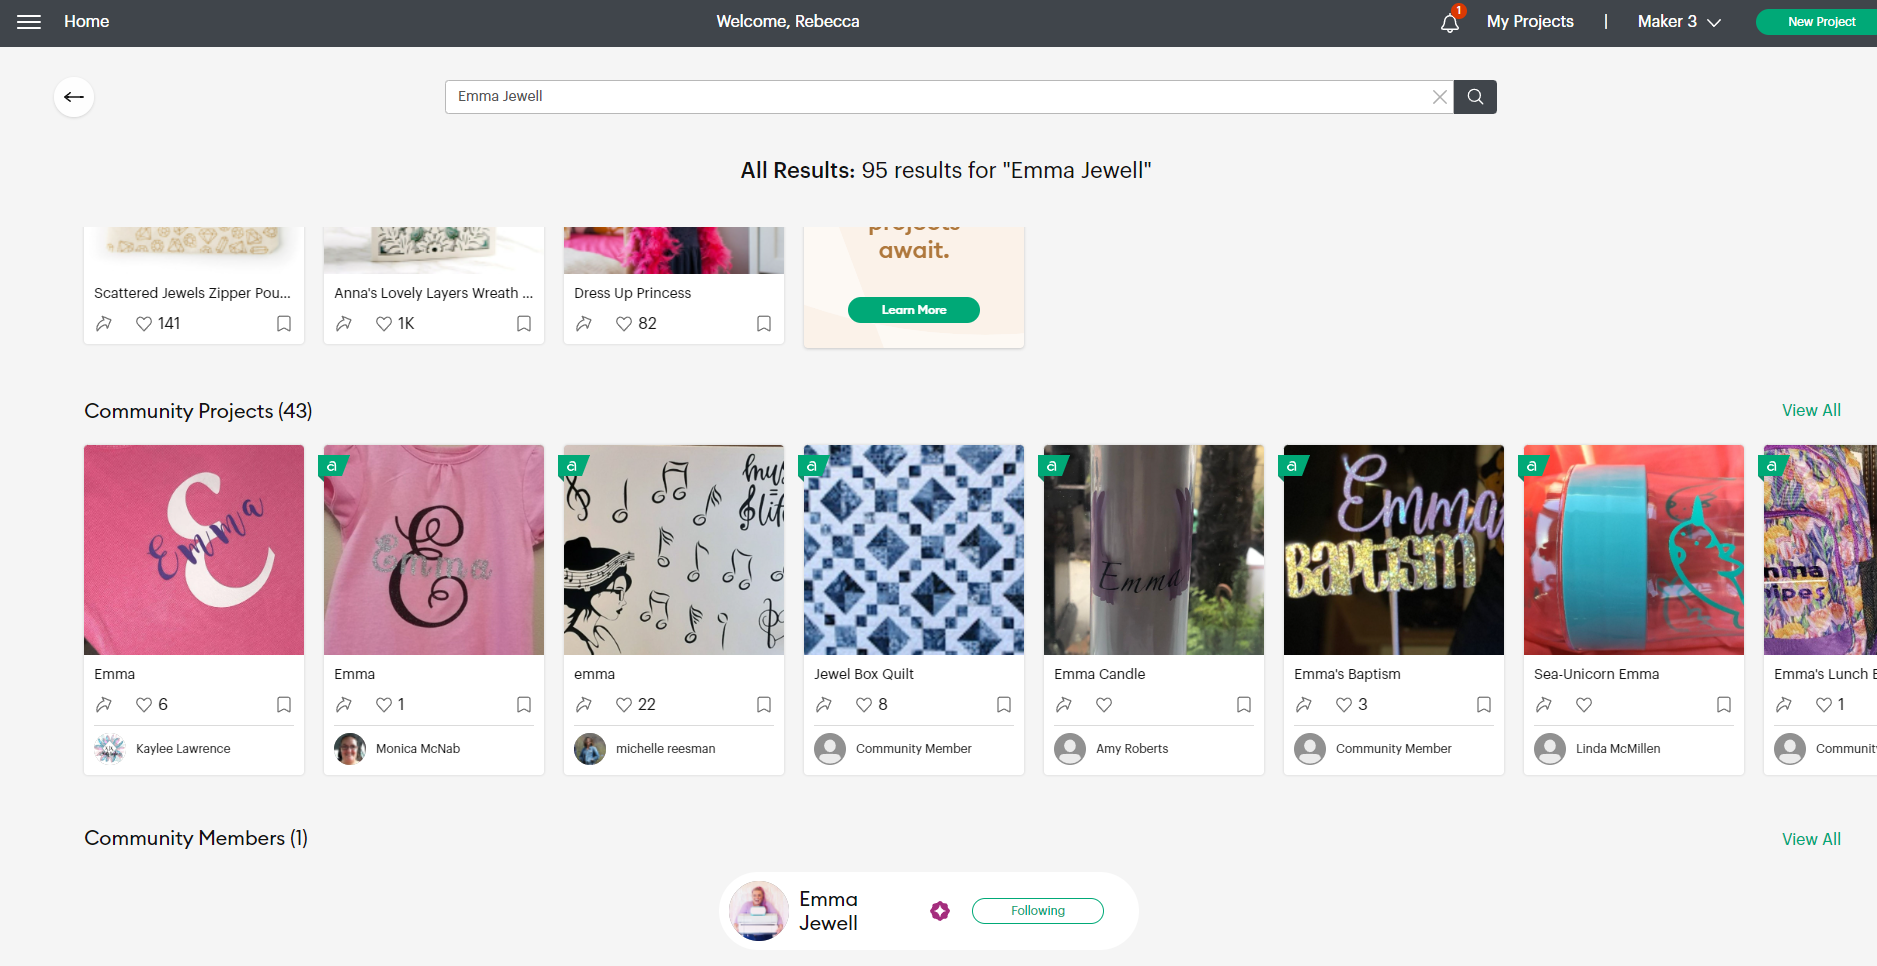
On the home page you can search for other makers and projects by using the search bar here too. So if there is a theme or a specific person you want to follow, you can now go ahead and find them or a project.
Find more tutorials about Design Space
Head to our Cricut Beginner Guide for written instructions on tools, materials, and more. Alternatively, Cricut Learn is a great place to start with video tutorials and free workshops.
Don’t forget to share your projects with us by tagging @cricut_uk on social media! We might share your content on social or on the blog!