Dorm room decor 101: styling art prints in your small space
Incoming USC senior, Chloe Miller, returns to show us how she styles her dorm room decor around her handcrafted Cricut art prints!
College move-in day has finally arrived! I imagined that when my last first day of school rolled around, I’d know exactly what I want to do after graduation and have everything together. Let’s just say– after a year and a half away from school, the only thing I am 100% certain about is how I want to decorate my dorm room!
Am I embarrassed to admit that? Absolutely not. As discussed in my previous blog post, I am obsessed with Danish-inspired art and dorm room decor. Figuring out how I wanted to style my space was a no-brainer!
I have seen so much inspiration on Pinterest for colorful wall prints – like these and THIS – that I knew I just had to use my Cricut Explore 3 to customize my own handmade prints for the school year. You can see in my last blog post here, I was so proud of the results! Now I’m here to show you how to best showcase your handmade Cricut projects in your dorm room, building a cohesive design inspired by your handmade art.
Find a fabulous frame
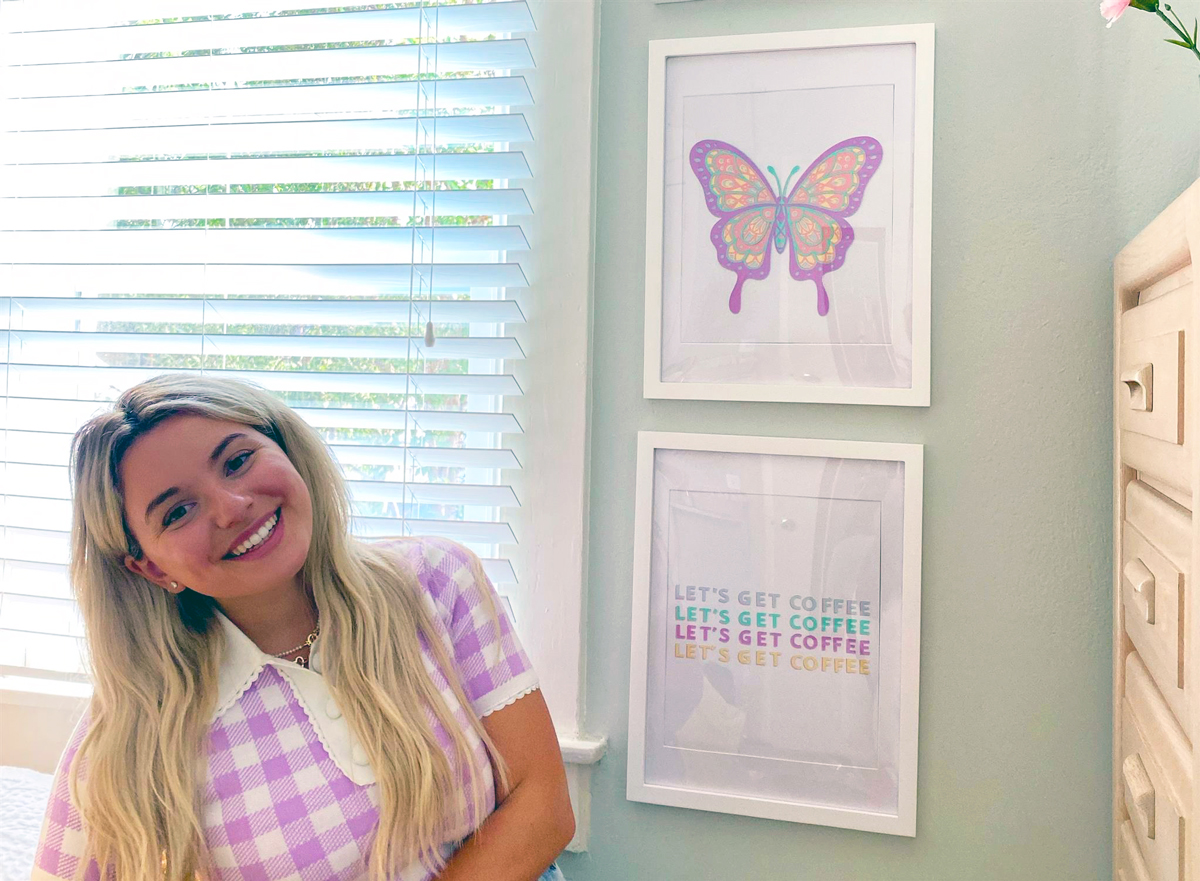
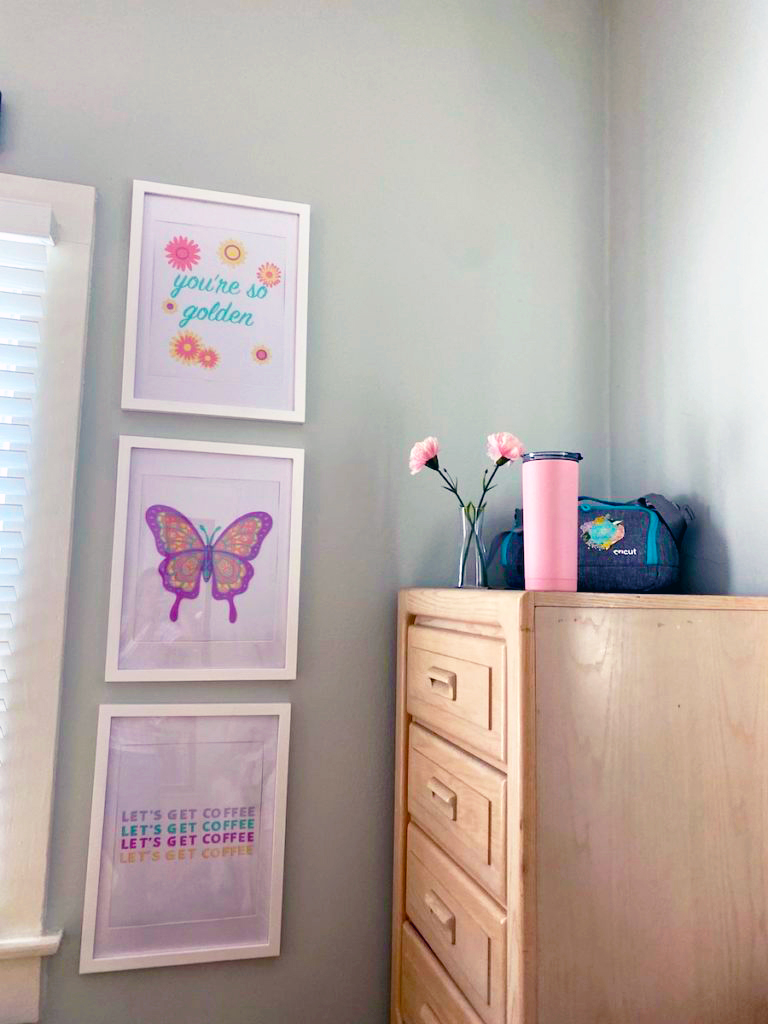
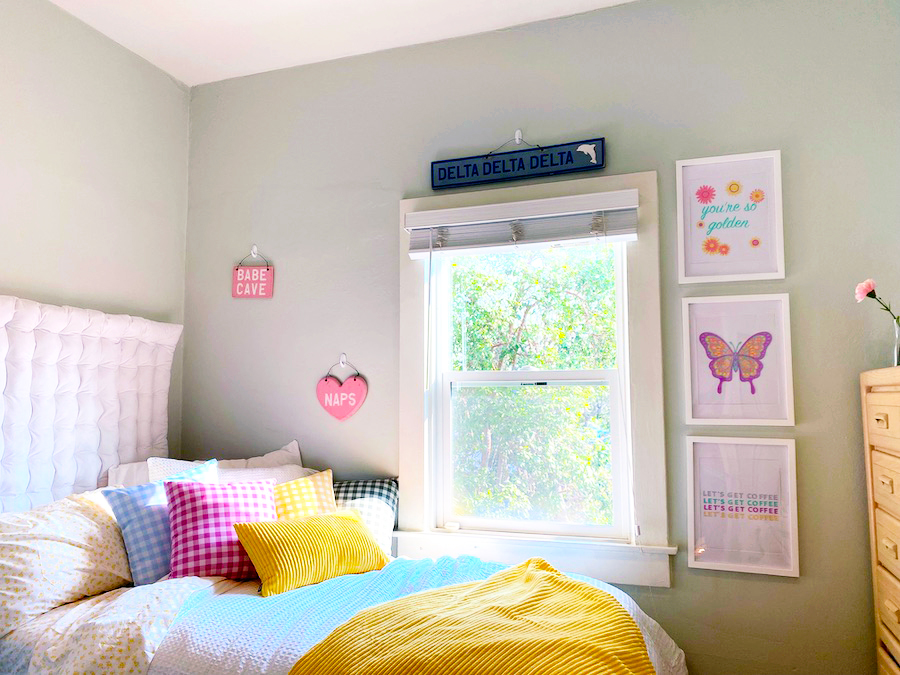
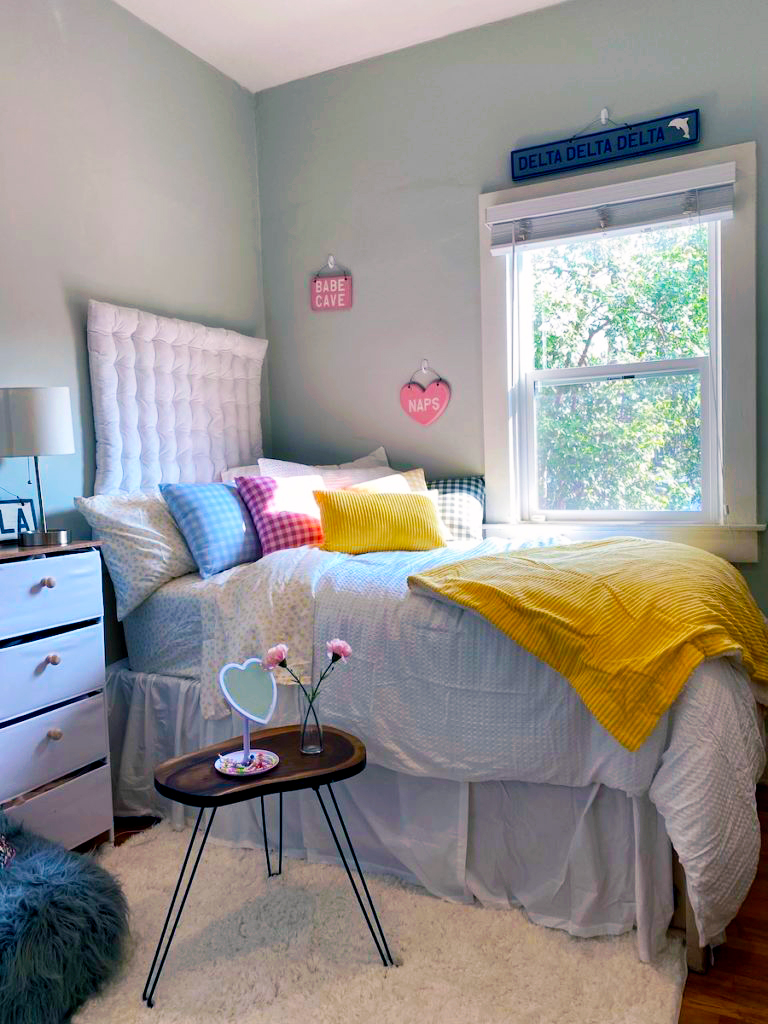
Let’s pick up where we left off– I finished the project but hadn’t framed the prints. I found the perfect white wooden frames online (size 10” x 12”) and placed the prints in the frames over white matting. This offered the crisp, clean look found in most Scandinavian designs and prints. I preferred a light and bright décor theme to make my room appear larger, but feel free to play around with colors and materials that match your desired look.
Placement is everything
I decided I wanted the prints to become the focal of my room, greeting my guests as they walk in. To accomplish this, I stacked them vertically on top of one another, right across from my door, ensuring that they were level and evenly separated. You can use non-permanent adhesive strips to keep them in place without damaging any walls!
Keep colors complementary
Danish décor is natural, airy, and cohesive, so I wanted to pull inspiration from my Cricut prints when choosing my bedding and other decor for a unifying look. I purchased gingham pillows and a pastel throw blanket that would pick up on the colors of the wall prints, and I am so happy with how the color scheme turned out! The Cricut cardstock colors were the perfect pastel tones that I needed to create the bright and happy vibe I was looking for.
If you’re brainstorming ways to create a unique dorm room for the back-to-school season, consider making your own wall prints with the Explore 3! Though my prints were a point of inspiration for my Danish-themed design, you can utilize Cricut to craft any aesthetic. I recommend playing around with other materials, like gold foil or vinyl, to curate wall art projects that fit your personal style.
Decorating a dorm room has become such a special ritual for college students. Handmade pieces can inspire you to craft an entire aesthetic you never dreamed possible! Moving forward, I know all my sorority sisters will be asking me to craft prints with Greek letters, USC designs, and other personalized graphics and phrases. I’d recommend checking out Cricut’s other dorm-friendly decorations and projects to help spruce up your space!
You Might Enjoy…