Craft whimsical wedding centerpieces
Getting married and want to DIY the perfect wedding centerpieces? This may be the perfect Cricut project for you! Michelle Edgemont of Michelle Edgemont Design teaches us to create a stunning floral arrangement with Cricut-made embellishments.
The newest wedding trend in 2021 is using dried flowers as delicate, organic accents to your décor. Whether in their natural colors, or dyed shades of pink, teal, and purple, using dried flowers means that you can make your own wedding centerpieces months in advance. I love saving time and money where I can!
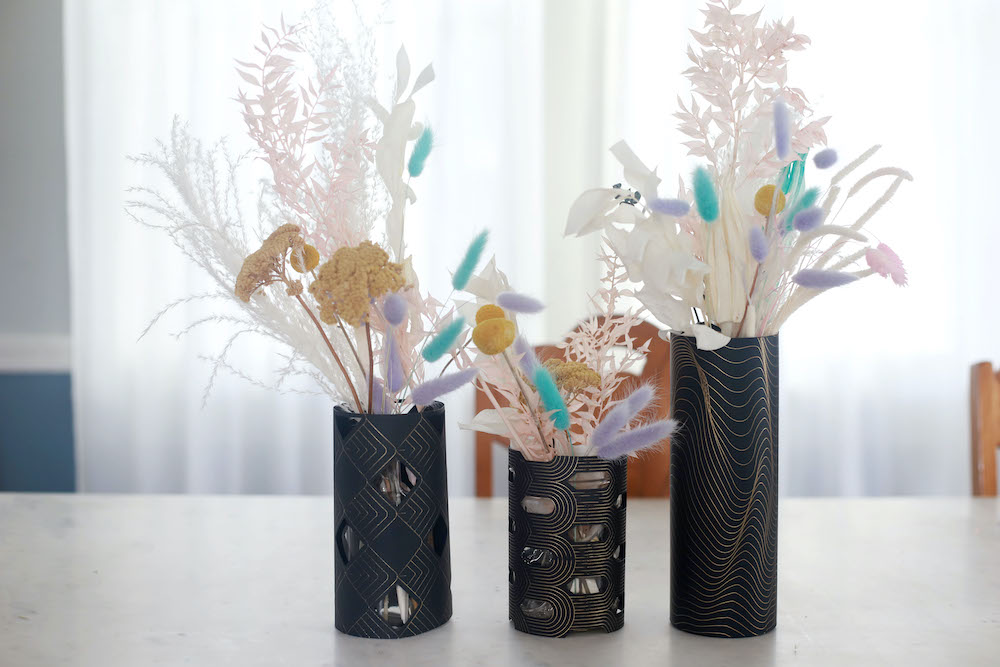
First, a bit about the unique florals within our arrangement. These wedding centerpieces are a mix of bleached dyed rustic, dyed bunny tails, bleached lemon leaf, yellow billy balls, and dyed seed pods. Pro tip: choose dried flowers in a variety of textures for your arrangement to add intrigue and dimension.
In the display used for today’s project, I have flowers that are tall and skinny, flowers that are fluffy, and a few that are voluminous and wide. The color palette should include a few primary neutrals and a pop of bold color. For this arrangement, I included white, baby pink, and lilac florals, with pops of yellow and teal.
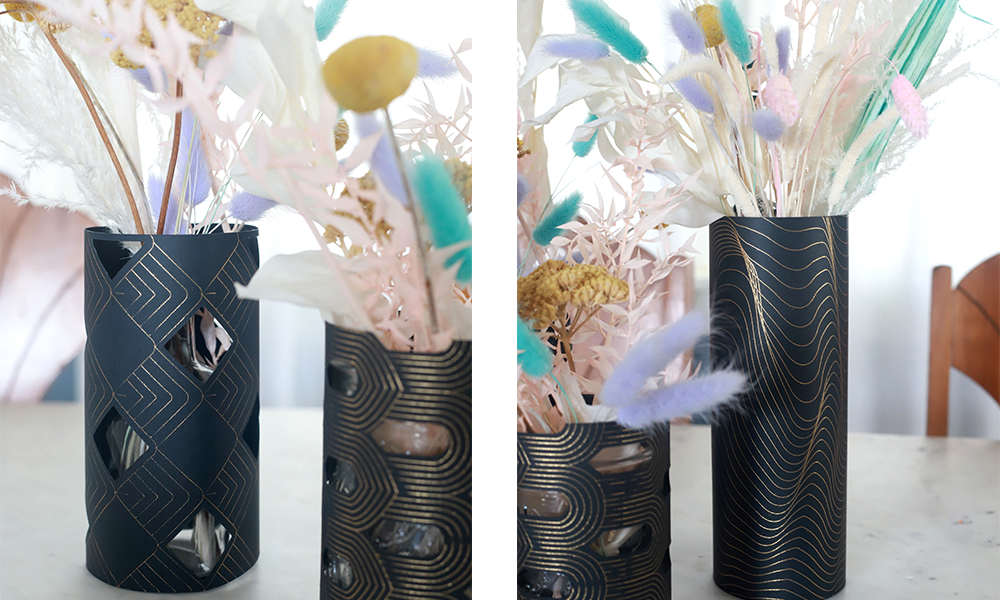
For the design of these wedding centerpieces, I styled the dried flowers in mason jars and bud vases. Although mason jars are inexpensive, their rustic style didn’t really jive with the modern, art deco aesthetic of the wedding in mind. To fix this, I designed three geometric patterns in Design Space that I foil transferred onto black cardstock. Once wrapped around the mason jars, the cardstock sleeves instantly transformed the wedding centerpieces into works of art.
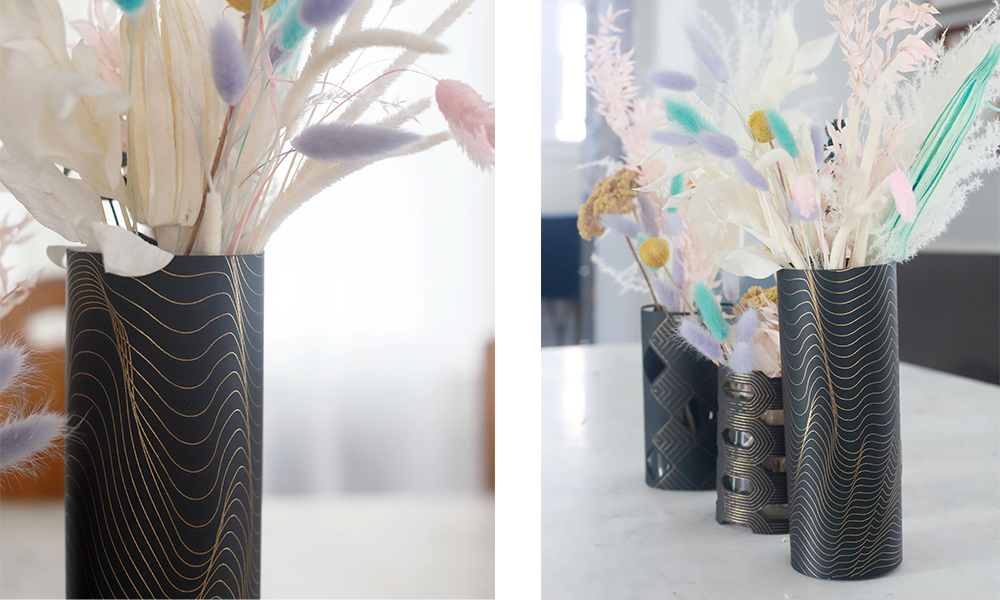
The sparkle from the gold foil is so pretty! I love this project because it gives you the opportunity to DIY your wedding centerpieces months in advance, has endless design possibilities to match the style of your wedding, and is budget-friendly.
Supplies needed
Whimsical wedding centerpiece
Step
Select the vases and jars that you would like to use for this project.Since they will be covered by paper and foil, you can use any containers you have on hand! I used a mix of mason jars and glass bud vases. I advise my clients to always use an odd number of vases as their centerpiece. Everything looks better in odd numbers!
Step
Fill your vases with a variety of different dried flowers and preserved foliage.As mentioned earlier, I chose a color palette of pastels and whites with a pop of teal. Follow the color rules I recommended, and try to create different heights with the stems of your foliage. Place some flowers high and others lower towards the edge of the vase.
Step
Place the cardstock on your grip mat.Each sleeve is made from one piece of either 12” x 12” or 12” x 24” black cardstock and 12” x 12” sheets of gold foil. You’ll want to add the cardstock to your grip mat as the first layer. Then, using the included tape, attach the edges of the gold foil shiny side up on top of the black cardstock as the second layer to your design.Once your design is selected, hit “Make It” in Design Space and let Cricut do its thing.Follow all instructions on screen as directed. You’ll want to start with the foil transfer tool in slot B, then change the tool to the blade when prompted. Be sure to have both tools on hand prior to beginning the cutting process!
Step
Remove the sleeves from the mats and adjust to your desired length.Using scissors, cut the sleeves to the height of the vase or jar you want to cover. Cut the design about ¼” taller than the vase to hide the top edge.Wrap the sleeve around your vase and tape the edges of your cardstock cover together.Use double-sided tape to adhere the inside of the sleeve. This will leave you with a clean and seamless design, leaving the focus on the gorgeous gold accents and pastel arrangement!
Step
Carefully slide each arrangement into its sleeve.Instantly you have upgraded your wedding centerpiece to something extra special!
The best thing about this centerpiece design is that you can make them well ahead of your wedding. Store them in large plastic tubs with lids to make them easy to transport to your venue. After your wedding, you can use a few of the vases around your home as decor and a beautiful keepsake from your special day. We can’t wait to see what arrangements you create!
Search How-To
I want to make...